
BackupBuddy from iThemes is a popular solution for WordPress developers looking to simplify the management of multiple client sites. This handy plugin helps handle backup, migration, and restoration of websites in a sensible manner. Backups include all elements of the theme – content and style – as well as any installed plugins and widgets.
Backing up or migrating websites individually is time-consuming and BackupBuddy allows busy developers to manage multiple tasks at once.
If you want to cut hours off the time it takes to manage websites for yourself or your clients, it’s a tool well worth exploring.
In this article, we’ll cover some background on the tool and how to go about using it. By the end, you should have a good handle on how to use BackupBuddy to start backing up your sites more efficiently.
Let’s start with a look at the pros and cons.
Pros and Cons
As with any plugin, there are pluses and minuses to using BackupBuddy. Here are the main points in its favor:
- A fair price for the functionality on offer.
- Easy to use interface.
- Unlimited scheduled backups.
- Includes iThemes Sync for up to 10 sites
- Can control backups to BackupBuddy Stash from Sync inside the WordPress admin.
The main snag that might put most people off is the fact that there is no free trial version of the software available. With that in mind, let’s get a bit more specific on the pricing.
Pricing

The following features are included in all pricing options:
- 1GB of BackupBuddy Stash storage space.
- 10 iThemes Sync sites.
- 1 year of ticketed support.
- 1 year of plugin updates.
The individual pricing tiers are broken out as follows:
- Blogger: Two sites for $80/year.
- Freelancer: Ten sites for $100/year.
- Developer: Unlimited sites for $150/year.
- Gold: Unlimited sites plus lifetime plugin updates for $297 (ticketed support must be renewed each year).
Let’s look at the features in a bit more detail.
Overview of the BackupBuddy Plugin
BackupBuddy ships with a solid set of basic features. The following data storage options are all supported:
- Stash (iThemes’ own storage solution)
- Amazon Web Services/Amazon S3
- Google Drive
- Dropbox
- Rackspace Cloud Files
- SFTP and FTP
- Backups to email
Backups can be automated and managed remotely and you can also use the tool to migrate sites or restore from previous backups. In terms of advanced features, the following are some of the standout options on offer:
- Customizable configurations to control the extent of backup desired.
- Enhanced deployment and site migration features for developers.
- Detailed event reports which can be exported and shared with collaborators or clients.
- Data chunking to support slow servers or large file transfers.
Using the BackupBuddy Plugin
Now that we’ve had a quick general look at the options available to us, let’s get on to actually using them.
Installation
We’ll be installing the plugin for a standalone site in our examples. If you’re looking to install on a multisite network, instructions are available in the iThemes help pages.
In the image below, we’re installing the BackupBuddy plugin in the standard fashion by uploading the .zip folder through the WordPress Admin under Plugins. Once installation is complete, you’ll be prompted to activate the plugin.
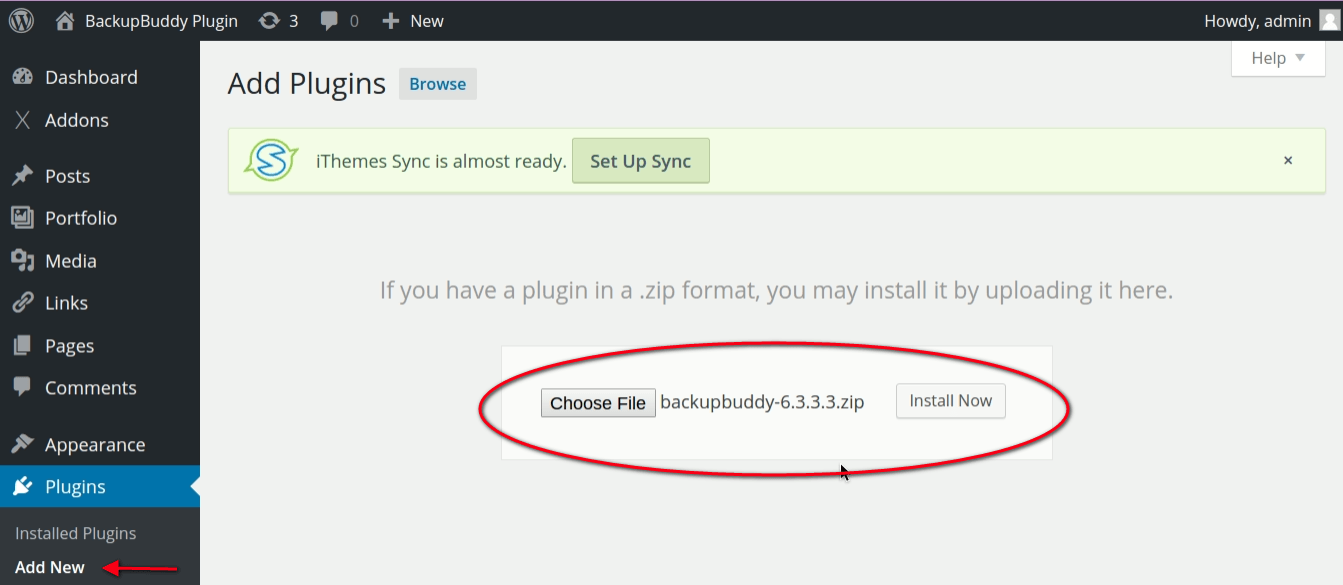
Once the plugin is activated, you’ll notice a new menu item in the admin sidebar menu called BackupBuddy.
Configuration
After activation, you’ll be kicked into the BackupBuddy Quick Setup Wizard pictured below. The basic options here are straightforward: your email address for backups and notifications, a password, your chosen storage method and basic scheduling info.
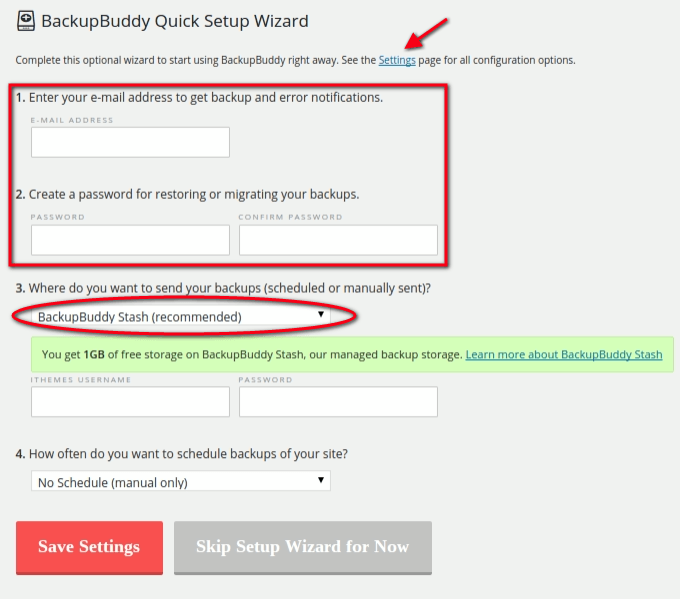
You can edit settings entered in the Quick Setup Wizard at any time and we’ll step through some of those options in more detail now.
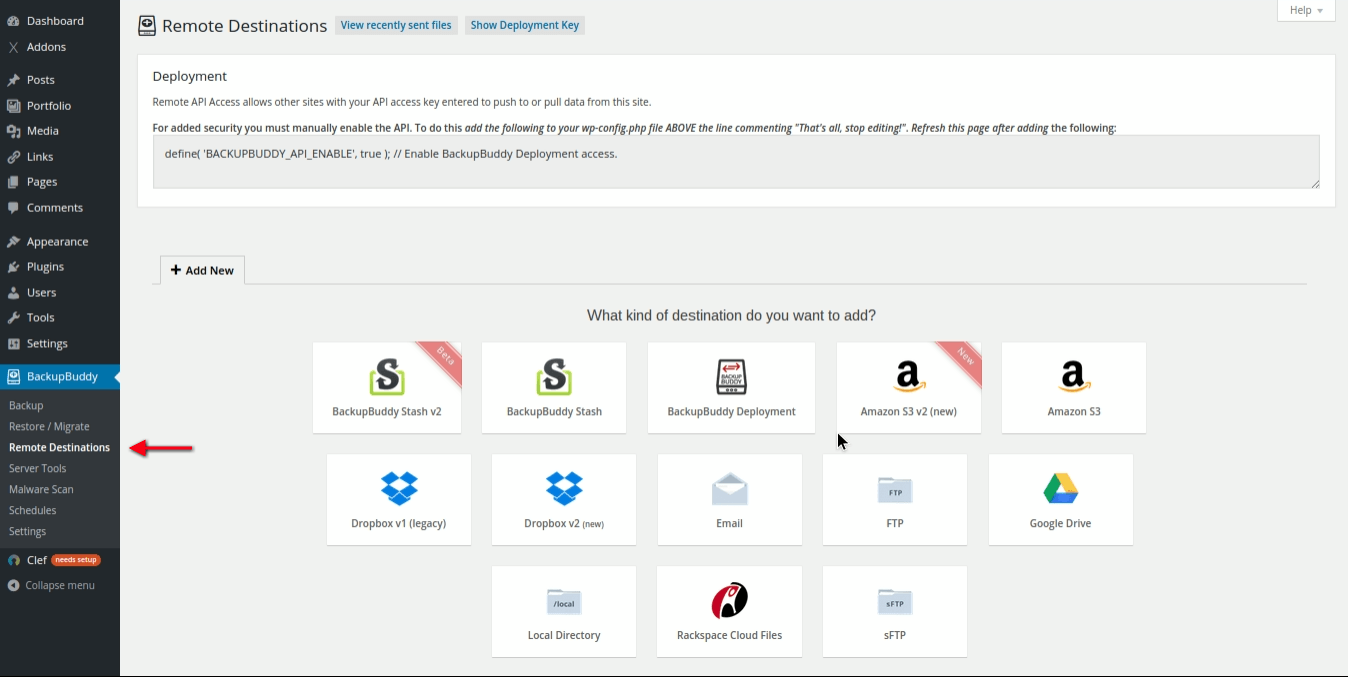
Remote Destinations
Accessing the Remote Destinations menu item gives you a full list of storage options to choose your default backup destination from.
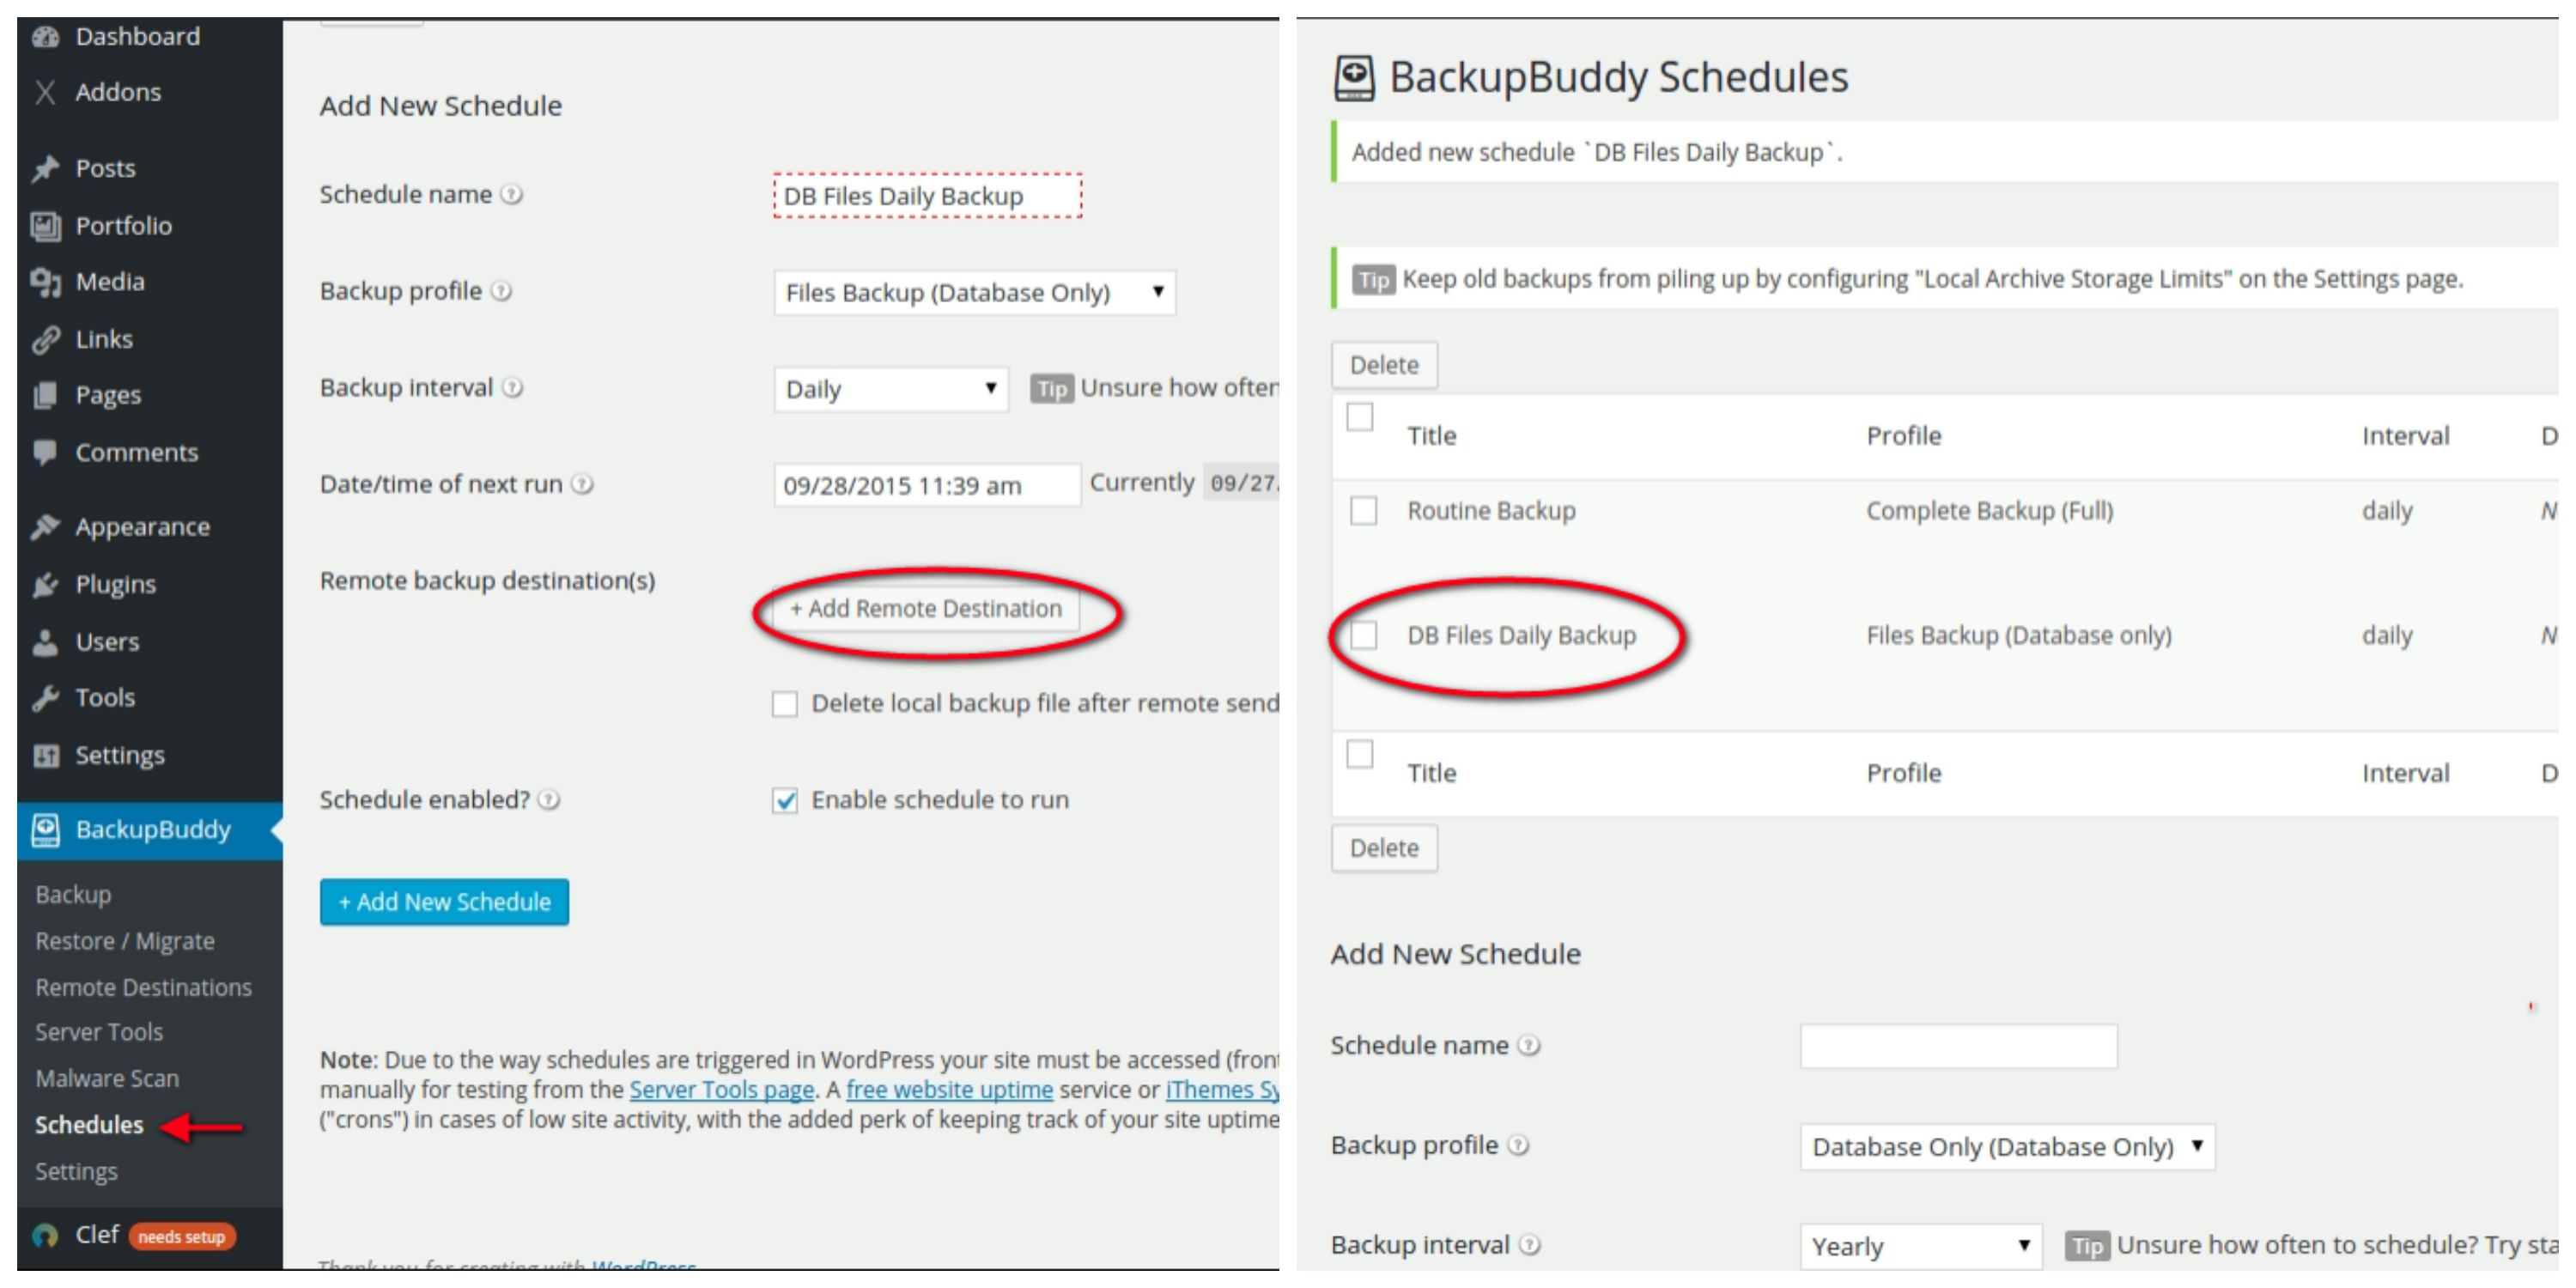
Schedules
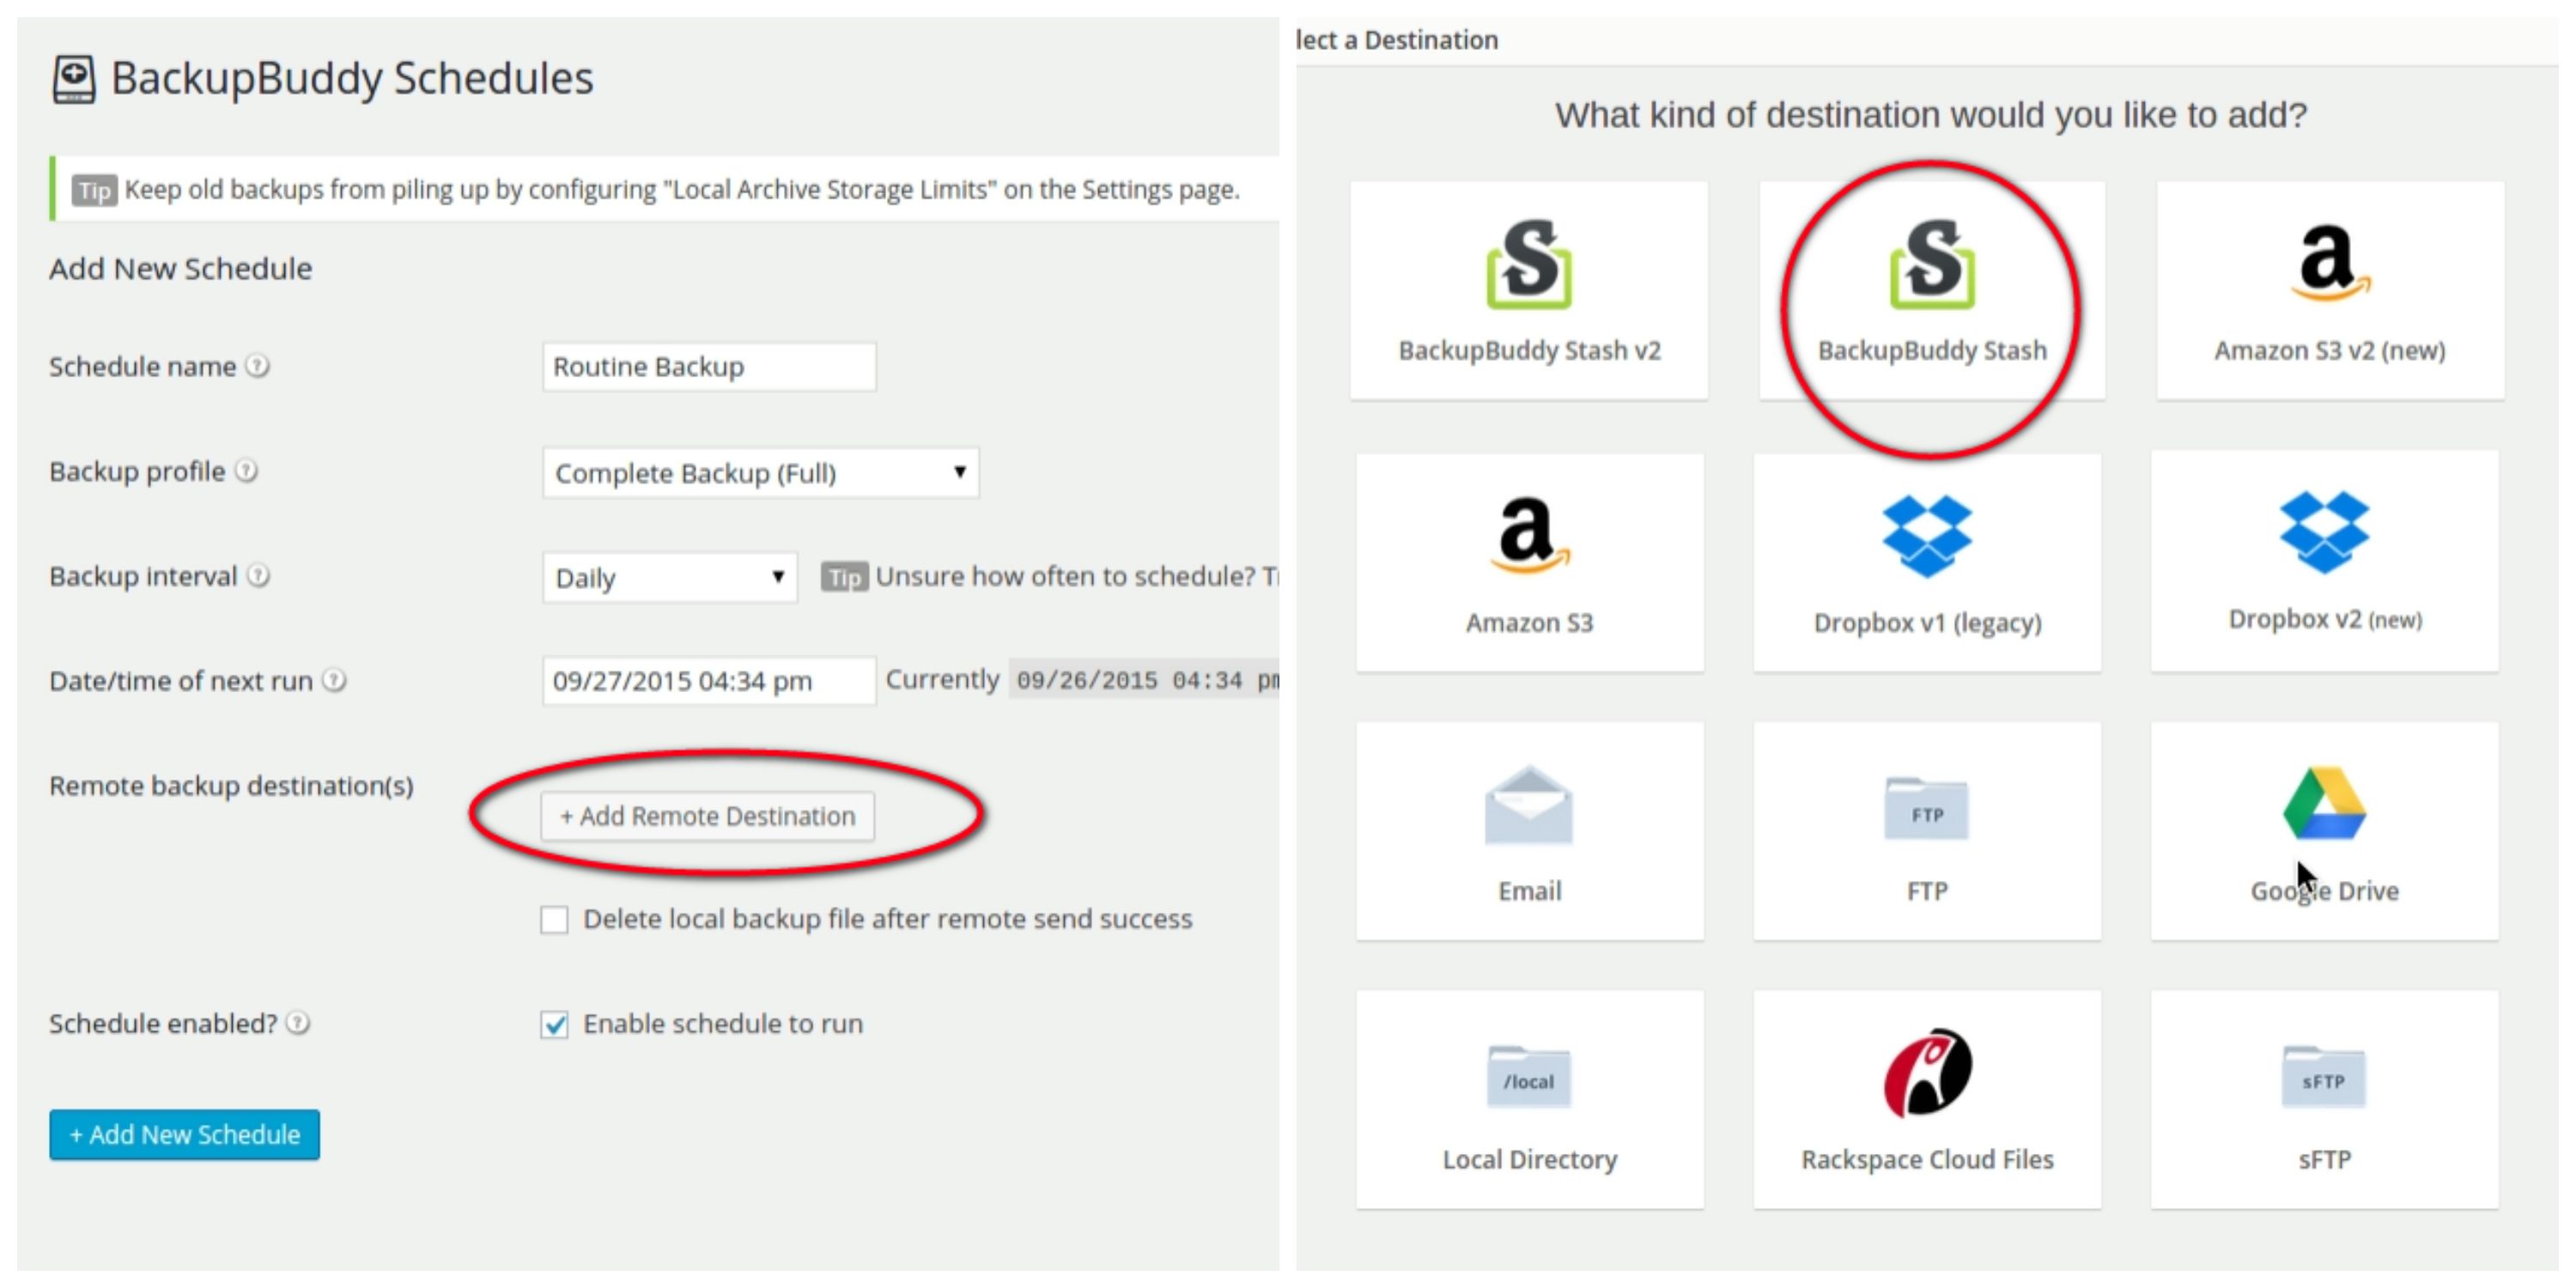
The BackupBuddy > Schedules menu item kicks you into a detailed set of options for controlling timing of different types of backups. Each backup schedule will have its own name and specifications once configured. You have quite a lot of flexibility at your fingertips here.
For example, you could choose to set up a daily backup that only includes database files, along with a weekly backup of all files. If you are managing a network of sites, their backup specifications can be set individually in Schedules.
You can also specify a different backup destination for each backup schedule as well. Note that values entered here override the default setting that you might already have set in Remote Destinations.
Scheduled backups can also be integrated with Profiles. We’ll discuss that option in a minute.
In the example below, we’ll send our backups to BackupBuddy Stash since we have 1GB free storage that came with the purchase of the BackupBuddy Plugin. More about Stash in a bit.
Backup Profiles
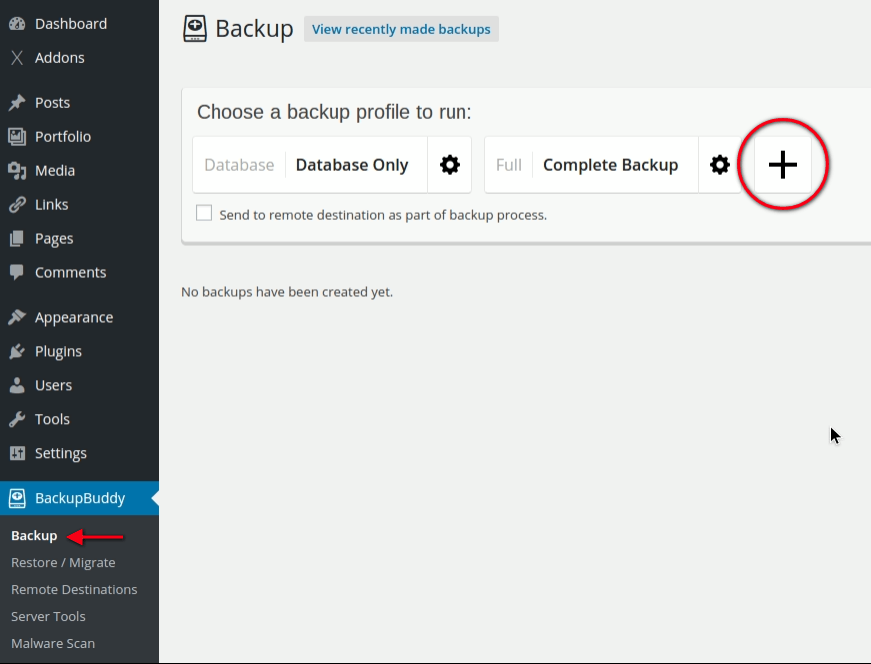
Backup profiles can be created by going to the Backup menu item in the WordPress admin. You’ll notice two default profiles in there to begin with. To create a new profile, follow these steps:
1. Click on the plus sign to launch the profile creator.
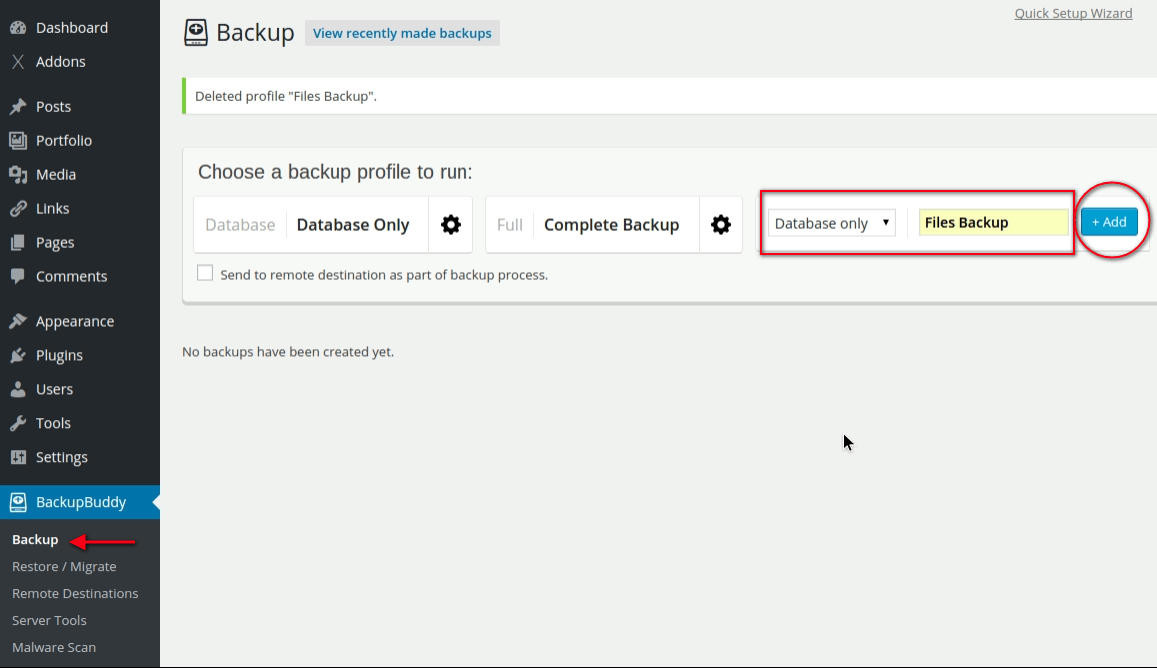
2. Enter a name for the profile and select what type of backup you’d like it to be from the dropdown options:
- Database only
- Full DB + Files
- Files only
We’ve named ours “Files Backup”. Click the +Add button once the name is entered.
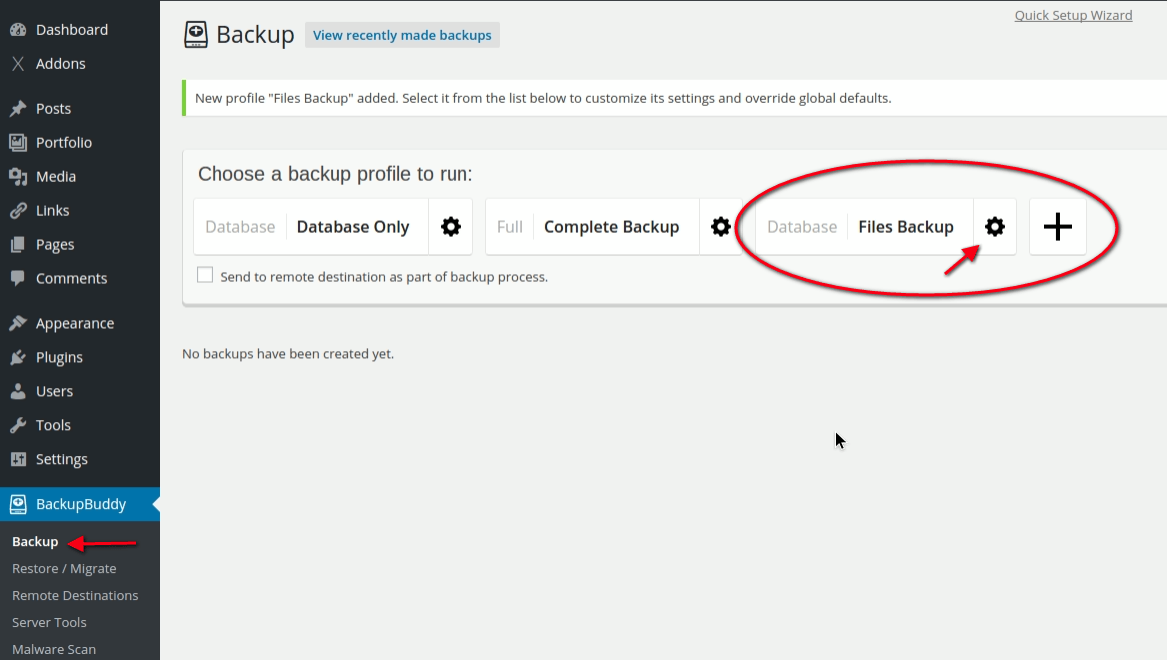
3. Your newly named backup profile should now show up under the list in Backup. To configure or change the profile’s settings, simply click on the gear icon next to the title as pictured below.
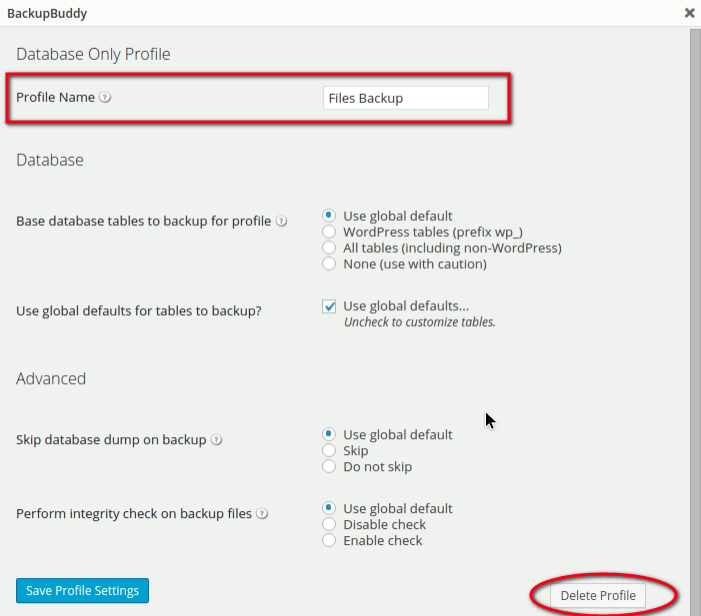
4. Within the individual profile settings the profile name can be changed or the profile can be deleted if necessary.
5. Notice the new profile now appears under your Schedules list.
We’ve called our new backup schedule “DB Files Daily Backup” and have the option of adding a remote destination for the backup if we choose. This will override any previous settings entered elsewhere for the purpose of this scheduled backup.
Aside from routine backups you may be doing for clients already, using profiles can be a handy way of organizing backups that you’d like to have sent directly to a client’s email or other destination of their choice – perhaps on a different schedule than your own administrator backups.
iThemes Sync Remote Backups
The iThemes Sync option we mentioned at the top of the post is included with the purchase of BackupBuddy and includes up to ten sites at no additional cost.
This option gives you remote control over all WordPress sites added to its console. You can use it to manage all of your backups from BackupBuddy and update and manage WordPress versions, plugins, and themes. It’s a potentially massive timesaver.
We’ve installed Sync through the WordPress admin panel just as with BackupBuddy earlier.
Once activated, an admin notification will appear on top of the WordPress admin which will walk you through the setup process.
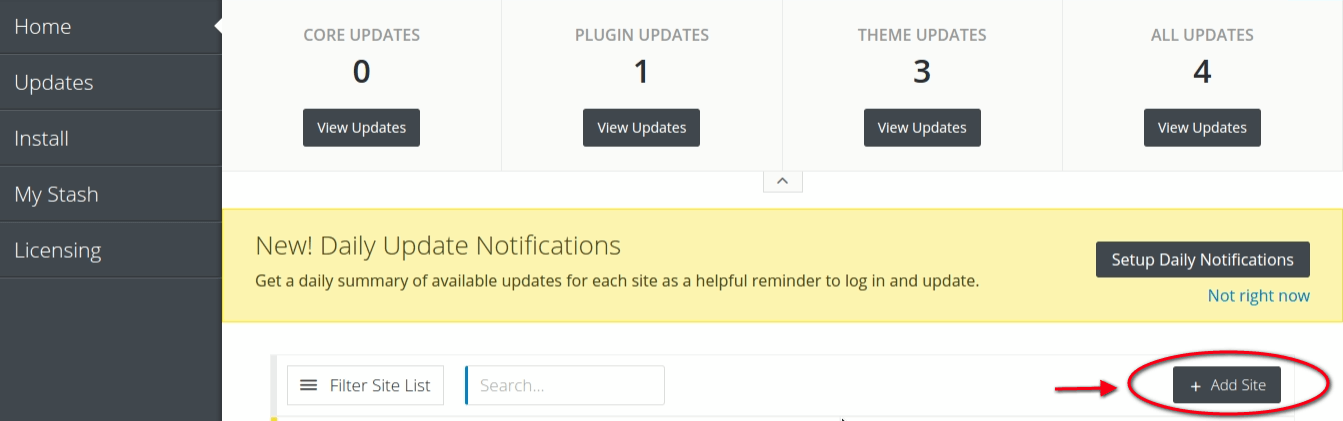
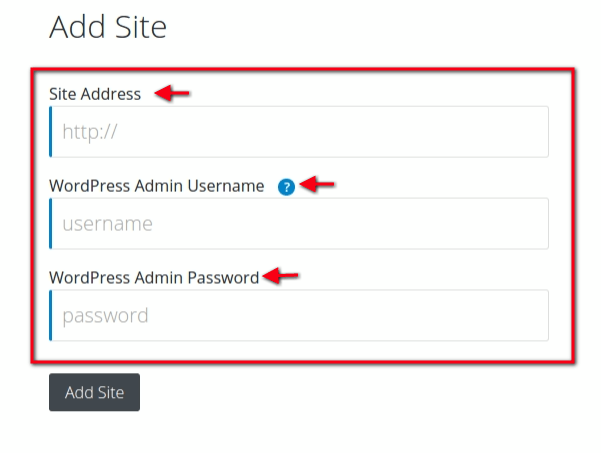
Within the Sync console you can add a website by visiting Home as pictured below.
BackupBuddy Stash
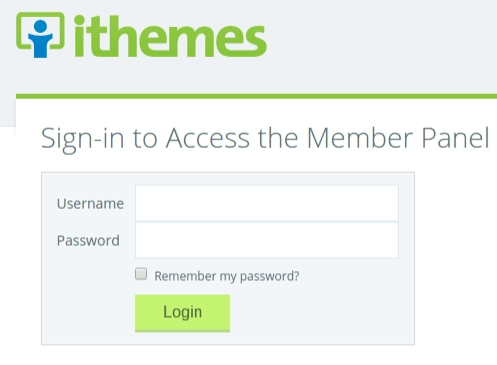
As mentioned earlier, we wanted to test out iTheme’s native storage option Stash so we’ll use that to store our first BackupBuddy backup. We’ve already set our default destination to Stash in WordPress so now it’s a question of logging into our Stashboard over at iThemes.
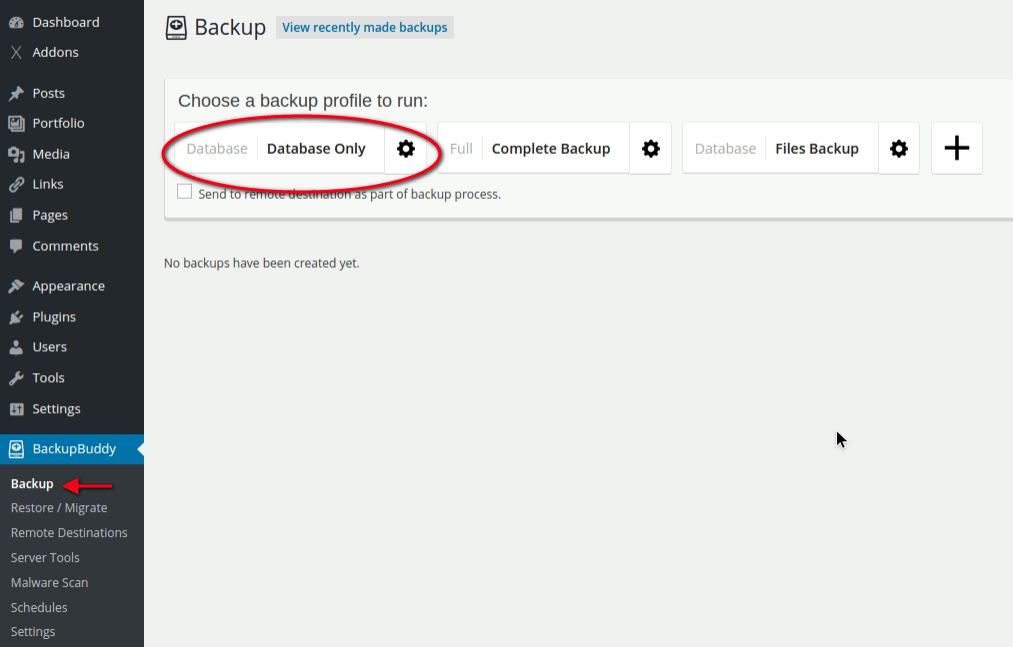
For this review, we’ll do a manual backup followed by a visit to our Stashboard.
1. From the Backup tab, we’ll need to choose which backup profile we want to run. In this case, we’ll choose Database Only.
2. To view our backup we log into our Stashboard and find this message below.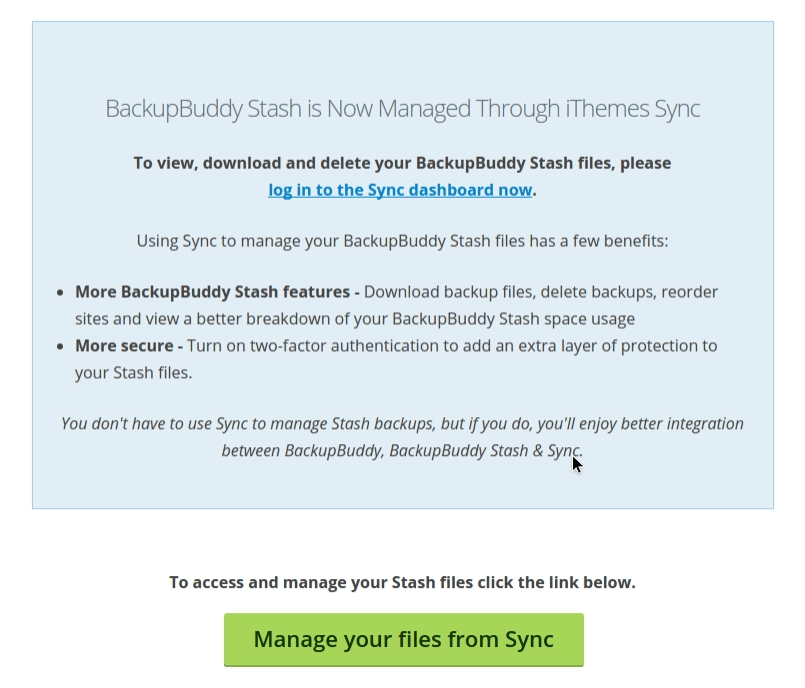
3. After clicking Manage your files from Sync, a window opens asking us to log into iThemes: After doing this, the My Stash window opens.
Now when we want to access My Stash we will click on the iThemes Sync tab from our WordPress admin.

Data Chunking Large File Transfers
A quick word about data chunking – this option allows the transfer of larger file sizes than your server might be configured to accept by breaking files into smaller pieces. BackupBuddy handles large file transfers automatically with a default setting of 80Mb and these settings can be changed in Destination Settings within the Remote Settings tab under advanced options.
Provide a value of zero for no chunking at all. Chunk sizes over 100Mb are not recommended.
Protection from Hackers
The BackupBuddy Plugin includes a complete malware scan. To run a scan, simply click on the Malware Scan tab in the WordPress admin and scroll down to click on the Perform New Scan Now button.
Support
Those who have an active subscription can log into iThemes to submit their questions for a ticketed response. There’s also comprehensive help info available at the iThemes BackupBuddy Codex.
Conclusion
BackupBuddy is sophisticated yet easy-to-use software that considerably simplifies the process of completing routine backup tasks for developers. Being able to manage and automate backup activities across an entire network results in much less time wasted fiddling with individual sites and settings.
Having iThemes Sync thrown in free with your purchase also adds great value to the already fairly-priced plugin and features such as malware scans and data chunking are the icing on the cake.
Backups are essential on every site and we can confidently say BackupBuddy is an excellent tool for the job. It’s a breeze to use and handy wizards exist to help guide you through the setup process. Using Stash within iThemes Sync was also as easy as advertised.
Have you had success using BackupBuddy or do you have any tips or tricks to share? Get in touch via the comments and let us know.
If you liked this article, then subscribe to our newsletter or follow us on Twitter for more WordPress related content.


I use UpdraftPlus and I think that is more user friendly and it is free. The Migrator addon (premium) is awesome to migrate wordpress to another webhosting or to a staging site.
Hi Peter!
Yes, I have used UpdraftPlus before and I agree, it’s a very nice option too.
Cheers,
Tom
On their website, iThmes claims that BackupBuddy does a “Full Site Restore – BackupBuddy handles restoring your entire site back to its original glory, including all uploaded media library files, themes and plugin files.”
However, when one of the site’s wordpress authors uses non-ASCII-characters (what the iThemes support team calls “international” characters), i.e. characters which are a integral part of most written languages but exceed the 26 characters known to the English speaking world, THE BACKUP WILL NOT BE RESTORED CORRECTLY EVEN ON THE SAME SERVER WHERE THE SITE WORKED FLAWLESSLY BEFORE – images and assets will be missing all over the website because their names are mangled in the process. I learned this the hard way when trying to restore a site, and ended up with a frustrated customer and a lot of extra work diagnosing and then fixing the issue.
iThemes support explained to me they are aware of the problem, but blame WordPress and the user for this, they suggest using some third party plugins to fix the issue.
What bugs me about this is several things:
(a) it’s so easy to issue a warning on either the iThemes website, on the plugin page, or when restoring the site, but they chose not to do that, even though they are aware of the issue.
(b) there’s a way to detect actual or potential issues and warn the user, either when the site’s language is one that contains “international” characters (I’m not aware of any European language with the exception of English and Italian, let alone Asian and African languages), or when a backup actually contains a file with those characters in the filename.
(c) there’s a way of fixing this in the background when restoring the site.
(d) my support ticket was put on hold, my answer to iThemes’ reply was never addressed.
So I cannot recommend BackupBuddy to anyone who runs a site in any other language than English (or Italian).
To the rest of the world, I’d also hesitate to recommend it, because I think that not addressing problems right away when there’s the potential of disastrous consequences for your customers (i.e. a restored site not working properly, which might not even be obvious on first sight) is not building trust on my part.
Disclaimer: I own a lifetime (GOLD) license for BackupBuddy, host quite a few wordpress sites for myself, and for customers, and I have a bit of experience developing web applications.
Backup Buddy is crap. Just bought a license and it doesn’t work…at…all… When I tried to get help via their support, they are less than helpful. When you ask for a refund of their product…which does not work…they refer you to their “policy” which is NO refunds. What a great business model! Sell a digital product that does not work and offer little/no support and no refunds…brilliant. Not cool at all!
Hey there!
Ah that sucks, sorry to hear about your bad experience. It looks like Backup Buddy is slowing going from a great product to not-so great one. I hope they listen to customers / feedback and start making changes.
You may want to look other alternatives such as Duplicator & updraftPlus.
Backup Buddy really is a garbage product. It will only work if you have the most basic of WordPress installs with no data. Otherwise get ready for failed backups and timeouts all day long.