
Searching for a tool to help you grow your email list on WordPress?
In our hands-on Thrive Leads review, we’re going to take a look at this powerful email opt-in tool from Thrive Themes, the team behind a number of popular conversion-focused products such as Thrive Architect (our review), Thrive Theme Builder (our review), and lots more.
In general, Thrive Leads is one of the best WordPress list building plugins, though a new pricing structure means it may not always make sense for your site. To learn more about those conclusions, keep reading our full 2021 review.
Here’s how we’ll break up our 2021 Thrive Leads review:
- The pros/top features of Thrive Leads.
- The cons/weak points of Thrive Leads.
- How to use Thrive Leads (a quick look at how everything comes together).
- Pricing information.
- Final thoughts on Thrive Leads.
Nine Top Features in Thrive Leads
Let’s kick off our Thrive Leads review with the things that Thrive Leads does really well…
1. Lots of Different Opt-In Types
Thrive Leads lets you create a variety of different opt-in types, which lets you add lead generation features literally anywhere on your site. You’ll get access to:
- Popups
- In content forms
- Post footer forms
- Ribbons (notification bars)
- Screen fillers
- Welcome/scroll mats
- Slide-ins
- Widget forms
- Two-step opt-in boxes
- One-click signup links

2. Tons of Templates to Choose From
To help you quickly get up and running with professional, optimized forms, Thrive Leads comes with a library of hundreds of pre-built templates for the various types of opt-in forms:

The templates look great. And one of the best parts is that they come with optimized copy (instead of just lorem ipsum text), which means you don’t need to be an expert copywriter to create an effective opt-in. All you do is edit the text to match your offer and you have a great opt-in.
3. Visual, Drag-and-Drop Editor
In addition to the many templates, Thrive Leads lets you customize your form’s design and content using a visual, drag-and-drop editor.
The editor is really just a lightweight version of the Thrive Architect page builder plugin, which means you have a lot of flexibility when creating your designs – editing flexibility is definitely one of Thrive Leads’s strong points:

4. Detailed Content Targeting Rules
Thrive Leads comes with really strong rules for targeting your opt-ins to specific content on your site. You’ll be able to target your opt-in forms to:
- Specific types of pages – e.g. front page, blog post page, search page
- Categories
- Tags
- Specific posts
- Specific pages
- Post types – e.g. all WooCommerce products
- Page templates
- Archive pages
- Specific URLs
In addition to the many content options, there’s also an option to target forms based on whether or not a user is logged in to WordPress. You can also target your forms to either mobile and/or desktop visitors.
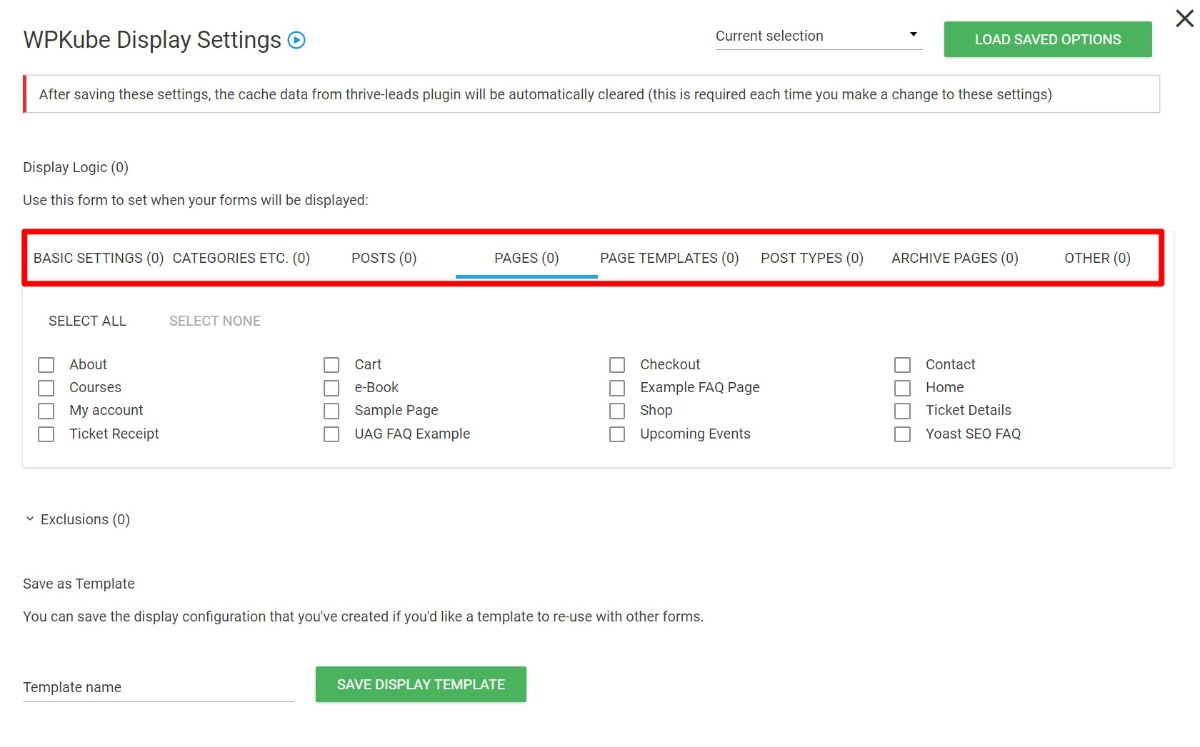
What’s more, you can use all these rules as both include and exclude. For example, target all blog posts except for blog posts in a certain category.
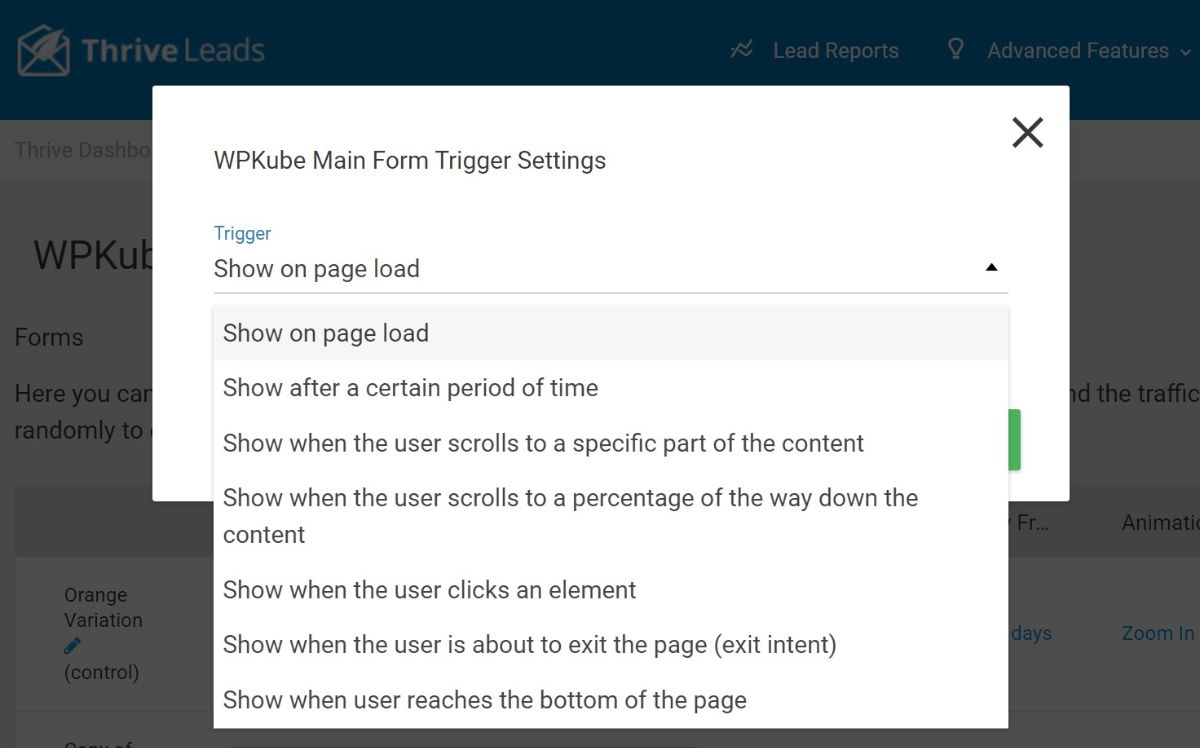
5. All the Important Trigger Rules
In addition to targeting rules, Thrive Leads also gives you a variety of different options to trigger your opt-ins, including the popular exit intent option. In total, you’ll get the following triggers:
- Exit intent
- On page load
- Time delay
- Scroll to specific element
- Scroll depth (percentage)
- On click on specific element
- Scroll to bottom of the page
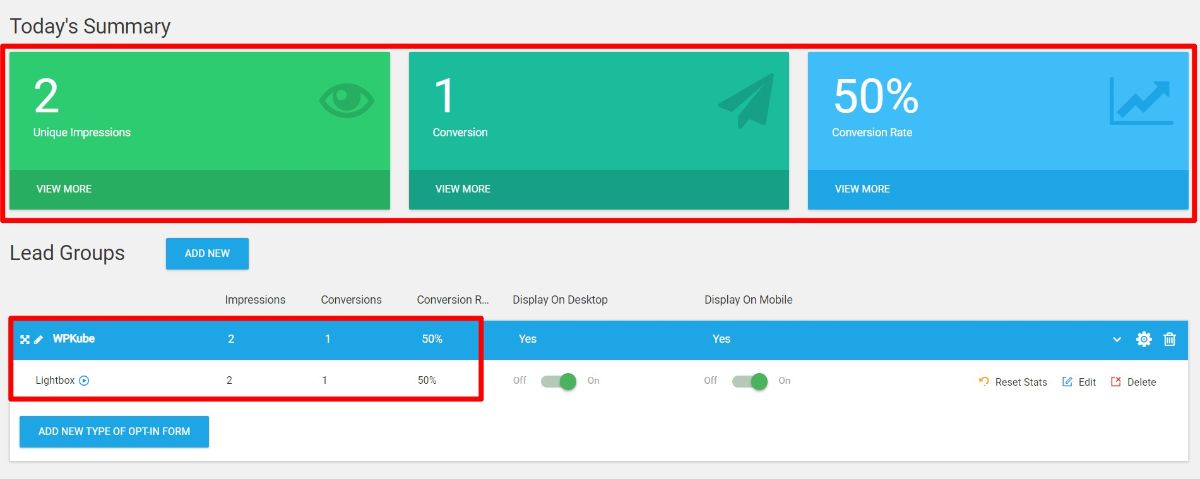
6. Built-in Analytics and A/B Testing
To help you analyze your forms’ effectiveness, Thrive Leads comes with built-in analytics and A/B testing.
In terms of analytics, you’ll get:
- Impressions
- Conversions
- Conversion rate
You can view stats by:
- Individual variants (in A/B tests)
- Individual forms
- Individual lead groups (groups of forms)
- Overall (all lead groups/forms)
You can also open a full reporting interface that lets you view things over time and by different forms:
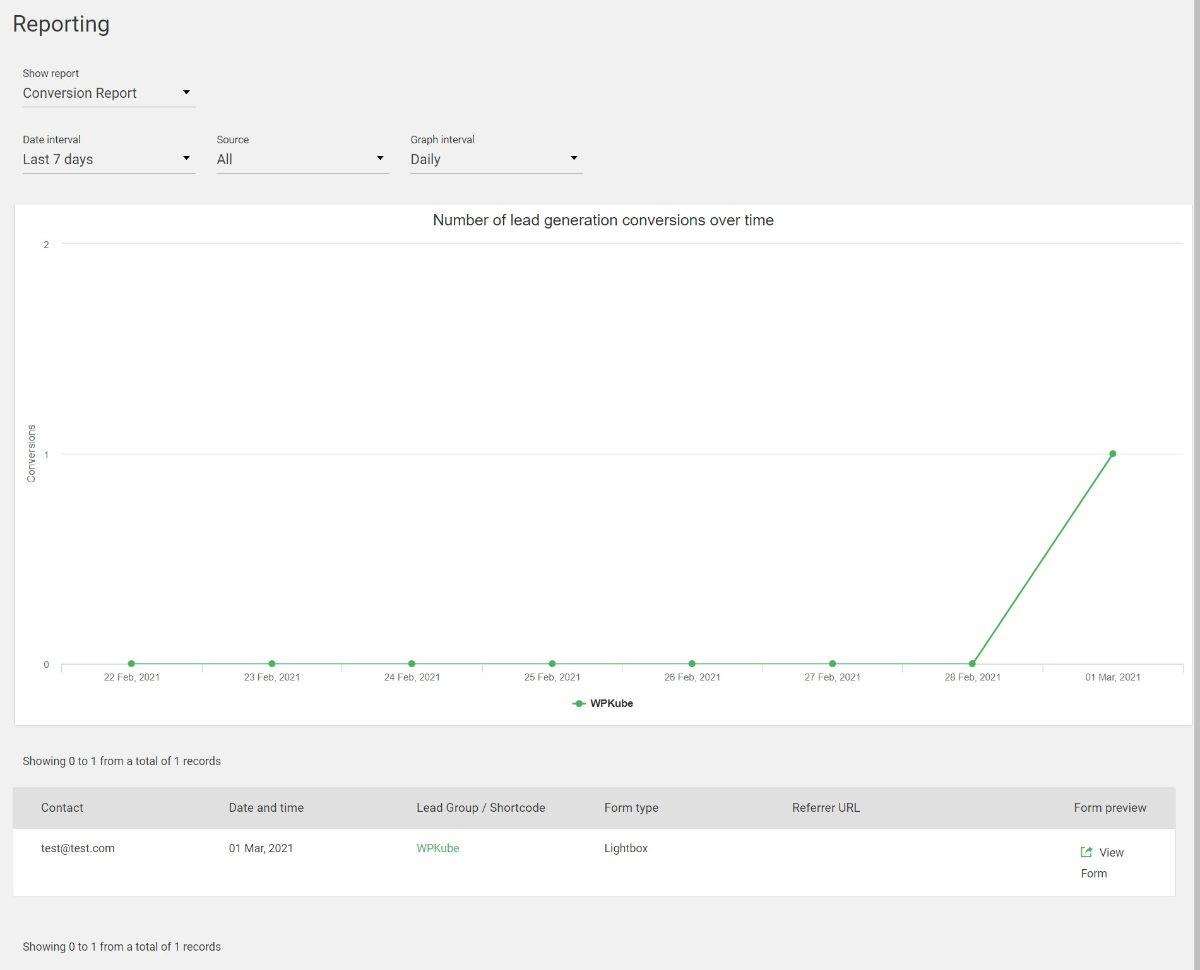
To optimize forms, you can also spin up infinite form variations to run your own A/B tests. For each variation, you can test different:
- Triggers
- Designs and content (even using a completely different template)
- Display frequencies
- Animations
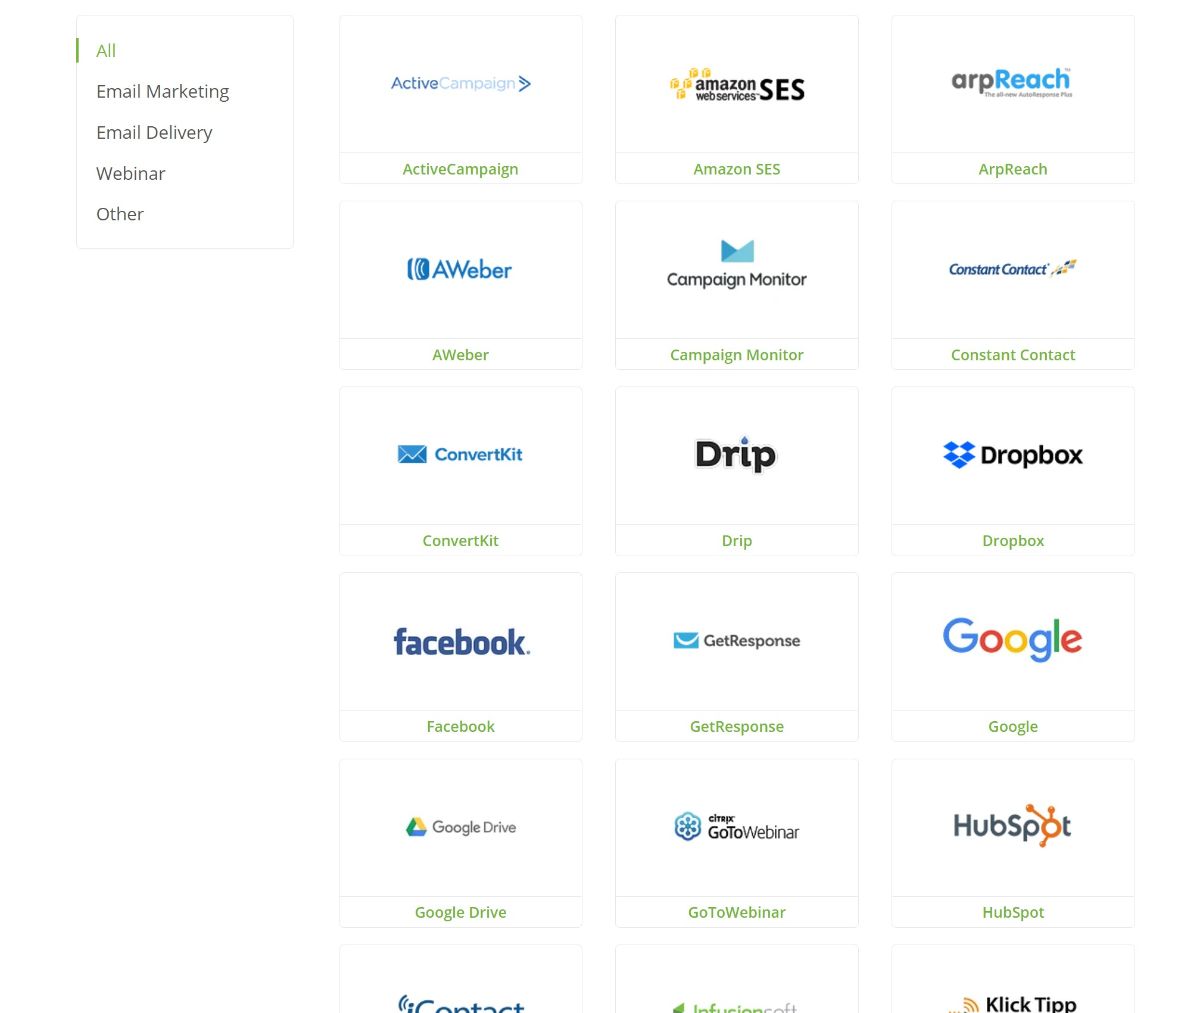
7. Integrations With Popular Email Marketing and Webinar Services
Thrive Leads integrates with virtually all the popular email marketing services (and some webinar services) so that you can add new subscribers directly to your service of choice.
You can check out the full list here, but it includes all the big names such as Mailchimp, Campaign Monitor, AWeber, ActiveCampaign, HubSpot, MailPoet, GoToWebinar, WebinarJam, and lots more.
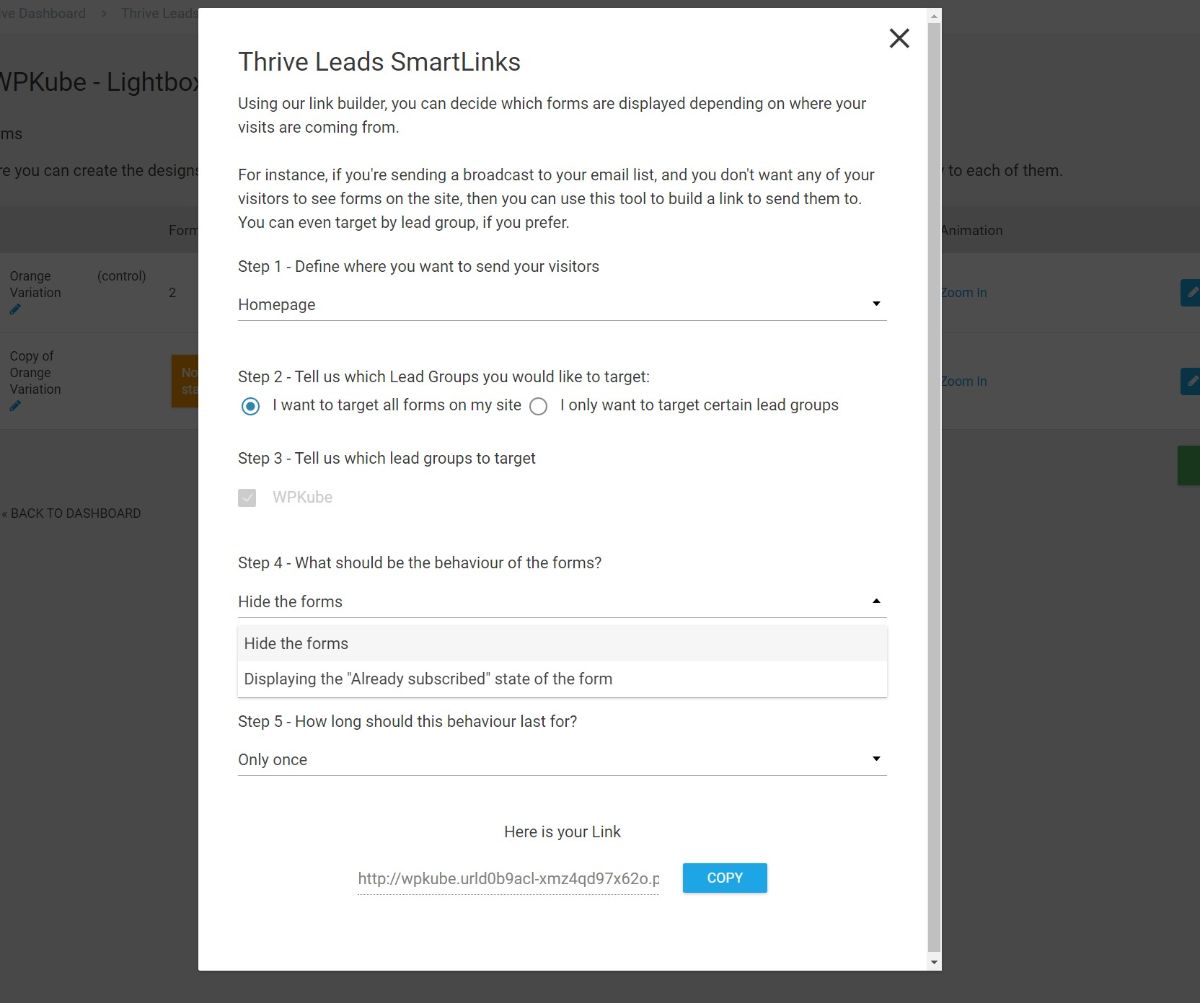
8. Smart Links to Avoid Displaying Offers to Subscribers
To avoid asking people who’ve already signed up to your list to join again, Thrive Leads comes with a really neat feature that lets you display a different offer or hide an offer to users who’ve already joined your list.
You can generate a special link that you can include in your emails. Anyone who clicks that link will either:
- Not see the form.
- See the “already subscribed” state of the form (which you can design using the visual builder).
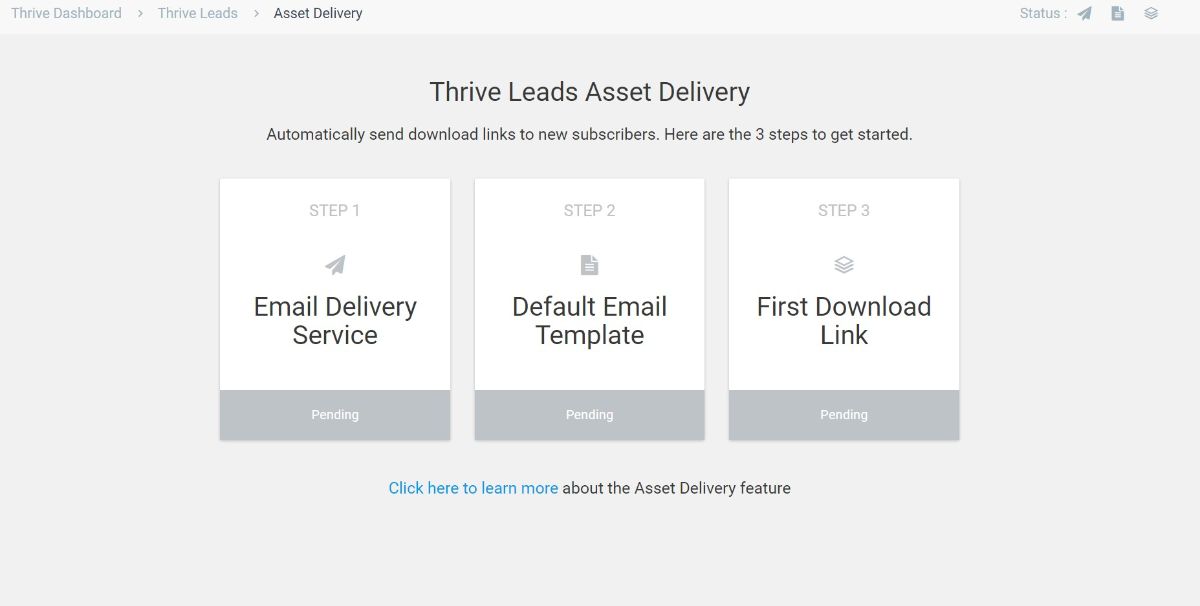
9. Asset Delivery for Content Upgrades
If you’re creating lead magnets or offering other types of downloadables in exchange for getting people to sign up to your list, Thrive Leads includes a dedicated feature to help you manage and deliver these bonus offers:
Two Weak Points in Thrive Leads
Our Thrive Leads review wouldn’t be very useful if we only focused on the good stuff, so let’s run over some of the weak points in Thrive Leads…
1. Non-Content Targeting Rules
Thrive Leads has really strong rules for targeting specific content on your WordPress site, but it lacks advanced targeting rules that go beyond that.
The only other targeting rules are an option to target by logged-in status or device. However, you don’t get options to target by:
- WordPress user role
- Referring source/URL
- Adblock usage
- Geographic location
- New vs returning visitors
- Etc.
These are advanced rules that can come in handy for personalization. If you like to have these advanced rules, you should consider this, but most people will probably be fine with just the many content targeting rules that Thrive Leads offers.
If you do need those advanced rules, OptinMonster is the king when it comes to advanced targeting and personalization. You can learn more in our OptinMonster review.
2. No Scheduling
In addition to missing some of those advanced targeting rules, Thrive Leads also doesn’t include any type of scheduling feature to only run forms between certain dates or times. This means that, if you’re running a special promotion, you’ll need to manually start and stop the form.
Not a huge deal, but it’s not quite as convenient as some other tools. Again, OptinMonster does include scheduling if you need it.
How to Use Thrive Leads
Now that you know the top features in Thrive Leads, let’s quickly go over how it works so you can see how everything comes together.
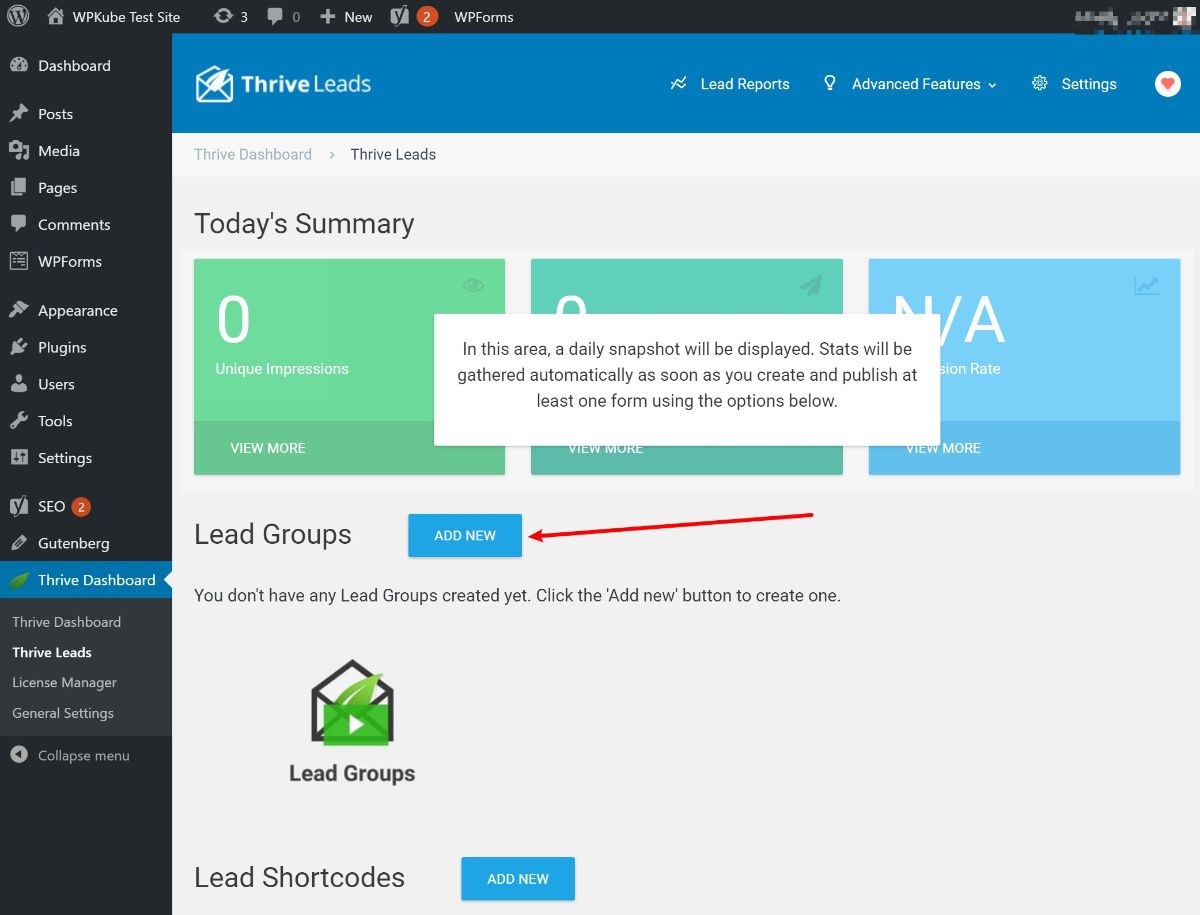
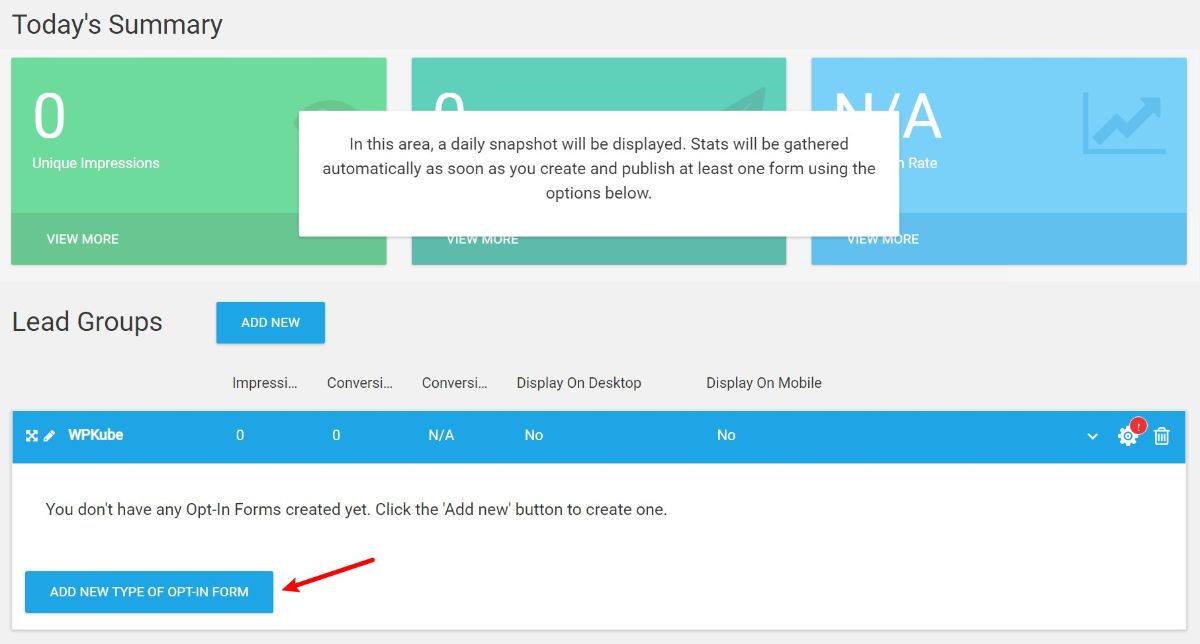
To get started, you’ll create a Lead Group, which is a collection of one or more opt-in forms that share the same targeting rules. For example, one lead group might contain a popup and also an in-content form.
You can also create separate lead shortcodes and two-step opt-ins:
Once you have a lead group, you can create a new opt-in form inside that group. You can also set up targeting rules for all the forms that fit in this lead group:
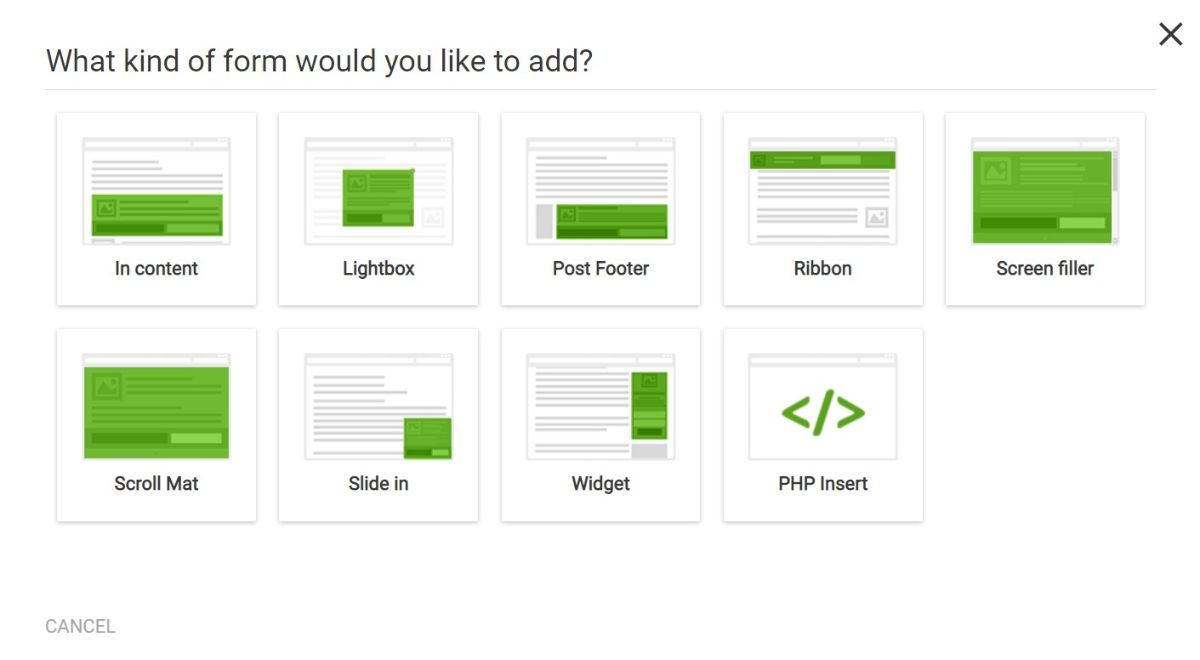
You can choose from the many form types:
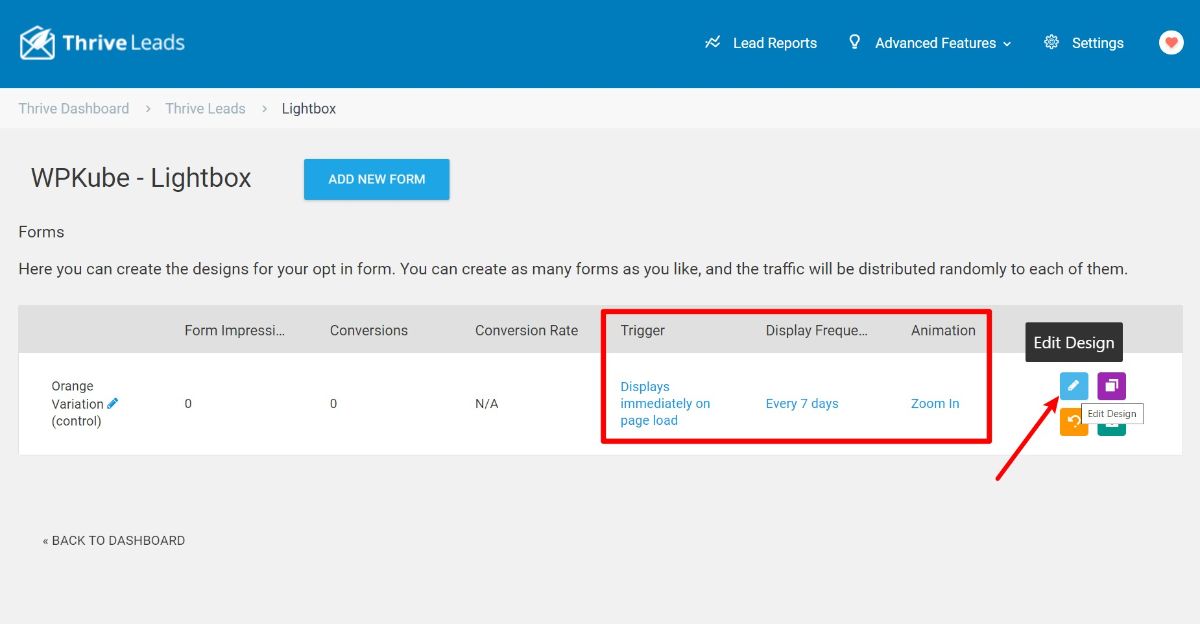
Then, you can add a form within that form type. Once you have your form, you can add triggers and display frequencies. Then, you can click the pencil icon to open the editor:
This will launch the visual editor where you can choose a template or build a design from scratch:
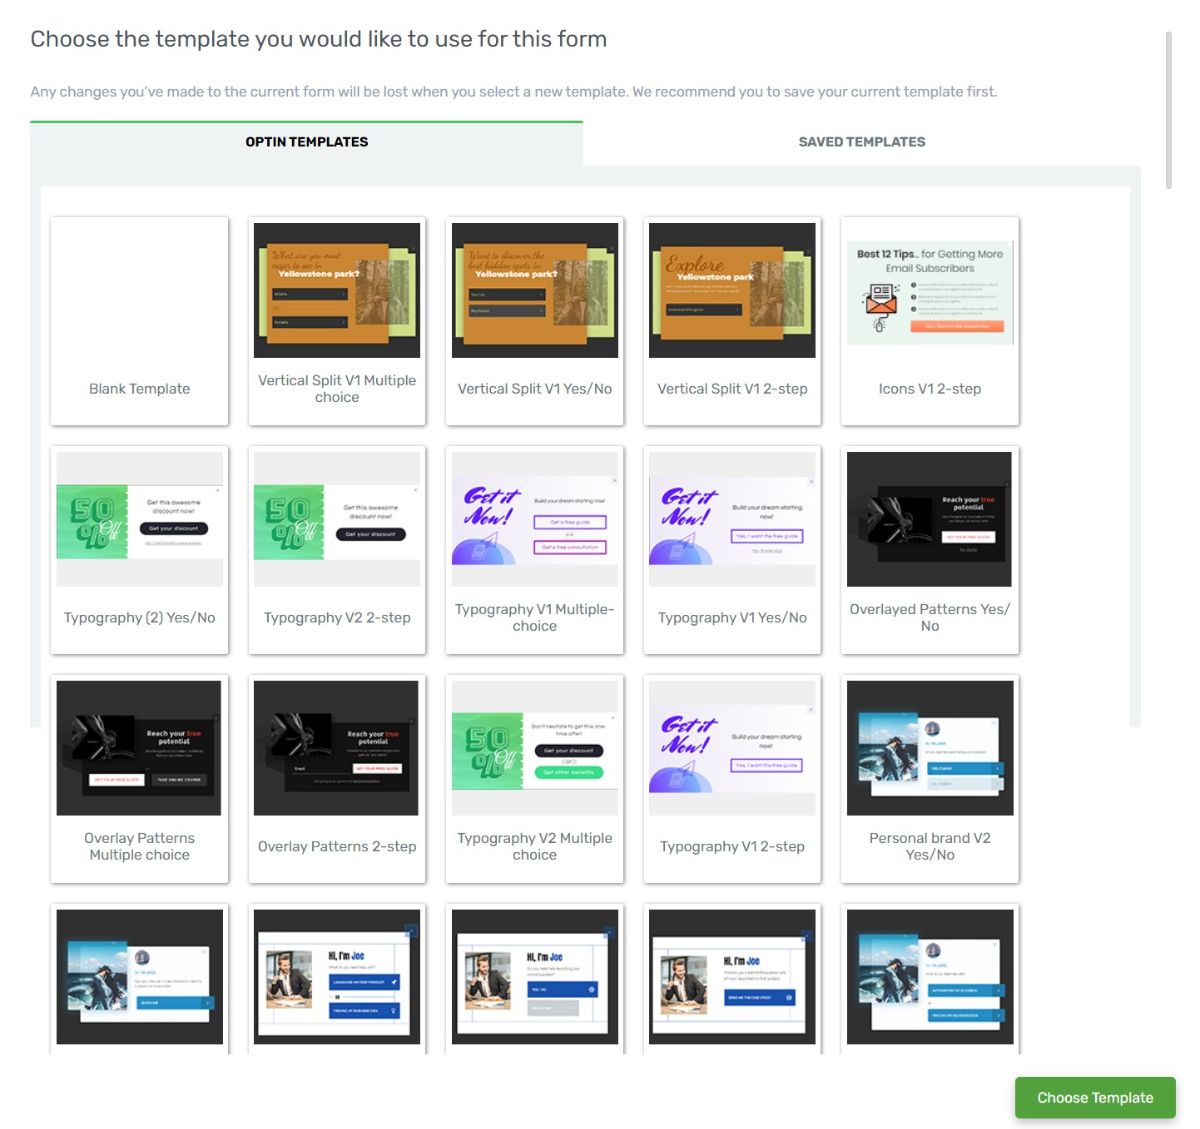
Either way, you’ll be able to use the visual, drag-and-drop editor to control your design:

And that’s it! Your opt-in form will now start displaying according to its trigger rules and the targeting rules of its lead group.
You can also set up tests to analyze different content/designs, different trigger rules and animations, etc.
Overall, everything is very easy and non-technical to work with.
Thrive Leads Pricing
Thrive Leads is only available as part of the Thrive Suite of products, which gets you access to every single conversion-focused plugin and theme that Thrive Themes offers. This includes:
- Thrive Architect page builder (our review).
- Thrive Theme Builder full visual theme builder (our review).
- Thrive Quiz Builder to create conversion-focused quizzes and surveys.
- Thrive Apprentice to deliver online course content (a lightweight WordPress LMS plugin).
- Thrive Comments to replace the default WordPress comments section.
- Thrive Ultimatum to add evergreen countdown timers.
- Thrive Ovation to collect user feedback and testimonials.
- Thrive Optimize to run A/B tests on the designs that you’ve created with Thrive Architect.
You get access to all of that for one low price. What’s more, you can use all of those tools on up to 25 websites, which means you can optimize all of your sites.
You can pay for your membership quarterly or annually:
- Annually – $228 per year (equivalent to $19 per month)
- Quarterly – $90 per quarter (equivalent to $30 per month)
You can learn more in our full Thrive Themes membership review.
Note – you used to be able to purchase Thrive Leads by itself. However, the developer has shifted to this all-in-one membership approach now and it’s no longer possible to purchase just the standalone Thrive Leads plugin.
Final Thoughts on Thrive Leads
Thrive Leads is definitely one of the best WordPress list building plugins. It comes close to the power of a tool like OptinMonster, but in a much more affordable package.
It doesn’t offer quite as many advanced targeting rules, but the pricing is impossible to argue with. With OptinMonster, you’d pay $228 per year if you wanted access to A/B testing…and a lot more than that if you want those advanced targeting rules. What’s more – that OptinMonster plan would only let you use it on two sites!
With Thrive Leads, you’ll pay the same $228 per year, but you’ll be able to use it on up to 25 sites and you’ll also get access to every single plugin and theme from Thrive Themes, including some really powerful tools like Thrive Architect/Thrive Optimize to create and test landing pages, Thrive Theme Builder to design your entire theme using a visual drag-and-drop interface, and more.
Getting access to all those tools across 25 sites is incredibly valuable. However, the caveat is that, if you’re not going to use those other tools, you’re missing out on a lot of the value in Thrive Suite.
If literally all you want is a list building tool, you might be better off with Convert Pro, which offers a lot of the same features/benefits as Thrive Leads but for only $79 per year (which allows use on unlimited sites). Or, you could check out some other options in our collection of the best WordPress list building plugins.
To sum up:
- Thrive Leads is one of the best list building plugins, and the full Thrive Suite offers incredible value for building conversion-focused WordPress sites. If you’ll use the other tools (which are high-quality), it’s a great decision. Learn more in our Thrive Suite review.
- If you won’t use the other tools in Thrive Suite, you can probably save some money by purchasing Convert Pro for $79, which is another quality option with similar features. It’s not that Thrive Leads is “bad”, it’s just that it’s overpriced if you’re not going to use the other tools.
Have any questions about our Thrive Leads review?


can i use thrives leads to create squeezepage ??
Nop, you will have to have purchase another plugin like Thrive Content Builder or OptimizePress. Thrive leads is only for building optin and popup forms.
Their pricing is ridiculous now. Was excited to try it, but at $588/year just don’t see the value over OptinMonster
It’s their membership plan. You can get it $67 lifetime.
I checked the thriveleads’ price and found that the price is $97 for unlimited sites with 1 year support and unlimited updates. Where is the $588/year option? Perhaps it is a typo?
I have been testing Thrives Leads, and I have to say that building opt-in popup, sliding, widget forms as never been easier. Split testing and automatic winner are some nice featues too.
Thanks for the comment Michael. I agree, it’s one of the nicer opt-in plugins I’ve used. Automatic winner is a rather unique feature that I’m not even sure I talked about.
Won’t use any Thrive plugins. Especially Thrive Builder.
If you uninstall the builder, your pages will be totally blank in the backend.
I see that the lifetime plan is $97 and not $67…is there any coupon to get the $67 lifetime plan?
Be very, very careful before signing up with Thrive Leads. Their service leaves a LOT to be desired. They have no concept of customer service. Consider OptinMonster, LeadPages or SumoMe instead. Same functionality, lower price and you don’t have to deal with broken customer service.
This post really helped me set up Thrive Leads and get started with it. Thank you so much!!
Don´t waste your time with this company
Once your support period expires, they want to charge you to answer the most elementary questions. Even pre-sales questions.
I was interested in buying a second license, so I asked which wordpress plugin they supported besides MailPoet
Do you know what they say?
They refused to answer this question unless I pay them more money for their support
Unbelievable!
BUYER BEWARE!
THIS GUYS DOESN’T CARE ABOUT THEIR CUSTOMERS!
STAY AWAY FROM THIS COMPANY!
Hi Sheila,
This is something that we fixed with Thrive Architect. When you deactivate the plugin you’ll still see all your content but the styling will be missing.