
The concept of evergreen content is a sound one. Though, there are lots of times you’ll want to date your content. Not only this, but comments and other site elements can benefit too. If you want to add a timestamp in WordPress, the process can be simple to implement.
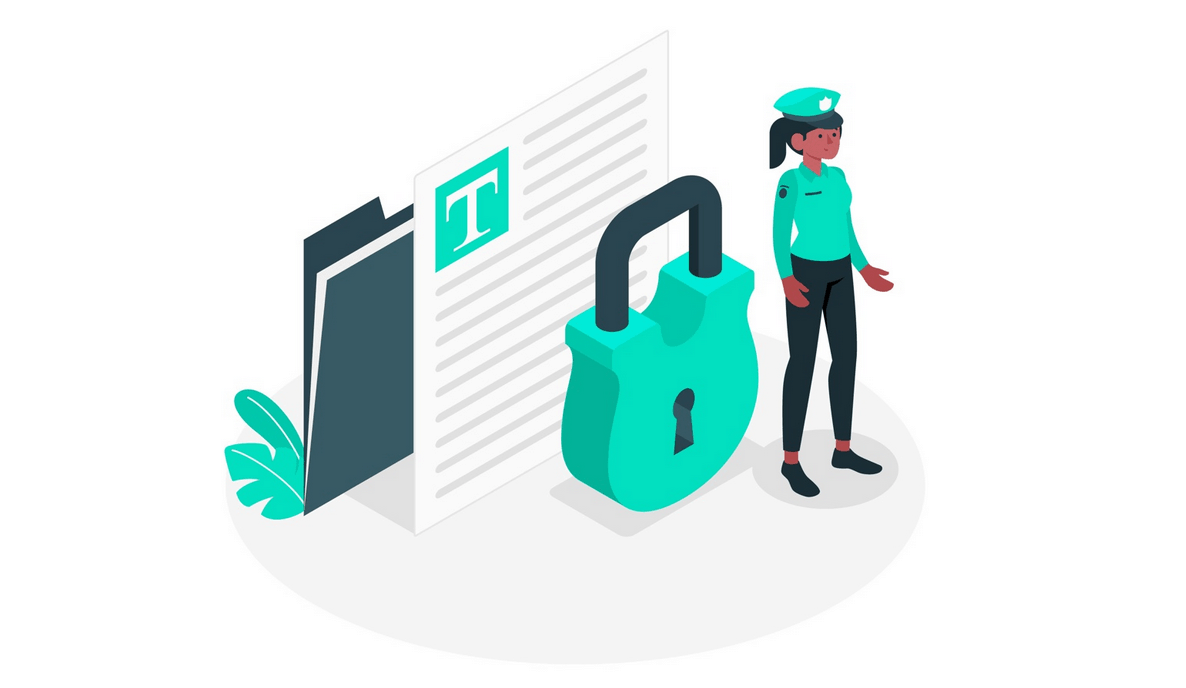
The WordProof plugin for WordPress let you add the functionality to timestamp your content using the power of the ‘blockchain’. This is bleeding-edge technology, refined into a powerful way to protect your content and build user trust.
In this post, we’ll show you how to use the WordProof plugin to add a timestamp in WordPress. Before this, let’s break down the whole concept of WordProof, timestamping, and the blockchain.
What a Timestamp Is (And Why You’d Want to Add Them to WordPress)
In its fundamental form, a timestamp is a way to tie a specific time and date to a piece of content. It’s not unique to WordPress, but you see this in a rudimentary form with comments and post dates:
Note that we’re talking about the core concept here. This is because timestamping can get complex, as we’ll see. At a base level, it’s a way to attach a time and date to content. It’s helpful and valuable for a few reasons:
- You can give readers an idea of when content was first published. This might help when deciding if content will apply to a current situation.
- Expanding on this, you can show readers if content has been updated, and when.
- For comments, you can gauge a timeline of events. This is helpful if a product has previously had issues, and you’re trying to decide if they’re resolved.
WordPress, of course, has its own way of timestamping content, but it’s a basic implementation. For the majority of users, this is fine. Some even decide to remove timestamping from their sites.
Though, there’s a more complex version of timestamping that we can use a plugin to implement. Let’s get into this subject next.
Introducing WordProof
Given that WordPress already has timestamping included in its core code, you’d be forgiven for thinking why you’d need a plugin to help. This is because adding a timestamp to WordPress can take different forms.
Rather than offer a date of publishing, you can use a plugin such as WordProof to embed a timestamp to offer verification of content.
This lets you connect your site’s content to any EOSIO blockchain. The great news is that you don’t need any prior experience of the blockchain to use WordProof. It’s a ‘plug-and-play’ solution, which means you don’t need to lift a finger to use the plugin.
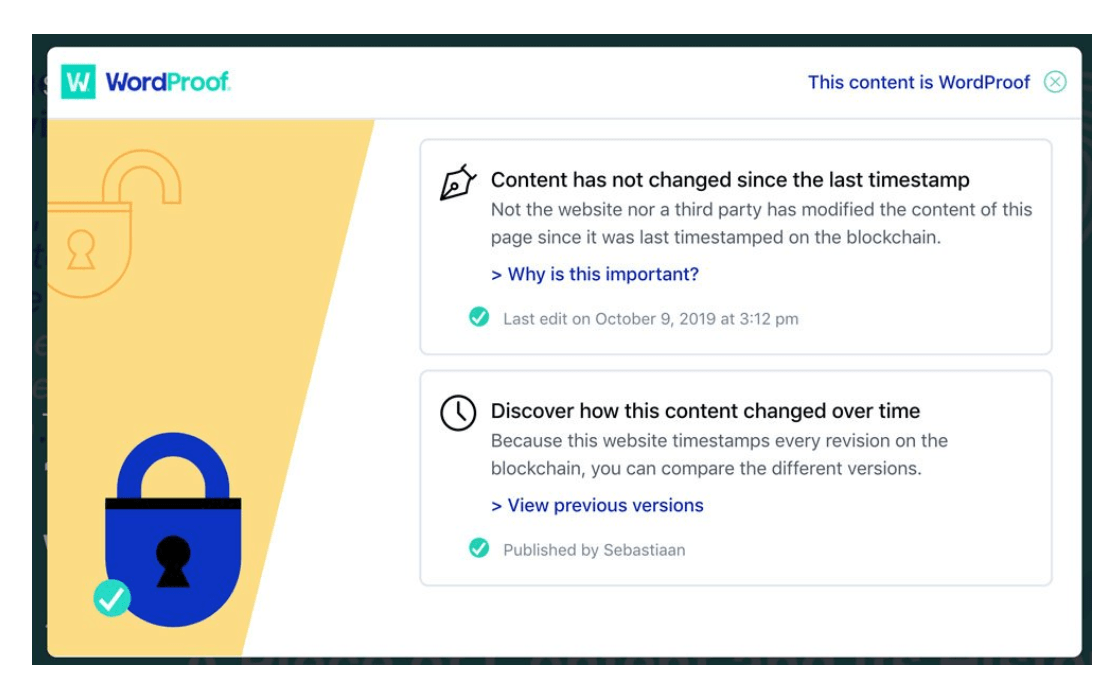
Apart from letting you auto-timestamp your content, you can also display a certificate that verifies your content, and lets the reader see how and when your content has changed. This is much like a Secure Sockets Layer (SSL) certificate.
As for why you’d want to do this, there are a few reasons:
- You can offer transparency to users, which will increase trust and authenticity.
- There could be Search Engine Optimization (SEO) benefits down the line.
- You’re able to prepare for future data protection regulations, especially within the European Union (EU), which has lead the way over the past few years.
- You can help protect the copyright of your content, through third-party verification.
It’s this last point that makes WordProof so interesting. It harnesses the power of the blockchain to add a timestamp in WordPress, which gives your content protection. We’ll talk about this next.
Explaining the Blockchain
The blockchain is something that has become more prominent over the last couple of years or so, with the advent of cryptocurrency. While this isn’t the focus here, cryptocurrency is a digital payment method that is verified using the blockchain.
In simple terms, think of the blockchain as a list of records in a database, each one linked using cryptographic methods. For every ‘block’ that exists, you’ll find transaction data of some description, a cryptographic hash of the previous block in the chain (hence the name), and a timestamp.
It’s used for a lot of other applications besides currency. For example, supply chains, healthcare, and energy companies like the decentralized openness of the blockchain.
You may be starting to understand how the blockchain can help you add a timestamp to WordPress, but we can help fill in the blanks a bit more.
How the Blockchain and WordProof Helps You Protect Your Content and Build User Trust
Because the blockchain encrypts every included block, it’s a secure system. As such, the data you see related to a block can’t be changed without amending every other block in that chain. For all practical purposes, it’s not possible. This means the data you see is ‘the truth’.
There are a lot of plus points in using something so secure to timestamp your content:
- For content that requires a high degree of trust, such as medical or financial information, a verified timestamp is a signal to the reader.
- You’re also able to offer proof that an article is accurate, especially when it comes to time-sensitive information. Consider information surrounding the COVID-19 pandemic as case in point.
- If you set things up in the right way, you have an element to help you win copyright cases. This is going to matter if you offer content that, if stolen, affects your income. A Non-Fungible Token (NFT) would be a good example.
By this point, you might be onboard with using a solution such as WordProof to add a timestamp in WordPress. The final step for you is to figure out how to implement them.
How to Add a Timestamp in WordPress (In 3 Steps)
The good news is it’s straightforward to add a timestamp in WordPress. In fact, there are three steps you need to take. Let’s go over them in brief:
- Install the WordProof plugin on your WordPress website.
- Go through the WordProof setup wizard and sign up for an account.
- Begin timestamping your content within WordPress.
Most of these steps are intuitive. First, getting the plugin on your site.
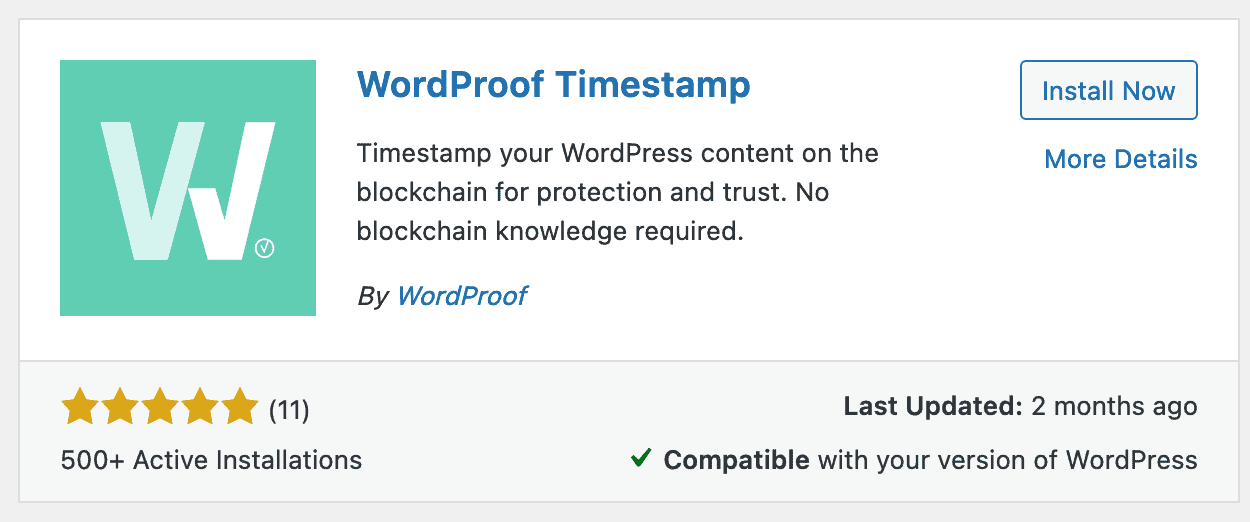
1. Install the WordProof WordPress Plugin
The first task is to install the WordProof plugin. This should be a familiar task for anyone who uses WordPress to even a basic level. It’s the same process you’ll use for installing any other plugin on your site.
Once you’ve done this, there’s a bit more before you’re ready to add a timestamp in WordPress.
2. Run the WordProof Setup Wizard (And Sign Up For a WordProof Account)
When the plugin is up and running, the first screen you’ll encounter is the Setup Wizard.
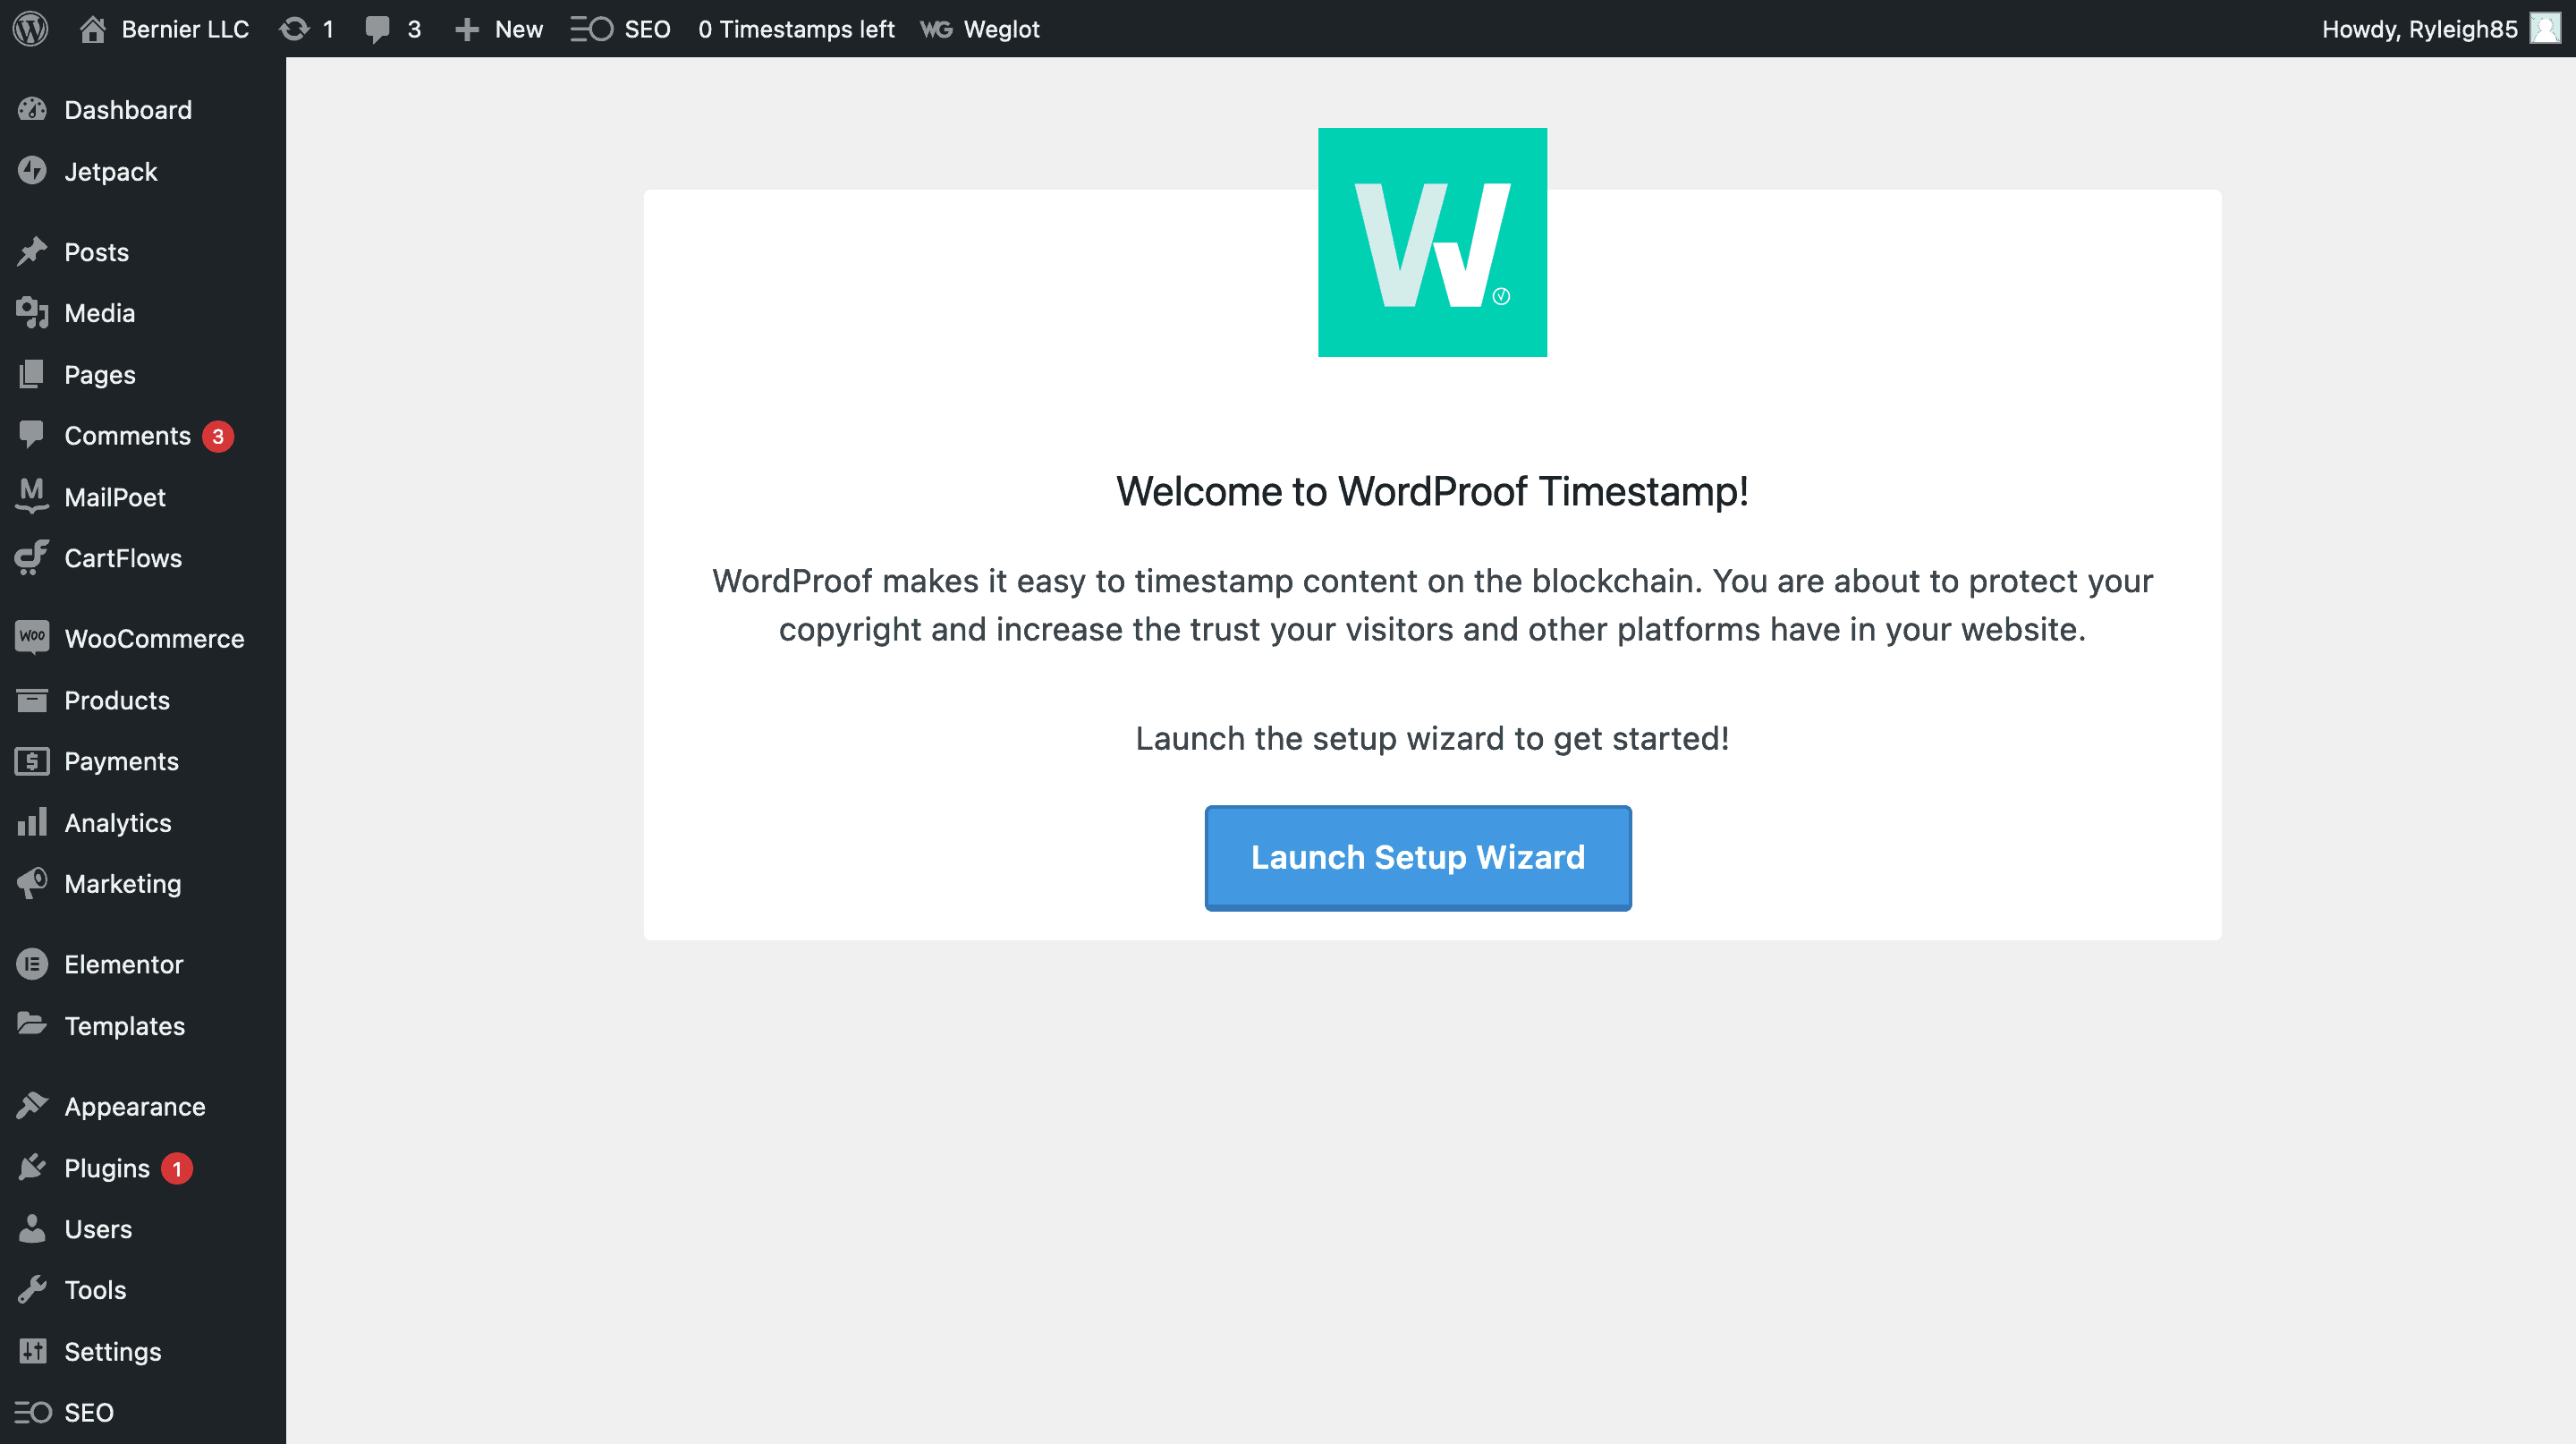
Much like many other plugins, this will help you get ready to use WordProof. Once you click the Launch Setup Wizard button, you’ll come to the first of five screens.
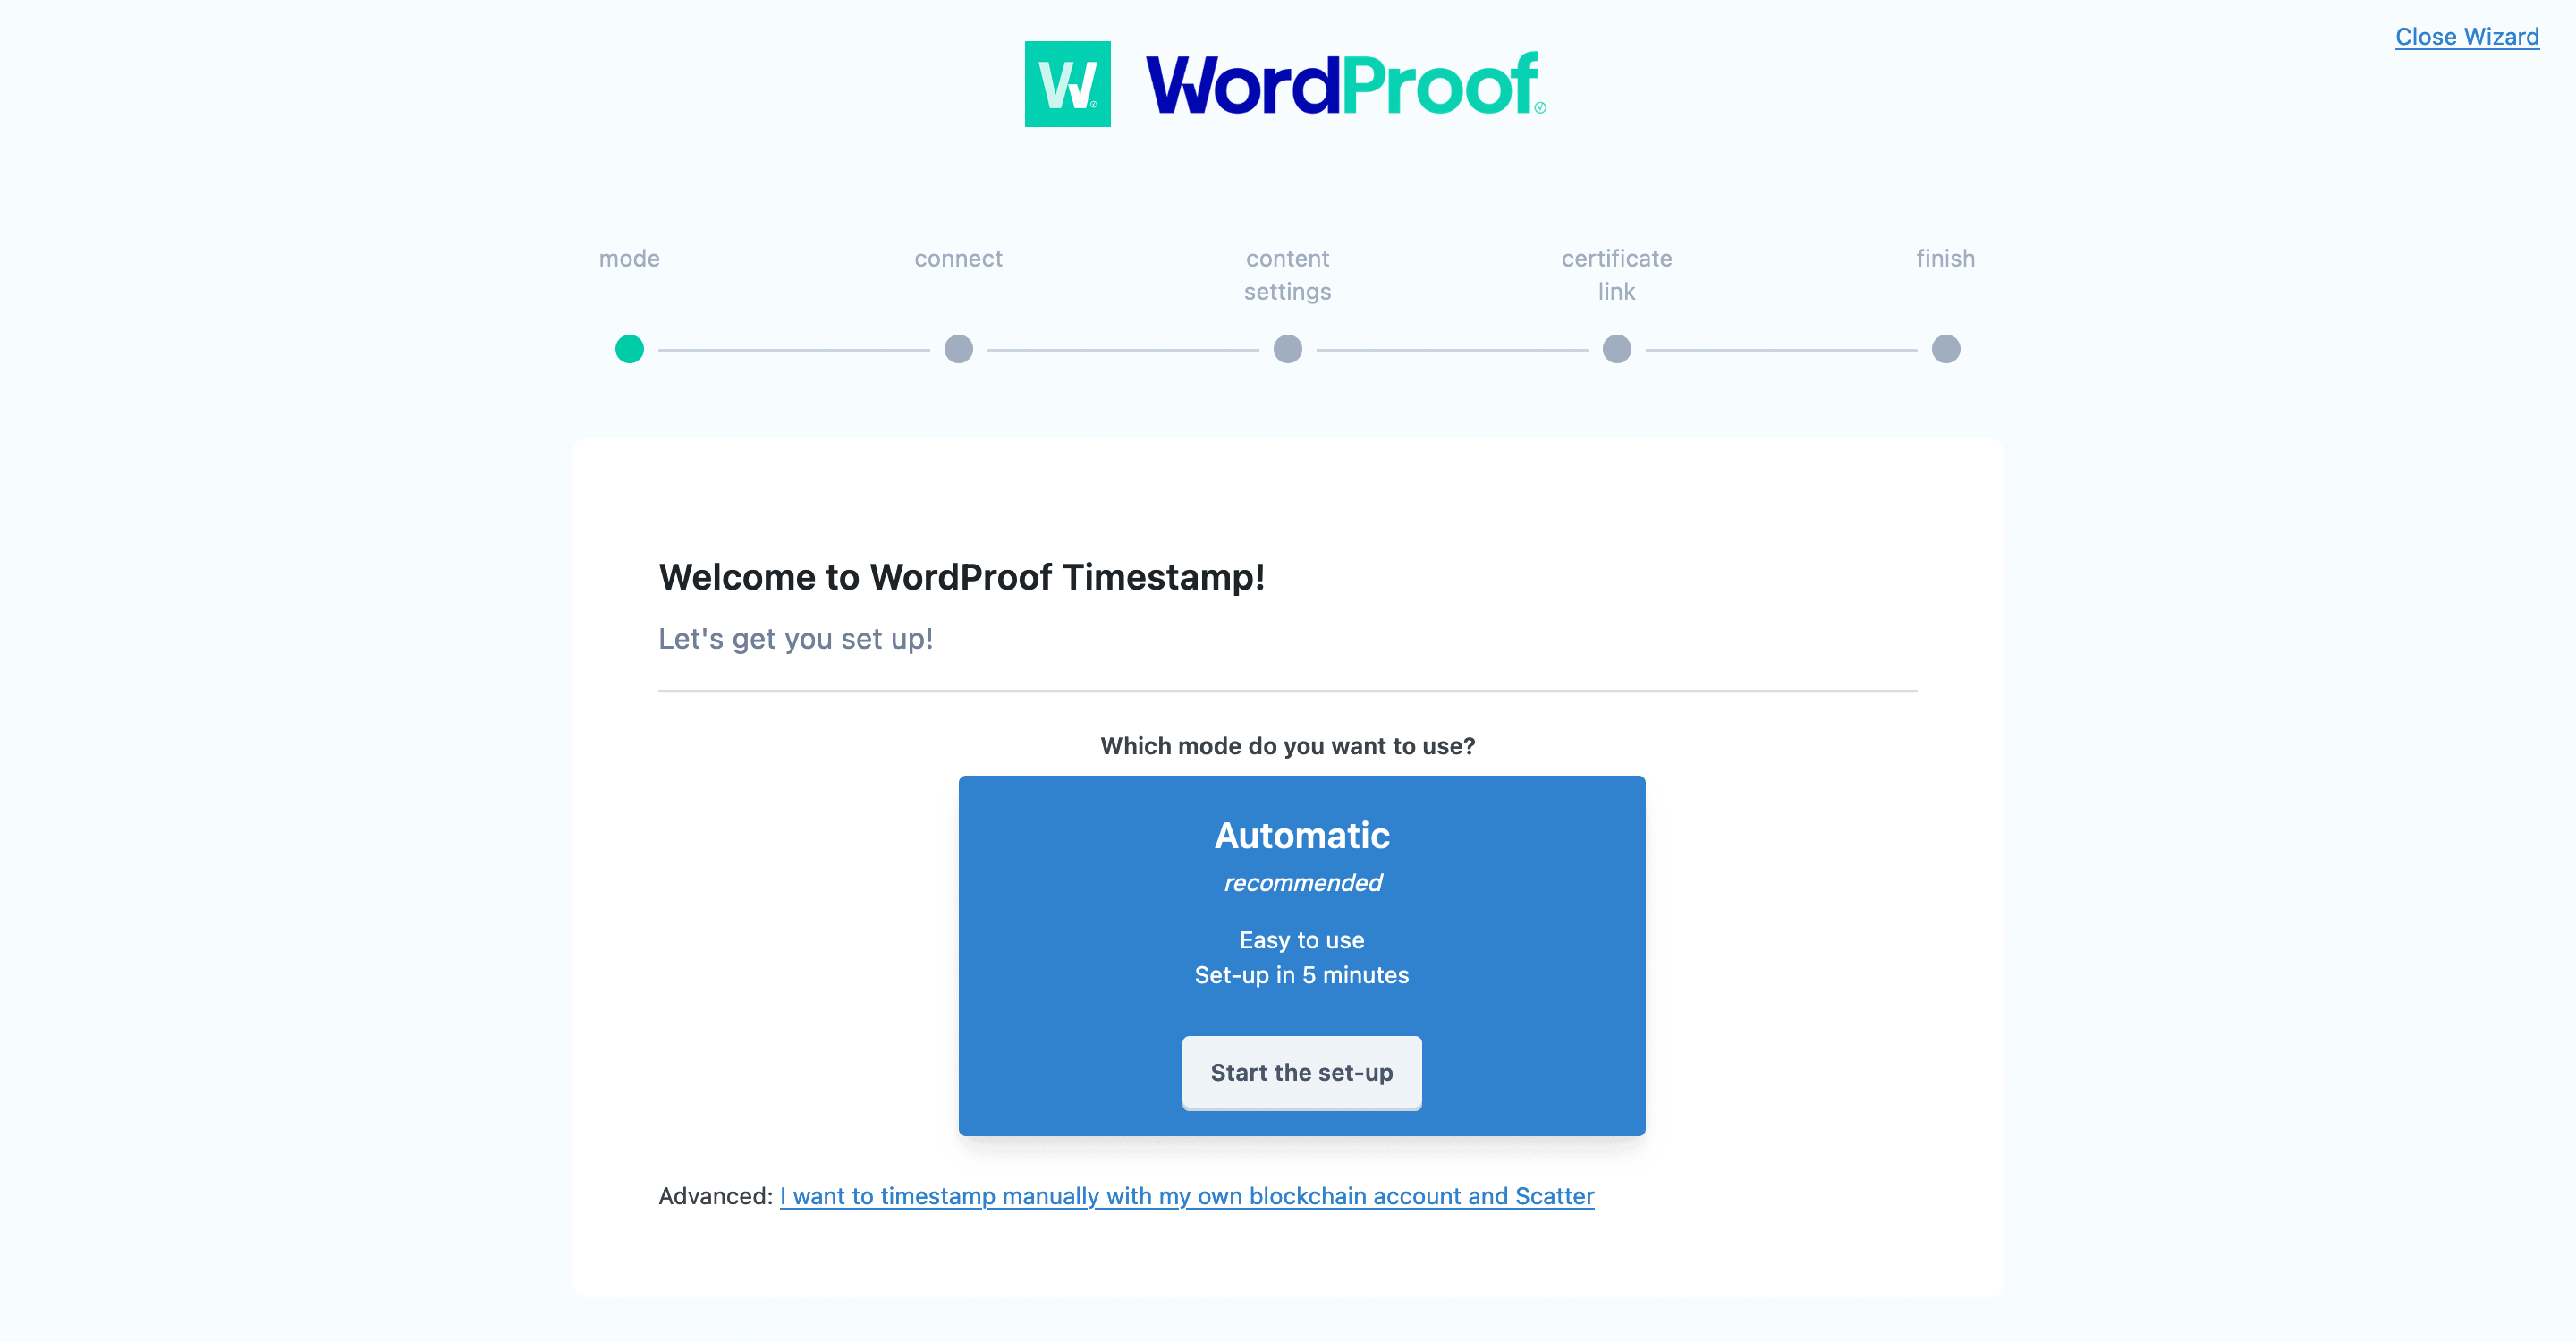
This gives you two options to choose from:
- Automatic. This is represented by the big blue box in the center of the screen. It’s going to be the default for most users.
- Manual. This link lets you set up your own blockchain account to connect with WordProof. It’s for advanced users, and we don’t recommend it unless you’re an expert.
In our example, we’ll click Automatic. This brings you to the Connect step. Every user will need to have a free WordProof account to use the plugin’s functionality.
You’ll be asked on within the Setup Wizard whether you have a Site Key:
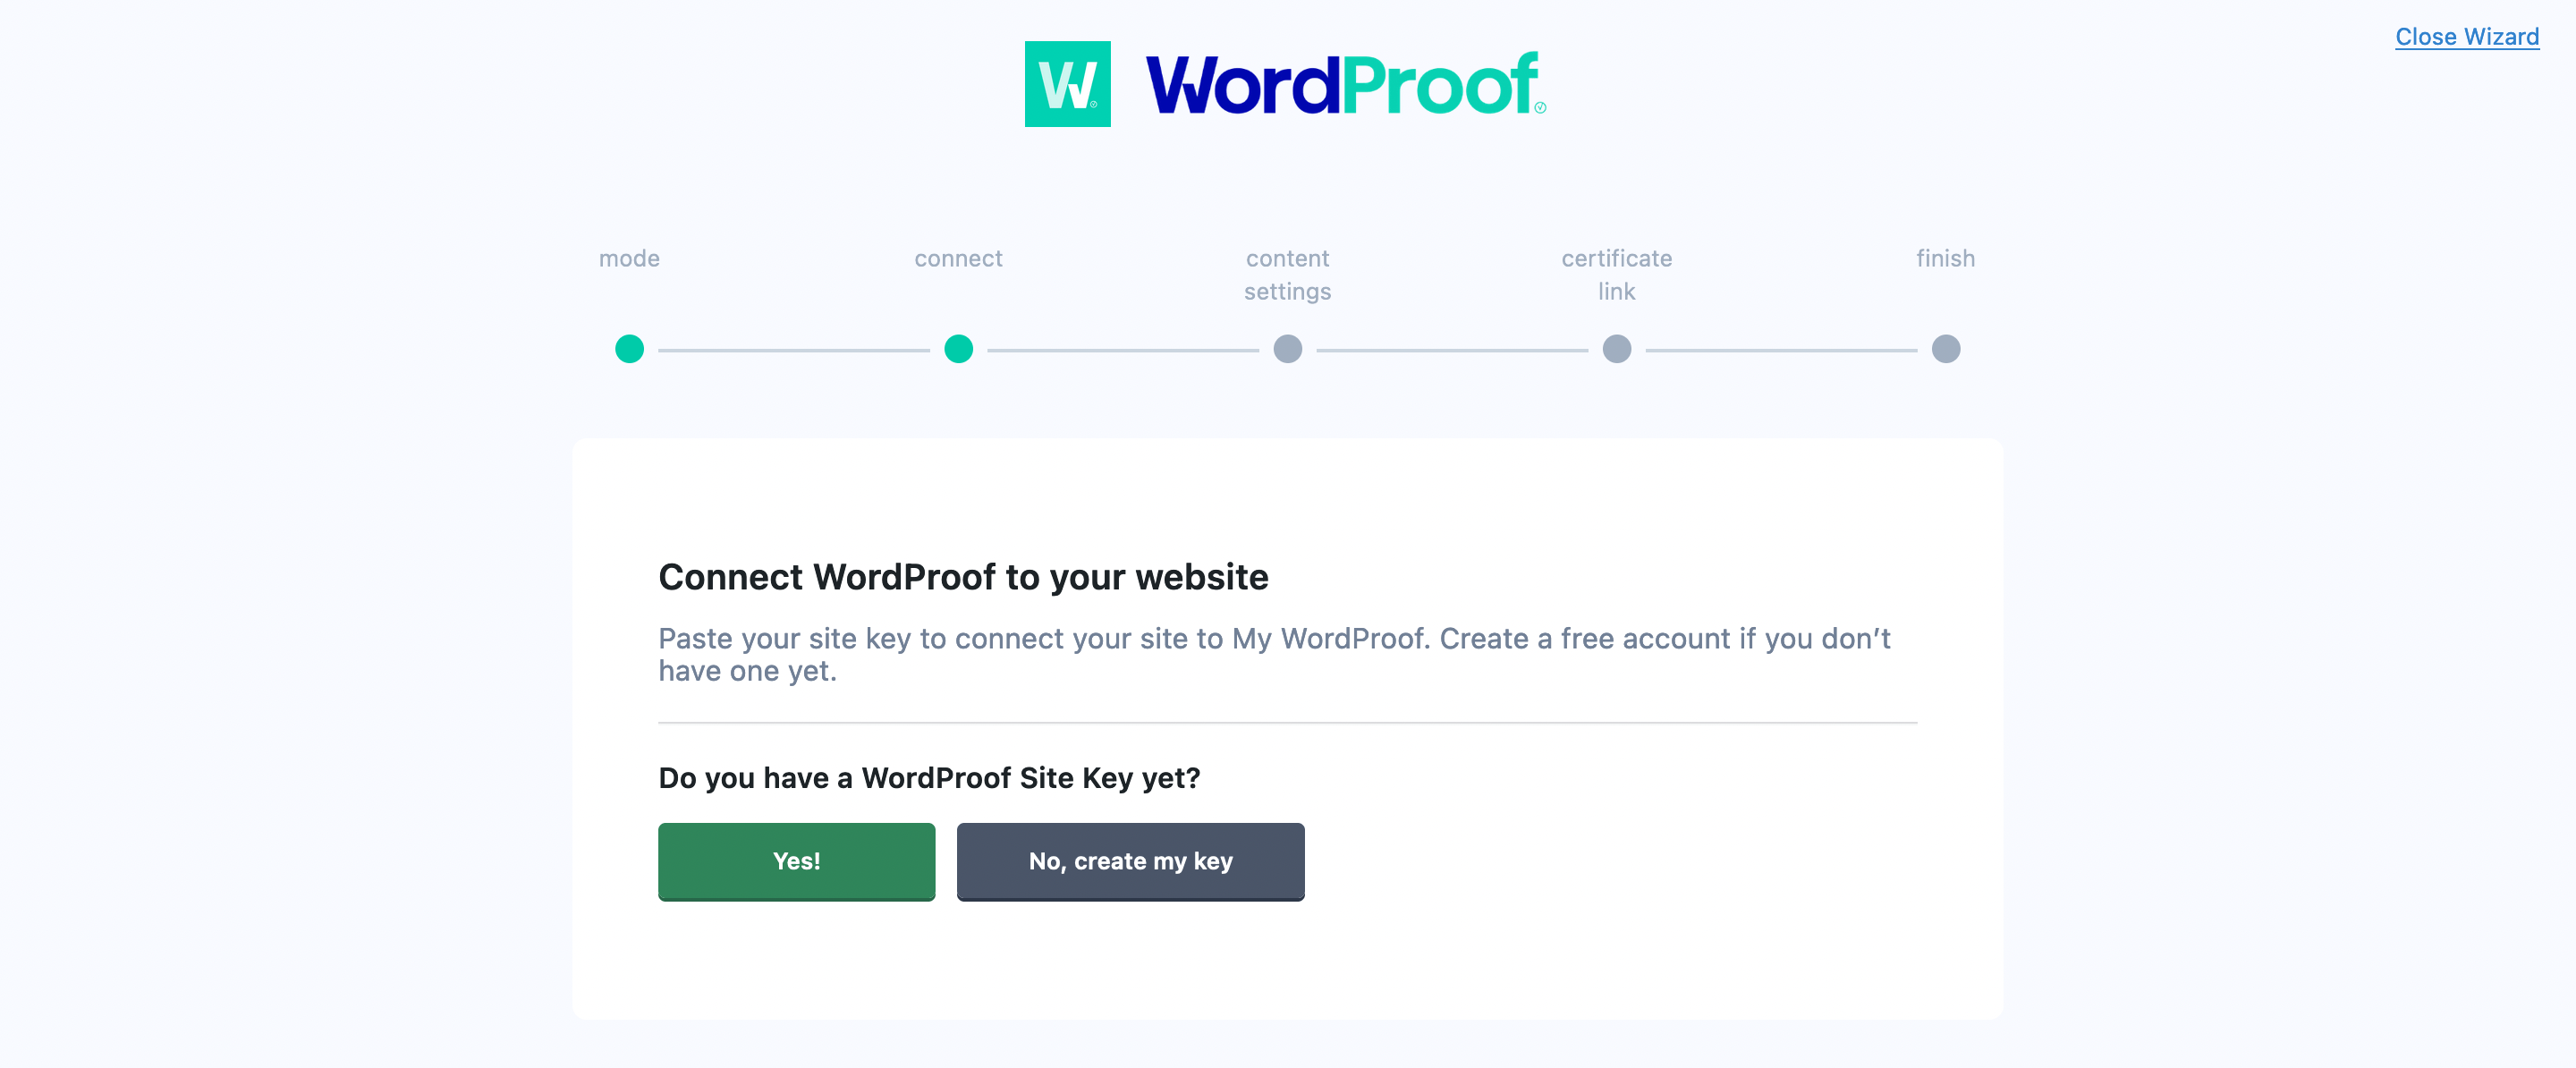
Under most circumstances, you won’t yet. To get this, click the No, create my key button, which will bring you to the WordProof dashboard. Here, add a website using the dedicated option:

You’ll want to add your URL, choose WordPress as your platform, and EOS as your blockchain:
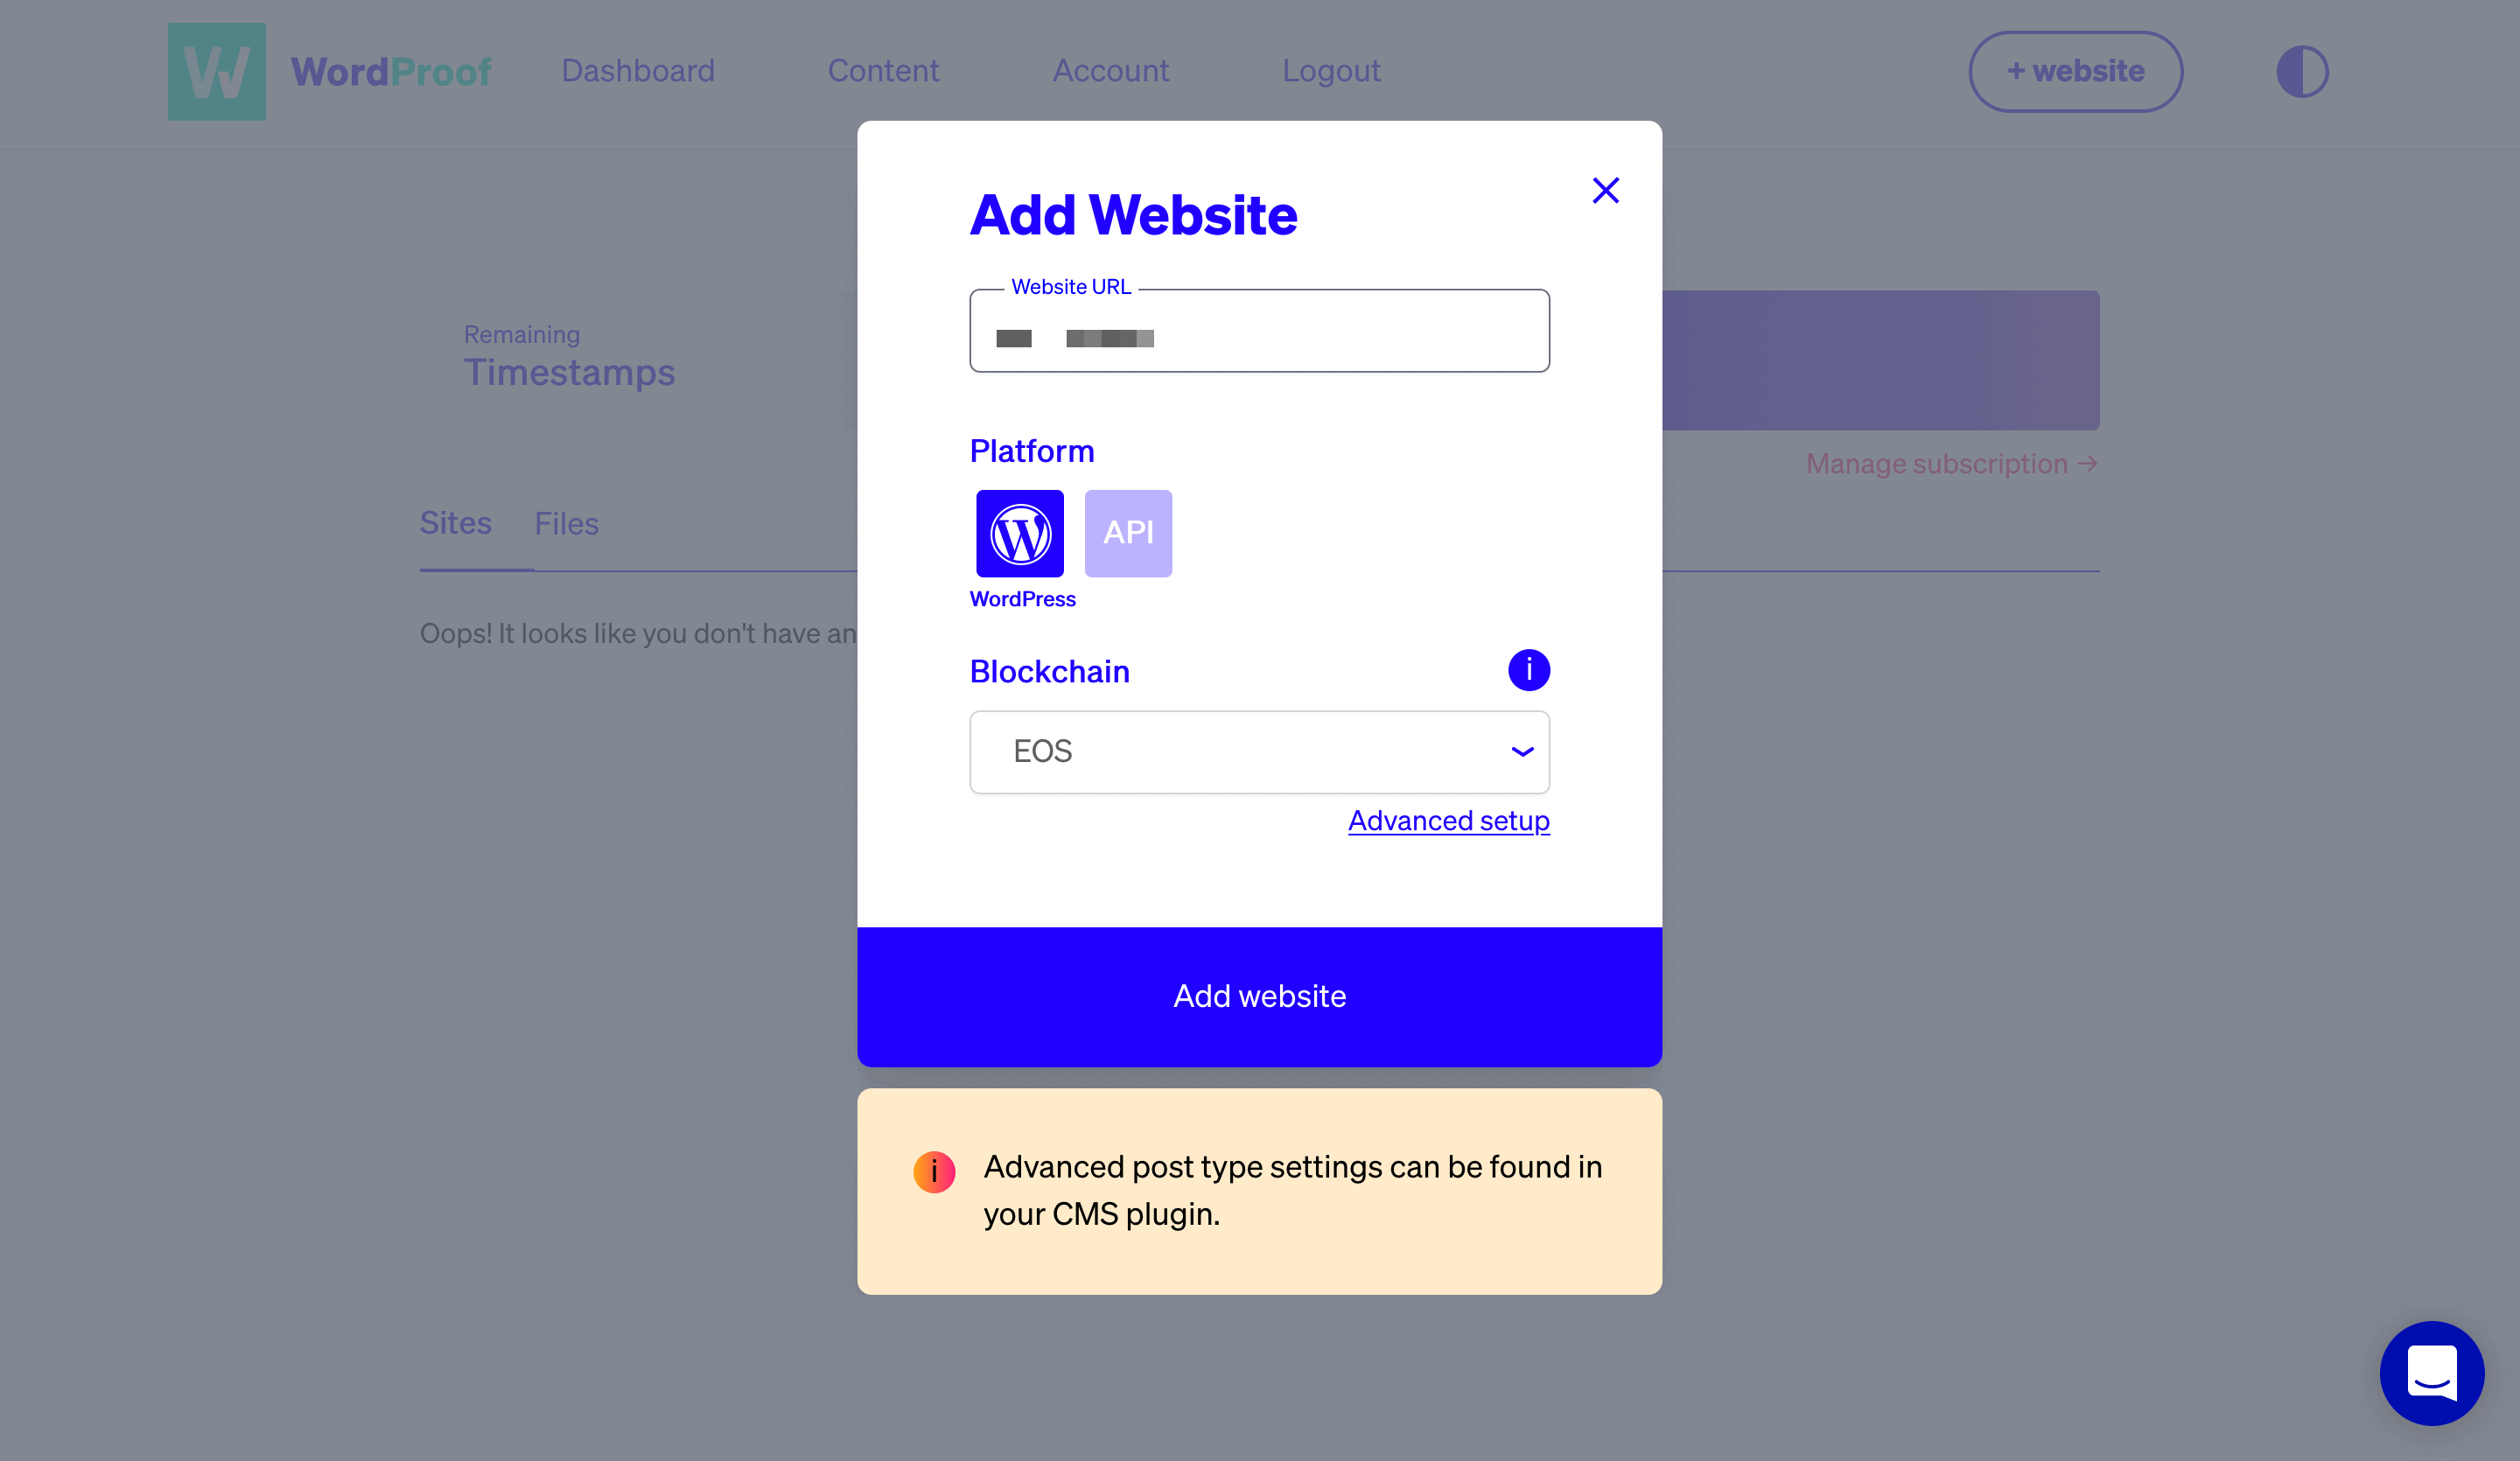
From there, you’ll get a site key, that can be pasted into the relevant field in the Setup Wizard.
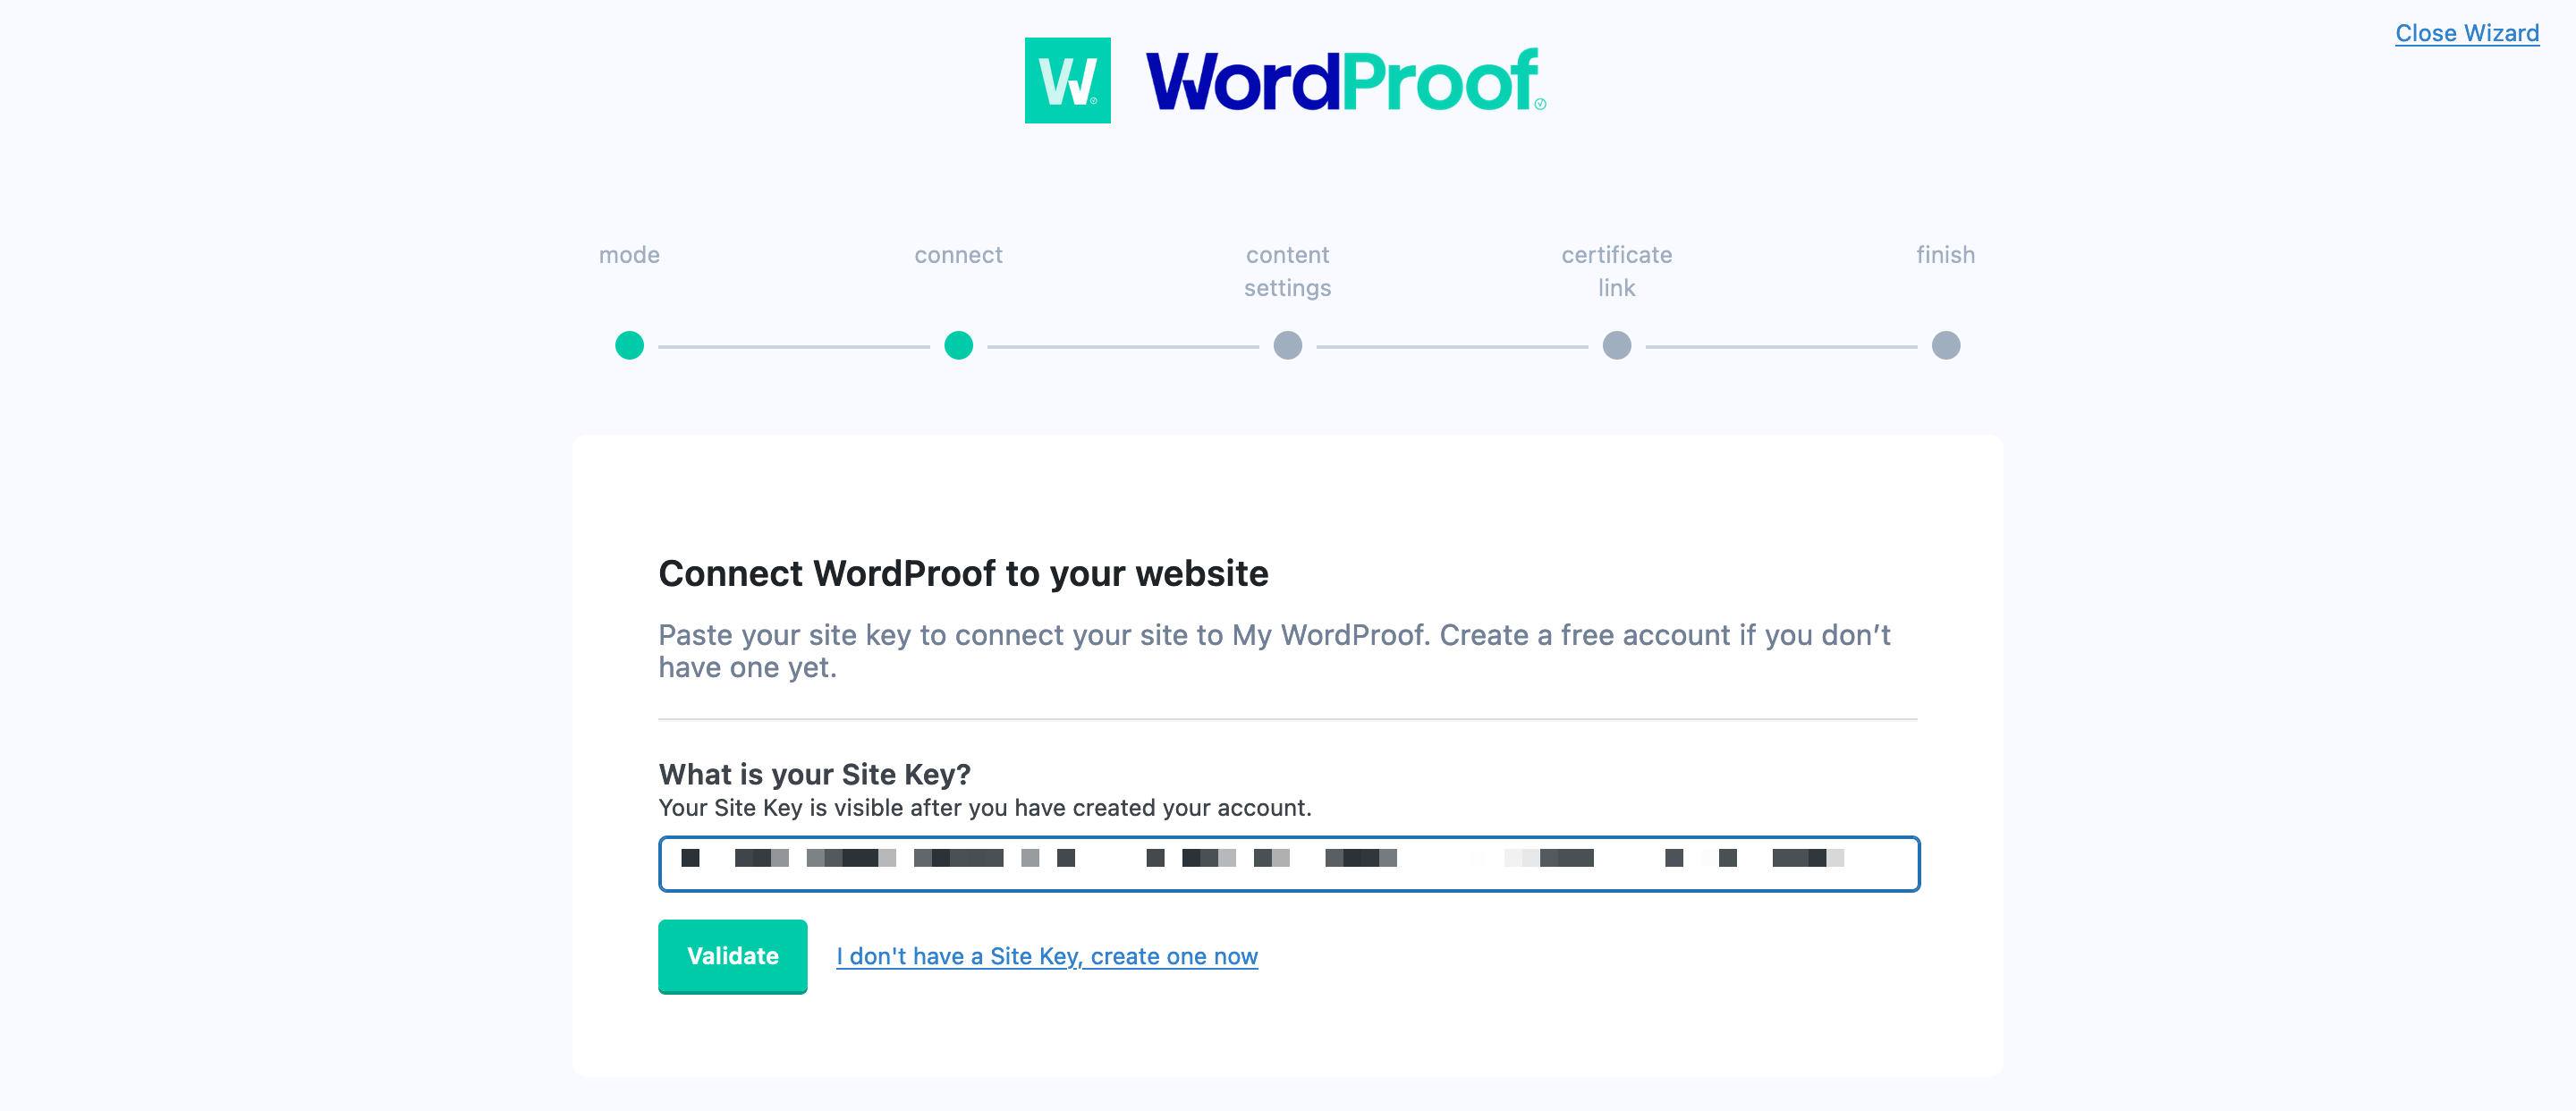
You can click Validate to move onto the Content Settings step. This lets you choose which content types to timestamp by default, and whether you show revision histories to visitors:
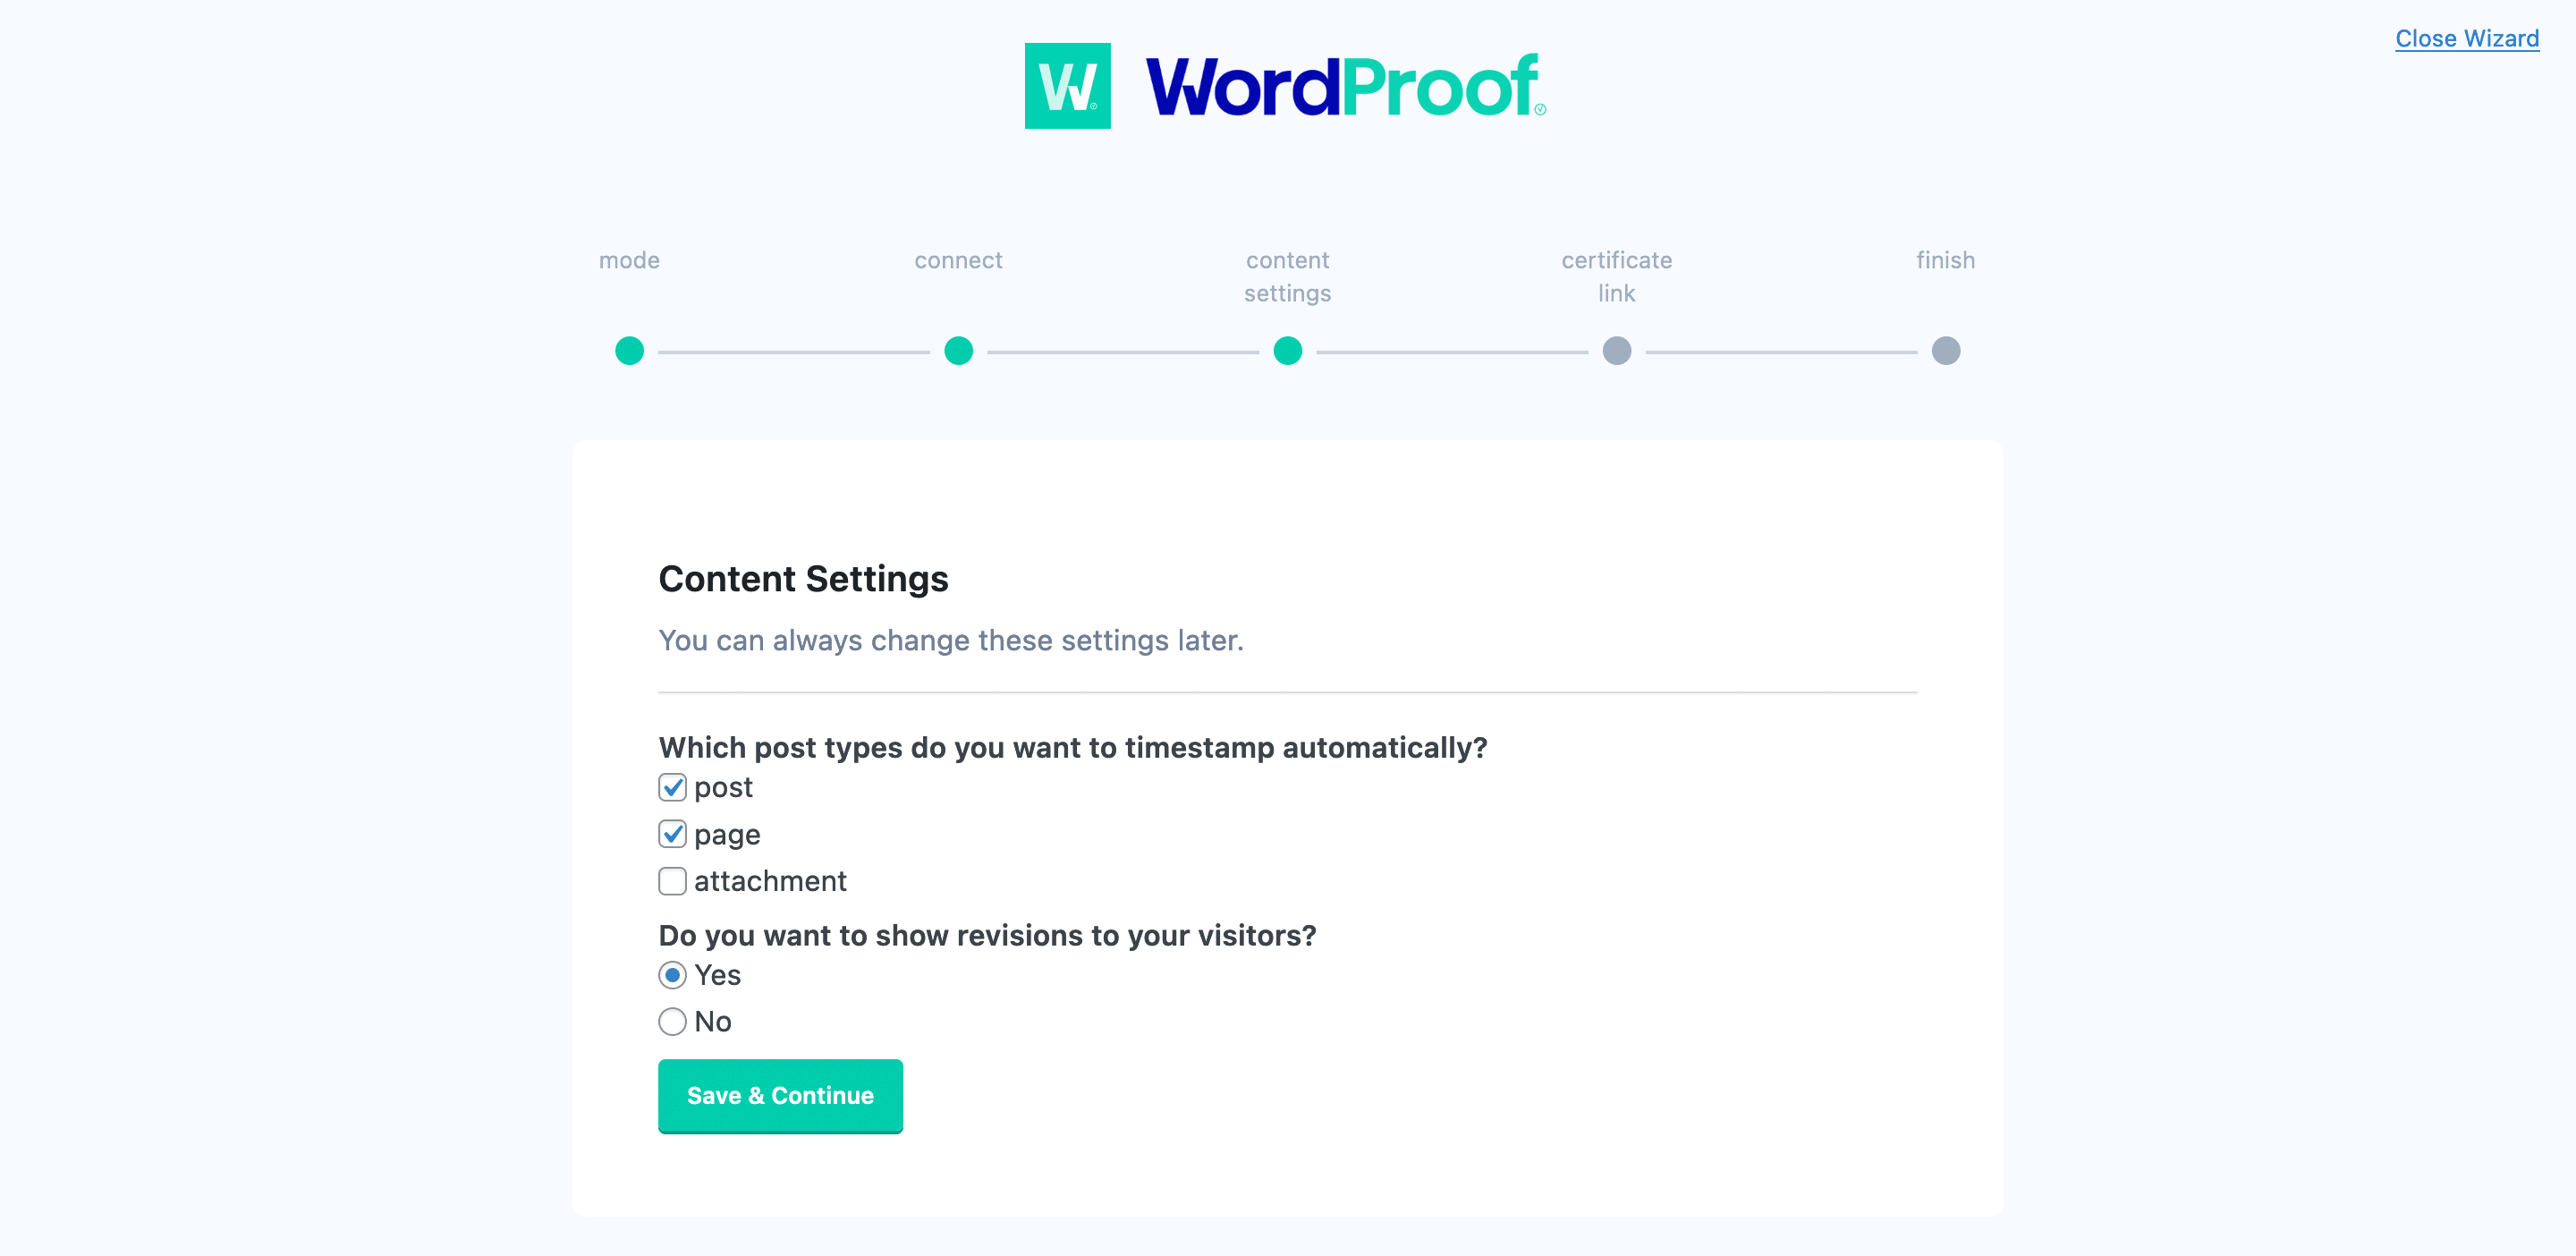
Saving this brings you to the Certificate Link screen. This lets you change the timestamp link text, although there are more settings within WordPress to customize this further.
Once you click to confirm, you’ll be ready to roll!
3. Timestamp Your WordPress Content
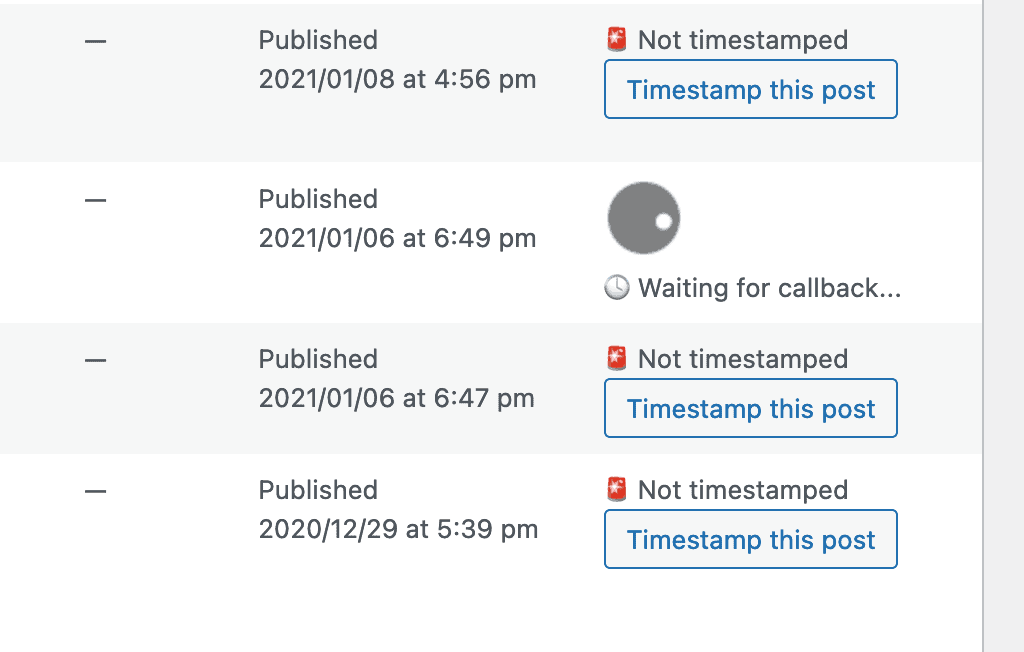
From this point on, you can leave WordProof to do its thing. Though, if you want to make a head start, you can go to either your Posts or Pages screen in WordPress and look to the right-hand side:
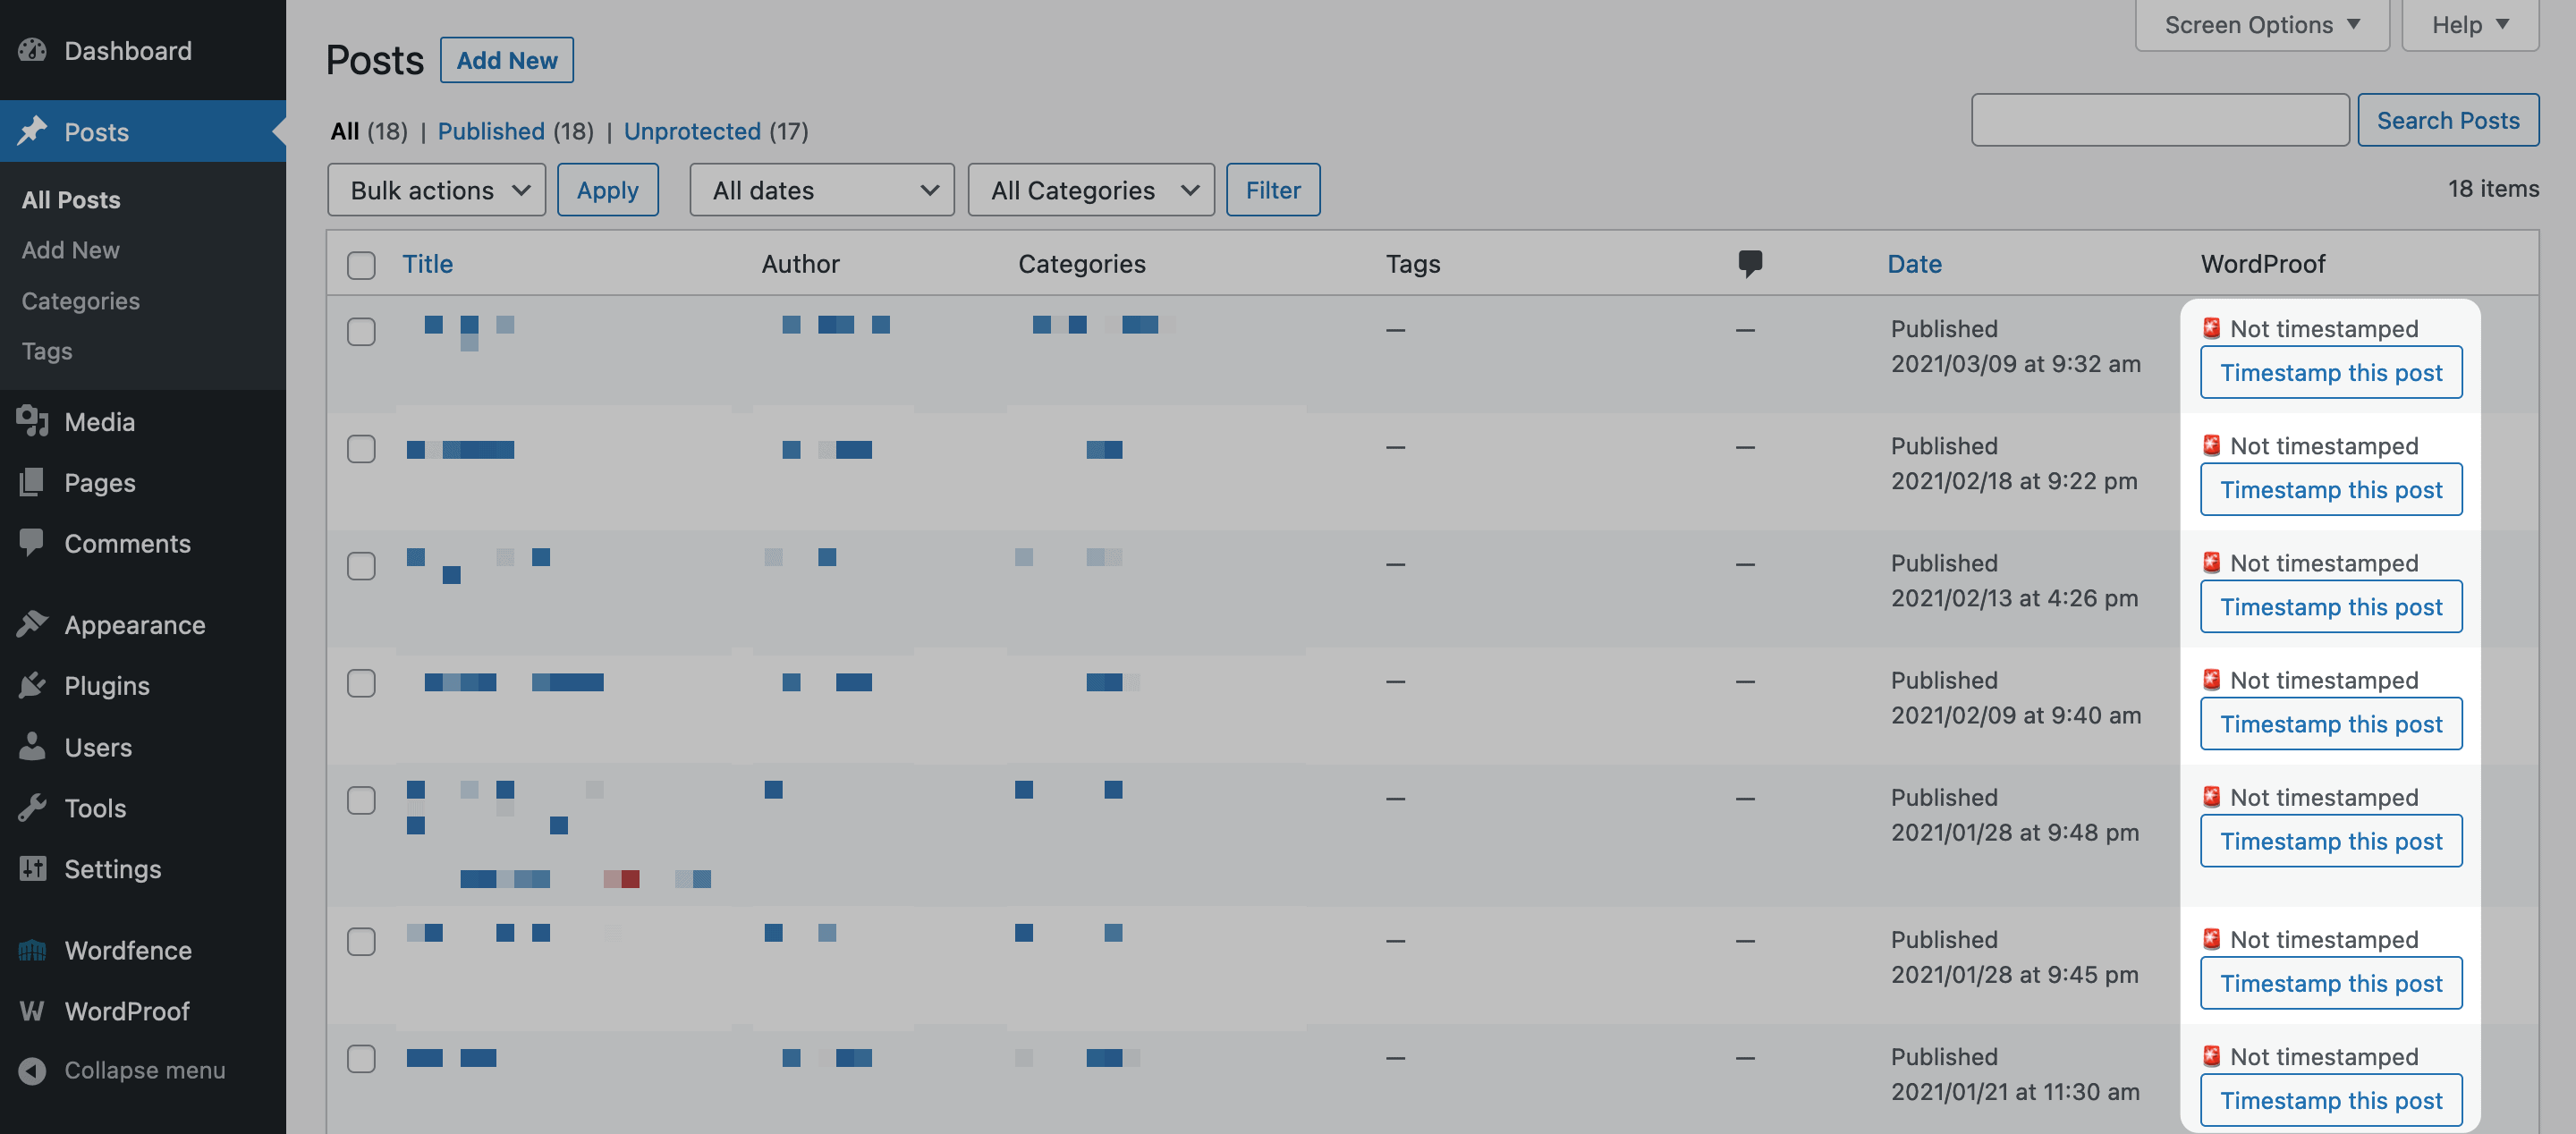
This gives you a button for each post or page to timestamp your content. Doing this ‘calls’ WordProof’s servers, which initiates the timestamp:
This is almost everything you need to add a timestamp in WordPress, although we encourage you to take a look at the intuitive options within WordPress to customize the experience further.
Wrapping Up
New technology such as the blockchain often needs a bedding in period before the average user jumps onboard. Though, if you use a timestamping plugin such as WordProof, you can verify your content, provide users with an SSL-style certificate of validity, and secure your content better.
This post has looked at how to get started with the WordProof timestamp plugin. Here’s how to add a timestamp in WordPress:
- Install the dedicated WordProof plugin.
- Go through the setup wizard to get WordProof ready, and sign up for a WordProof account.
- Begin timestamping your WordPress content.
Would you like to add a timestamp in WordPress that’s verified and secure? Share your thoughts with us in the comments section below!


Leave a Reply