
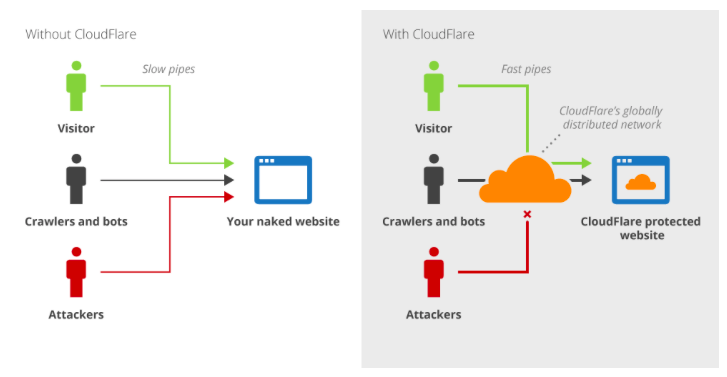
A content delivery network, or CDN, is a network of worldwide servers that delivers cached web content to users based on their location. Because it takes less time to send data over a shorter geographical distance, using a CDN to host your website instead of a single server can speed up loading times for your website.
Cloudflare CDN can also help to protect your site from DDoS attacks and malicious bots by flagging suspicious IPs and forcing them to manually enter a captcha before accessing the site. This can also help to speed up your site, as bandwidth and server resources won’t be wasted on the malicious traffic.
Cloudflare is one of the most popular CDN services around at the moment, mainly because they offer a free plan that is ideal for personal websites and blogs, or anyone who wants to try out a CDN before committing to a paid plan.
It’s also very easy to start using Cloudflare with your WordPress site and in this guide we’ll talk you through the steps so you can give it a go and see if it makes a difference to your site.
Option A: Install Cloudflare through your hosting dashboard
Some webhosts, like Bluehost, provide an easy installation of Cloudflare directly from cPanel:
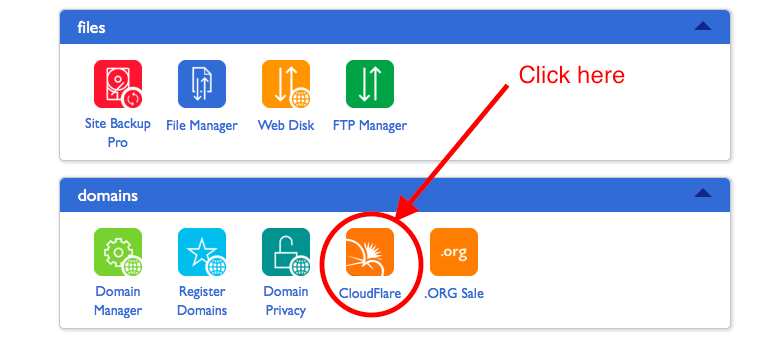
You need to register for Cloudflare at cloudflare.com first.
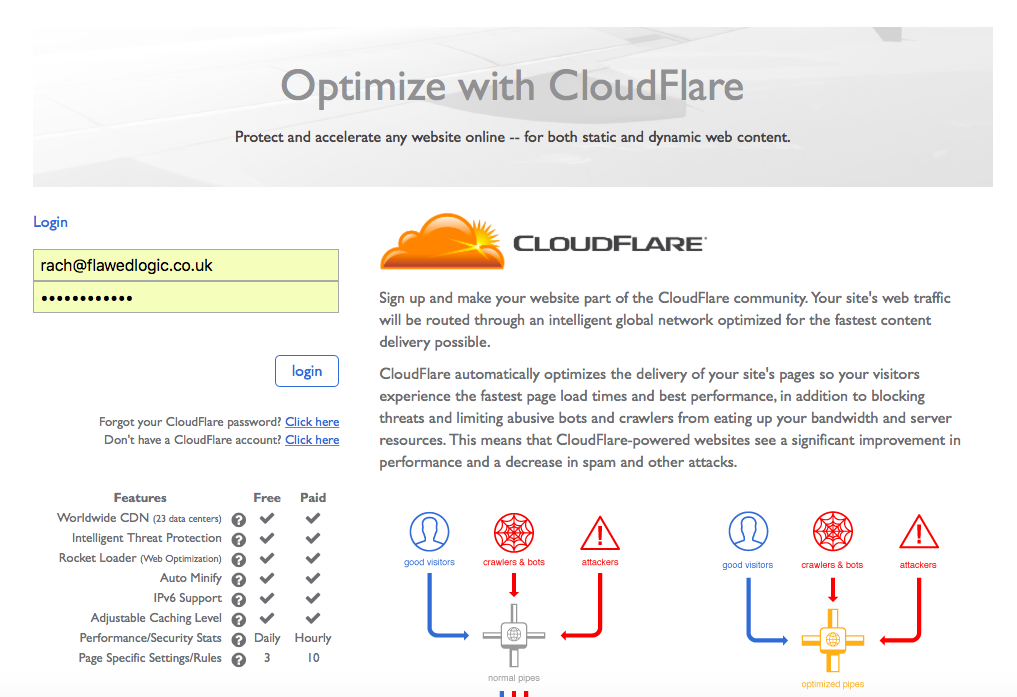
- Go to cloudflare.com and enter your email and preferred password in the sign up box or click the sign up button on the top right:

- Enter your details on the registration page if they’re not already pre-filled:

- Click the “create account” button. Don’t continue onto the next step of scanning DNS records, as this will all be taken care of by your webhost.
- Go back to your webhost cPanel. You’ll then need to enter the username and password you used to signup to Cloudflare
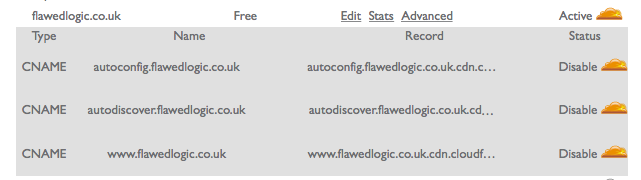
- You’ll then be taken to the Cloudflare settings page for your WordPress site. Just click the “activate” link next to your domain to turn on Cloudflare. If you’ve already set up your site in Cloudflare but want to take advantage of having the settings available in cPanel, you’ll get a message here to disable and delete your site in cloudfare.com.
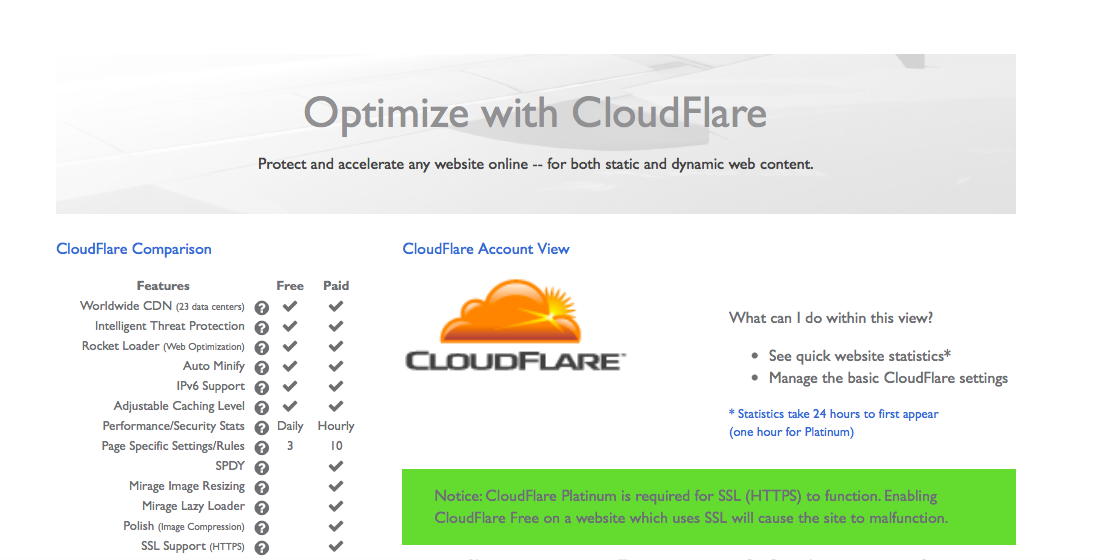
The free version of Cloudflare is not compatible with SSL certificates provided by your web host so if you use SSL on your site you’ll need to opt for one of the paid Cloudflare plans. The free Cloudflare plan also provides a SSL option for those who don’t need the full security of paid SSL certificates.
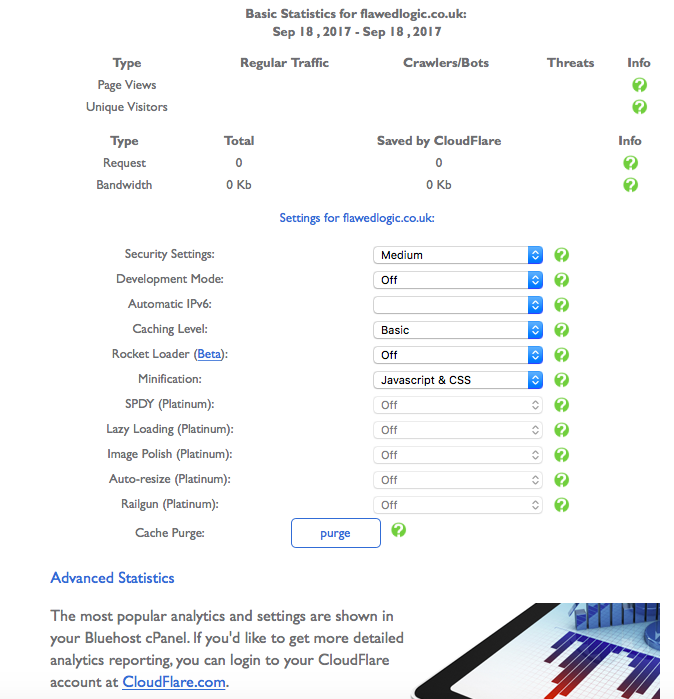
Once you’ve enabled Cloudflare for your domain, your webhost will take care of the rest and you’ll have access to Cloudflare statistics and settings directly from your cPanel dashboard.
Option B: Setup at the Cloudflare website
If your webhost doesn’t give you the option to activate Cloudflare through your control panel, it’s easy enough to do yourself.
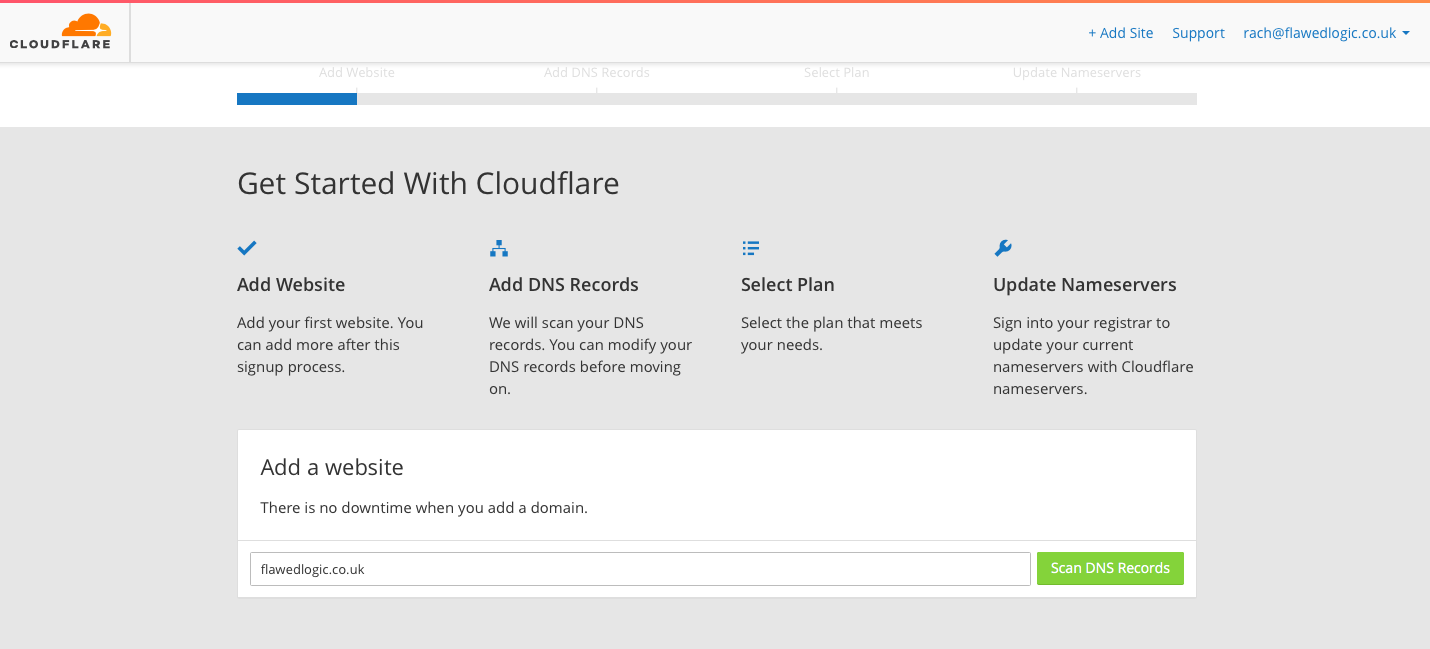
The first step is to sign up for a free Cloudflare account.
- Go to cloudflare.com and scroll down a little to the sign up box or click the sign up button on the top right:
- You’ll be taken to a registration page:
- After filling out your details and clicking the “create account” button, you’ll be walked through the process for getting started with Cloudflare.
- Start by entering your domain and clicking the button to “scan DNS records”
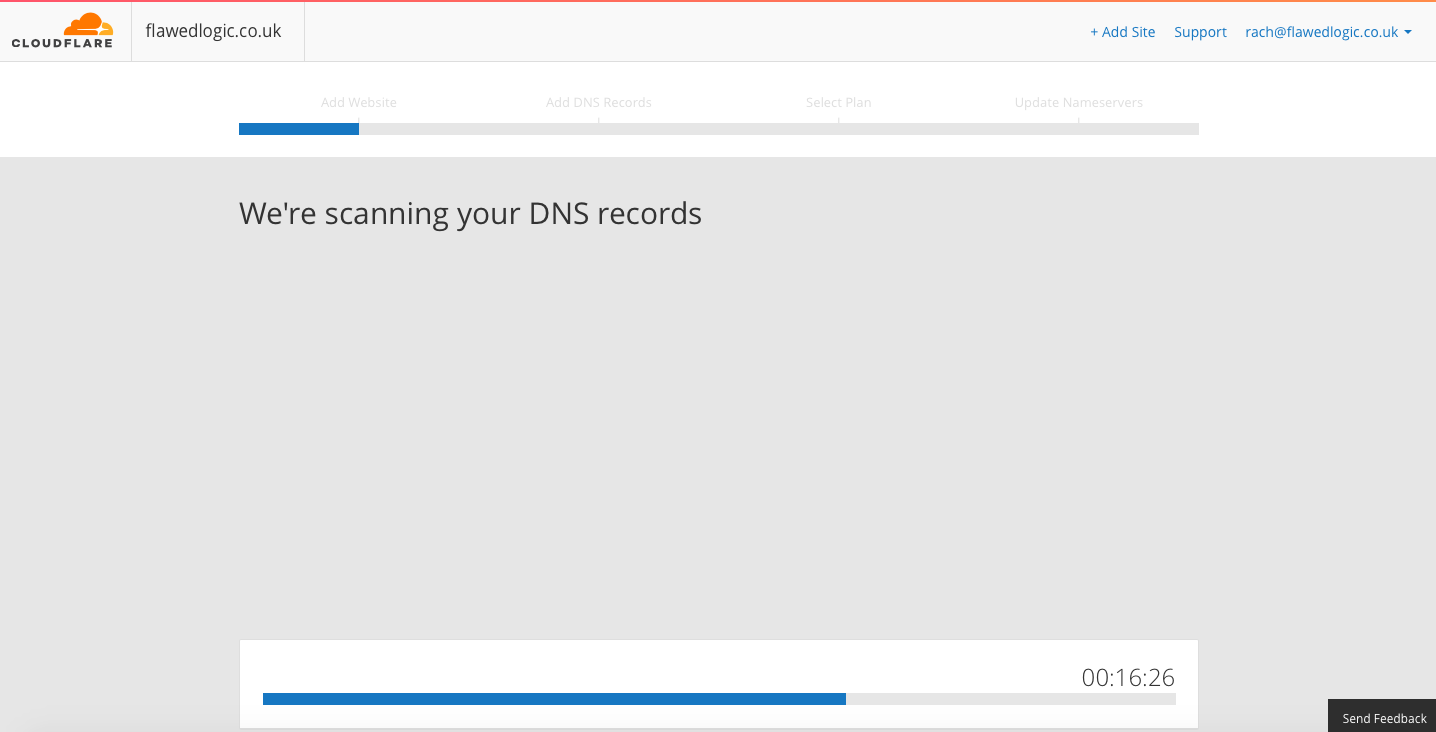
This will take a couple of minutes:
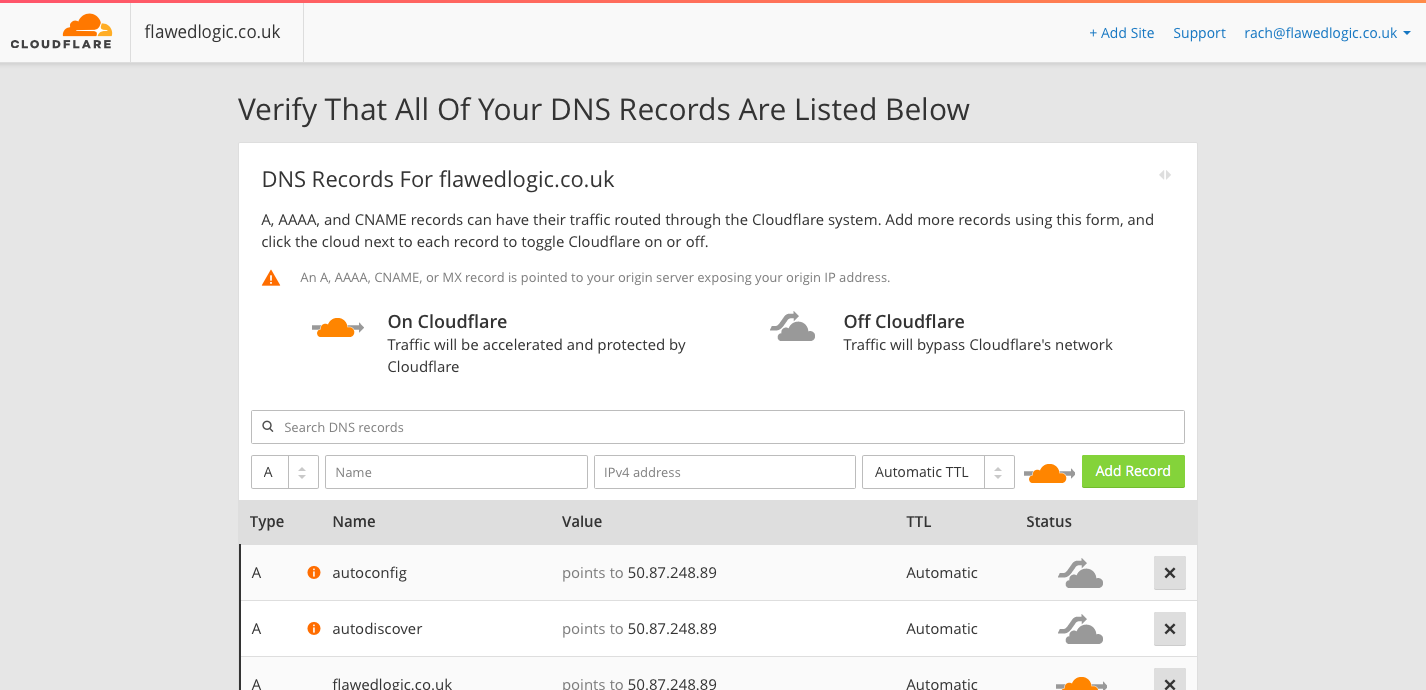
- Once the scanning is finished, press the “continue” button. You’ll be presented with a screen showing auto-detected DNS settings for you to verify. In most cases you won’t need to change anything here. Make sure that Cloudflare is enabled for both your naked domain and www (orange cloud) and that it’s disabled for mail services and ftp (grey cloud). If everything looks ok just scroll down and click the “continue” button.
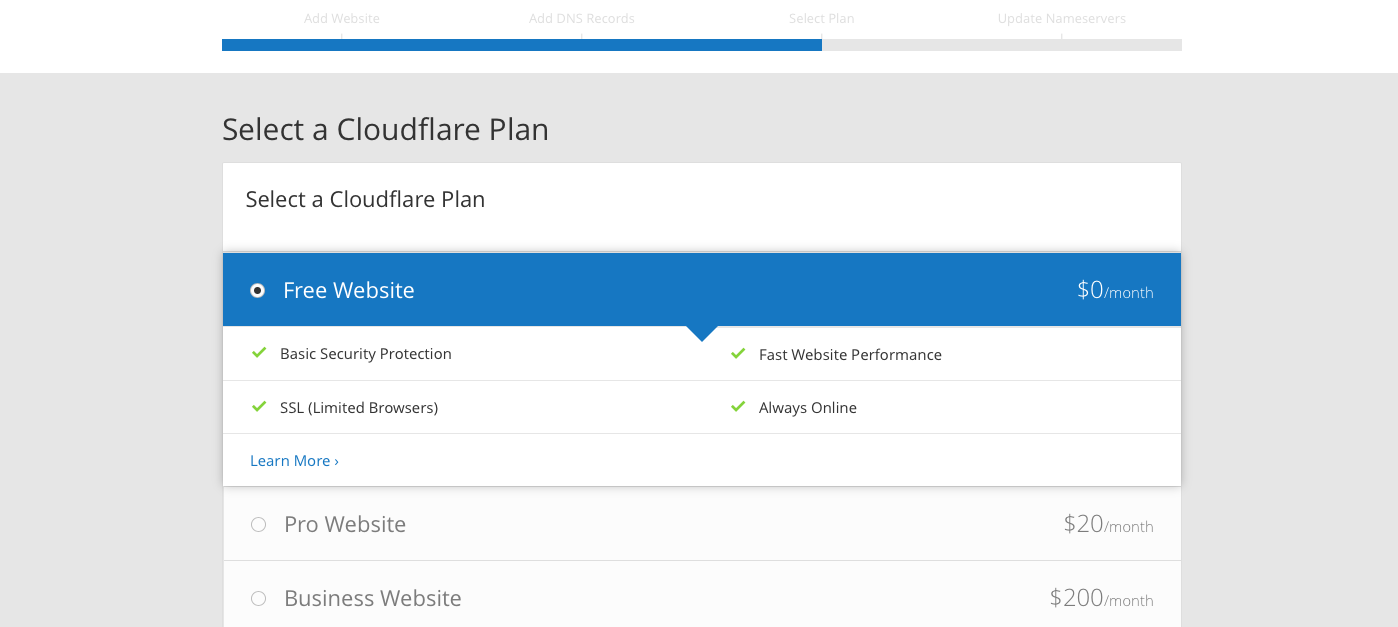
- You then need to choose a plan. Select the “free website” option.
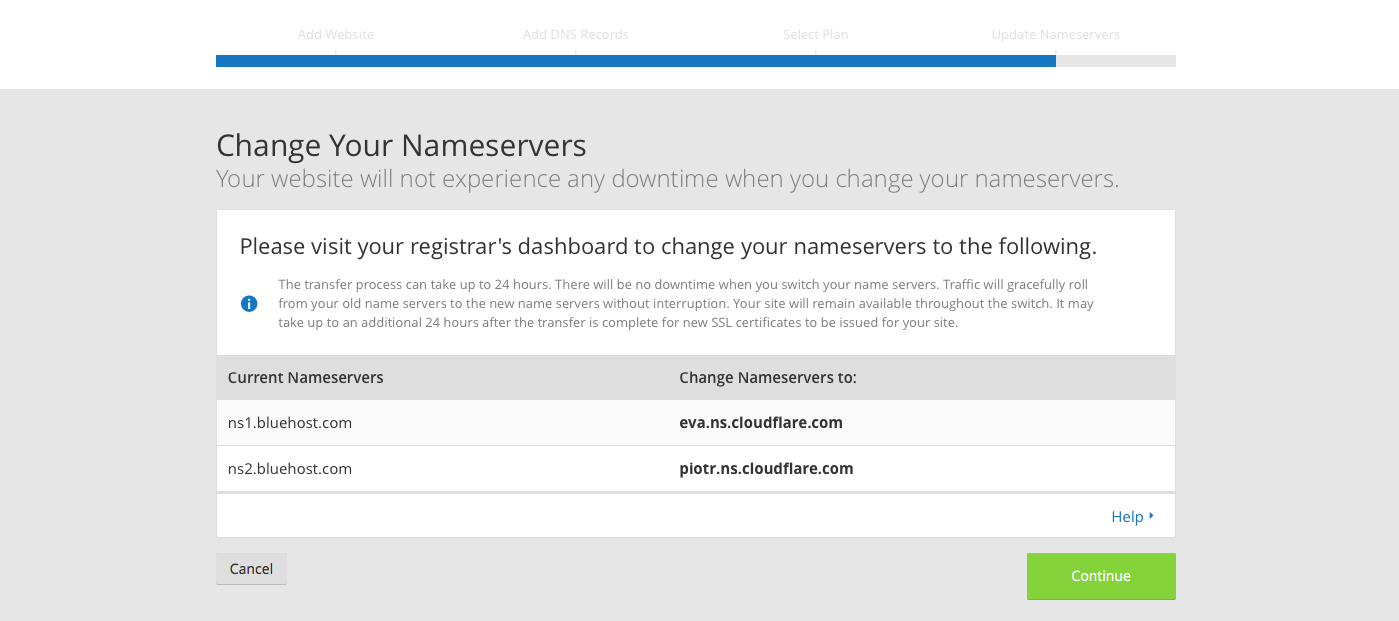
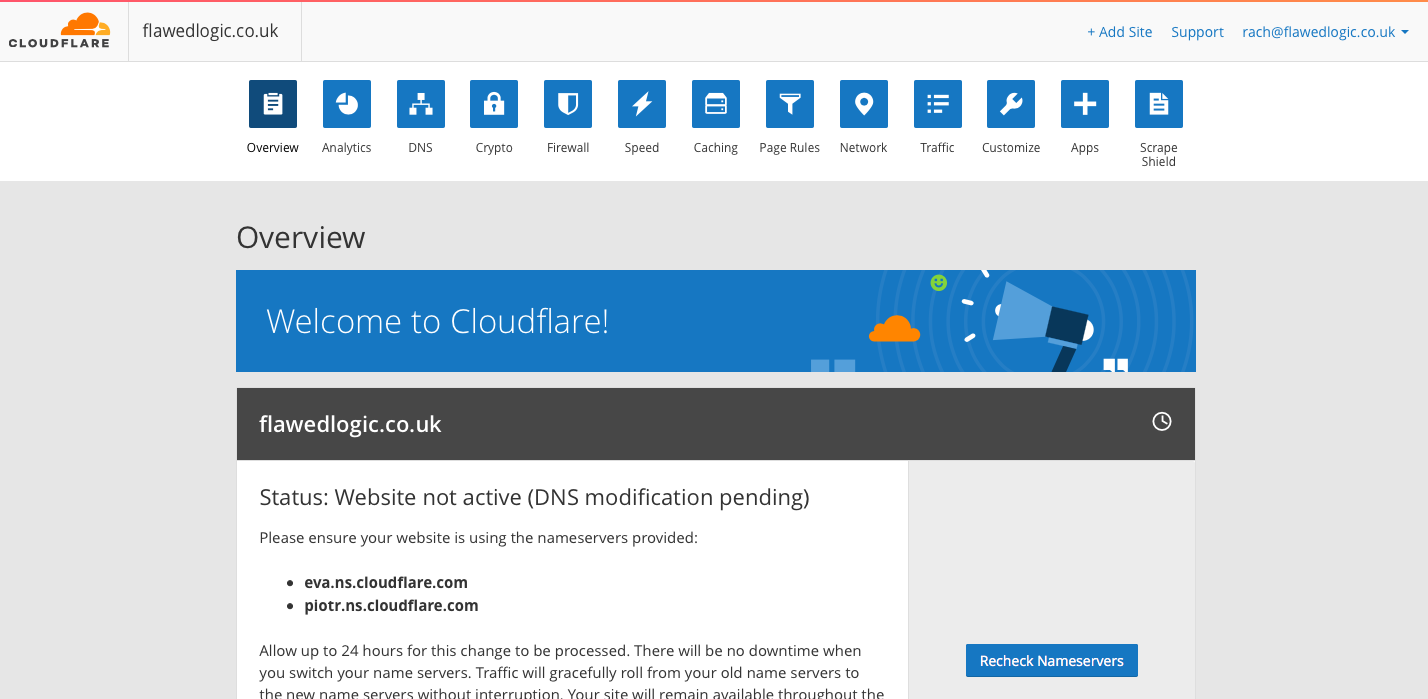
- The final step will provide you with the Cloudflare nameservers that you’ll need to change in your registrar settings (this is where your domain name is registered, which may or may not be the same place as your hosting). It can take up to 24 hours for the new nameservers to be recognized, but should not cause any downtime.
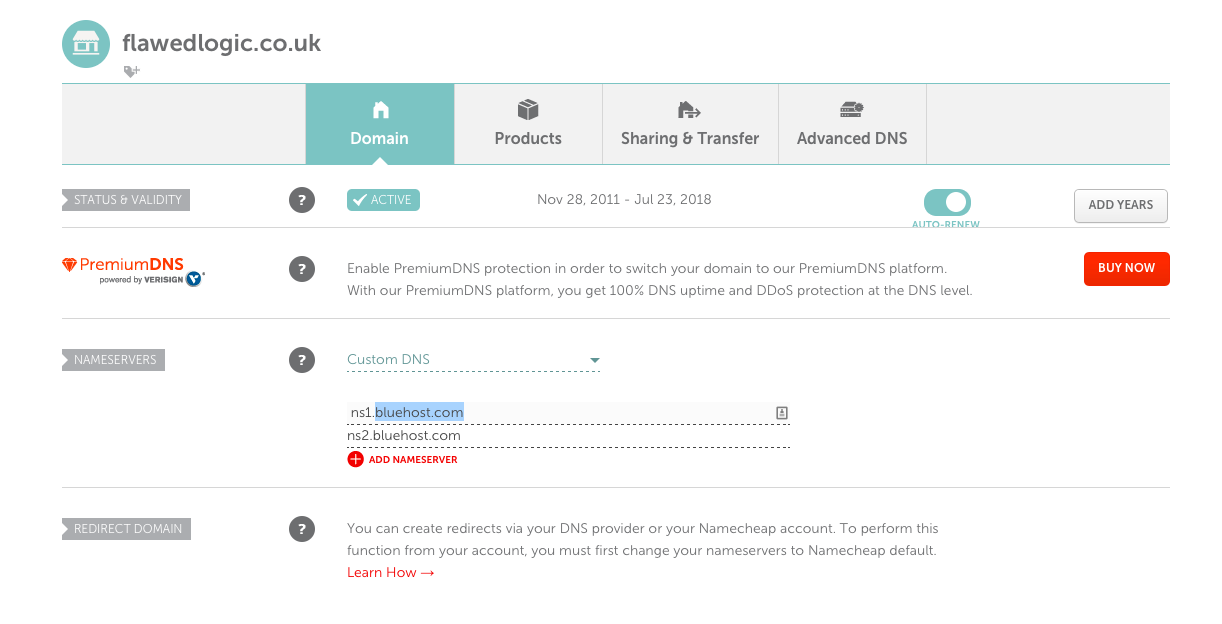
Here’s what the settings look like in Namecheap:
- Once you’ve changed your nameservers at your registrar, go back to Cloudflare and click the “Recheck nameservers” button. This will add your domain to the checking queue and you can return in a few hours to check that everything has been switched over correctly.
Setting up the Cloudflare WordPress Plugin
Cloudflare has developed an official Cloudflare CDN plugin to provide additional functionality and easy access to settings for WordPress users directly from the dashboard without needing to go to the Cloudflare website.
Features include:
- One-click settings optimized for WordPress
- Automatic cache purge when you update your site
- Direct access to settings and analytics from the WordPress dashboard
- WordPress-specific firewall rulesets for paid accounts
- Support for HTTP2/Server Push to deliver push notifications to the user’s browser.
- In your WordPress dashboard go to Plugins > Add New and search for “cloudflare”.
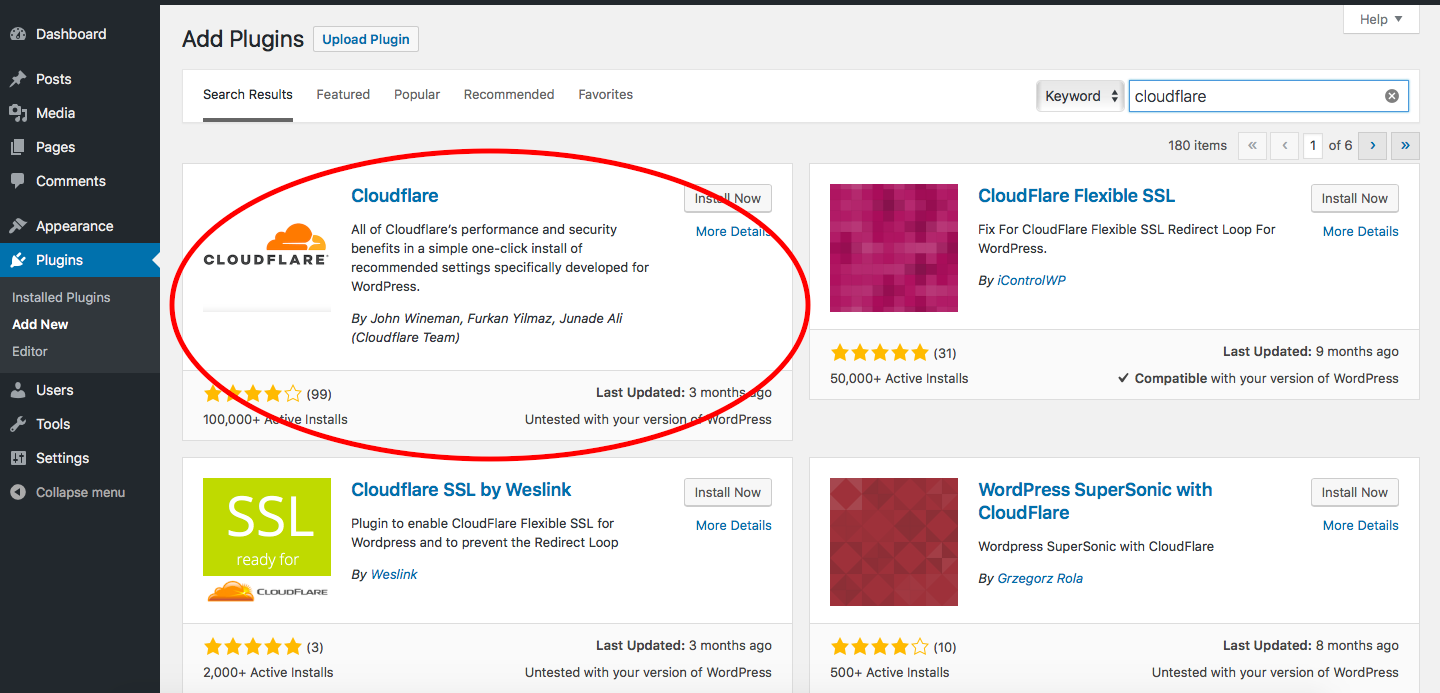
- Click the “Install Now” button for the official plugin.
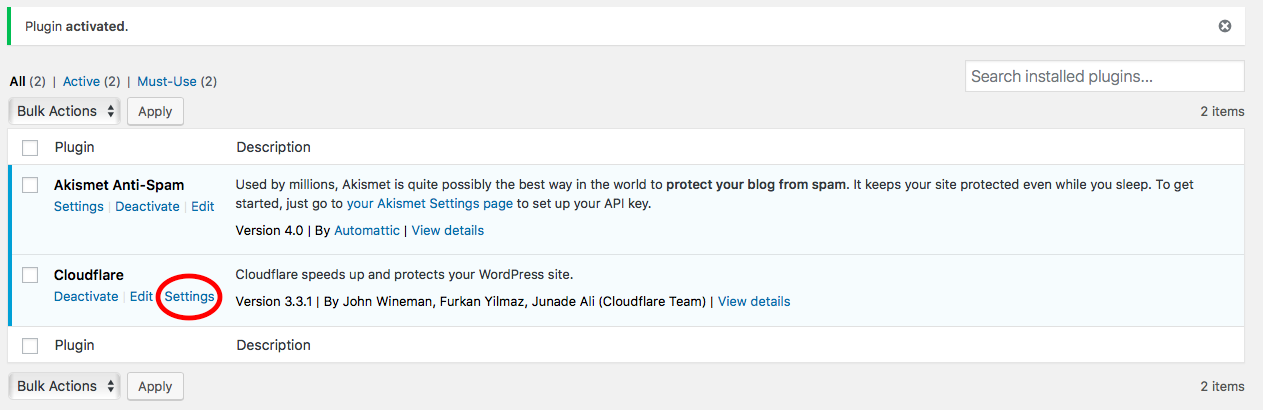
- When the button changes to a blue “activate” button, click it again.
- This should take you to the plugins page. Click “Settings” under Cloudflare (you can also access the settings page from Settings > Cloudflare in the main WordPress menu
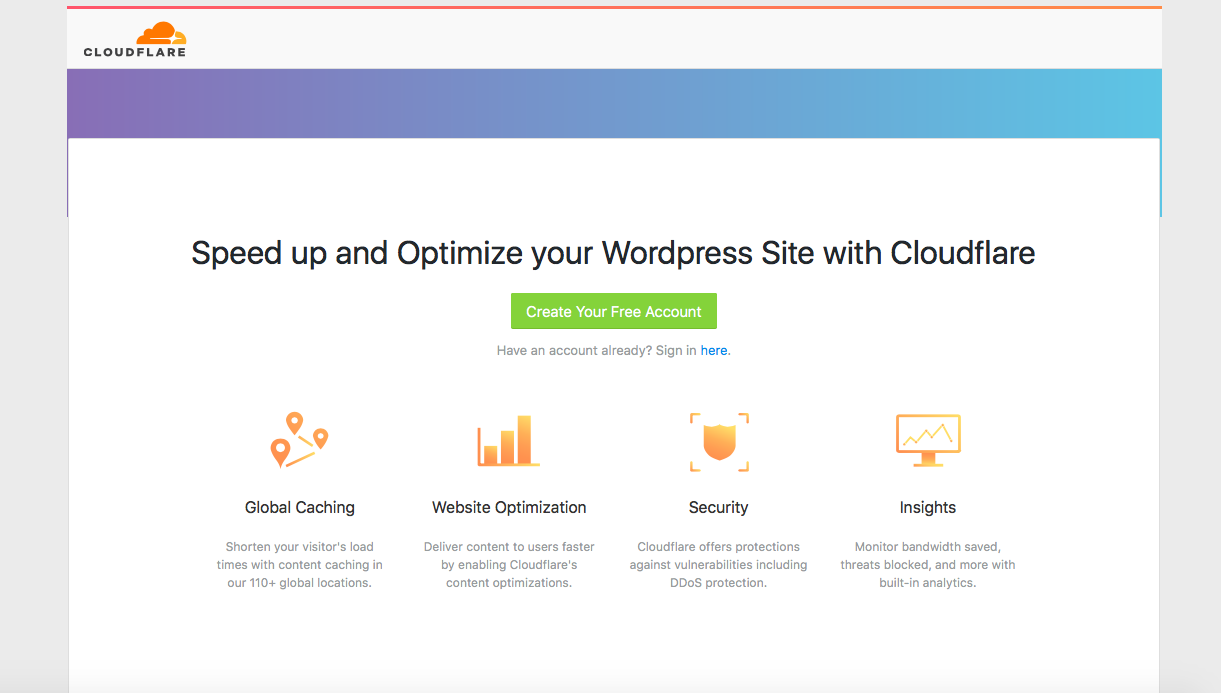
- Click the link on the settings page to sign into your Cloudflare account
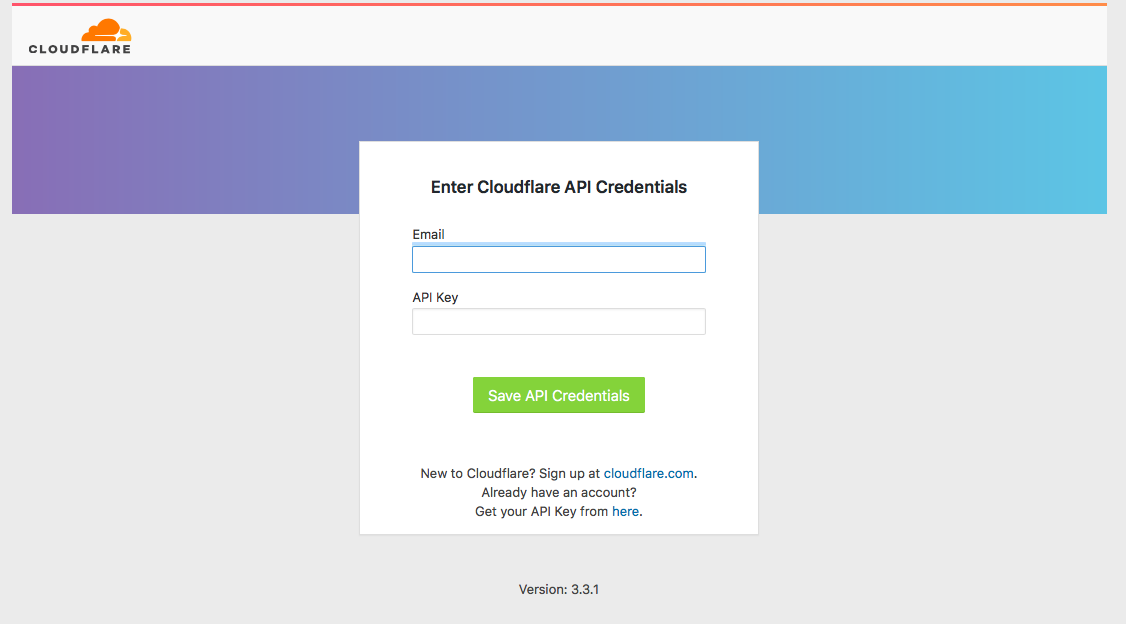
- Enter your email and API Key (you can find this under “Global API” at https://www.cloudflare.com/a/profile)
- You’ll then be taken to the Cloudflare settings homepage
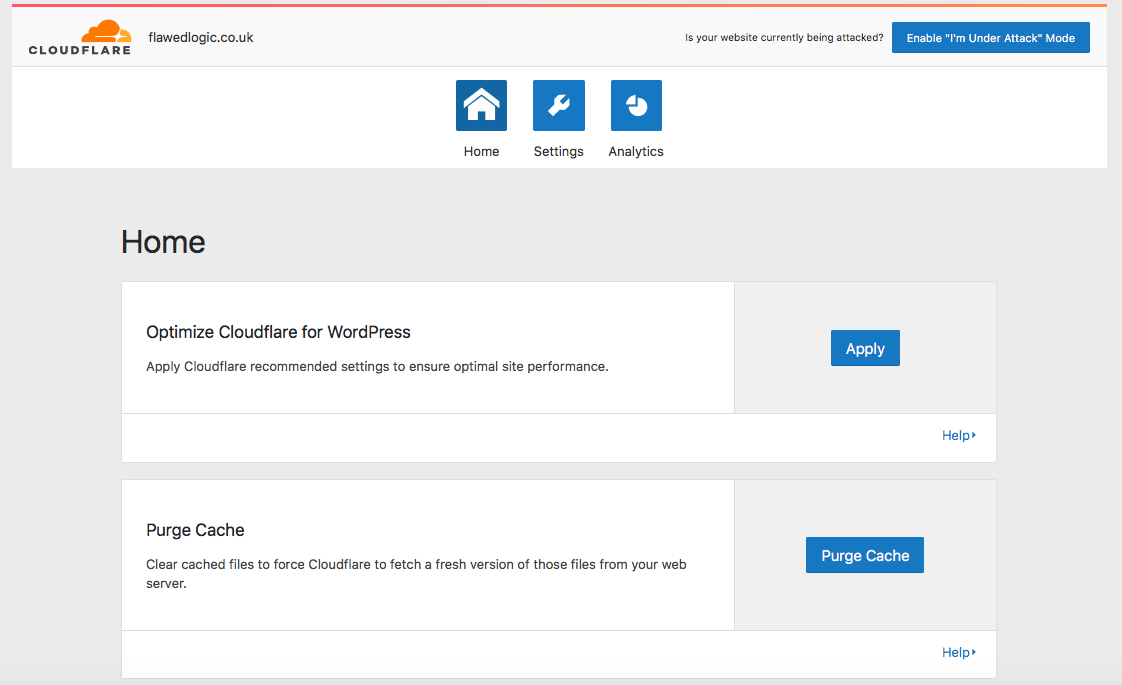
- Use the one-click settings to optimize for WordPress – click the “Apply” button.
- Enable “Automatic Cache Management” so that the Cloudflare cache will be flushed automatically when you update your site (this stops Cloudflare from serving up out of date versions of your site)
- Click on the “settings” link to review your settings and change anything if required.
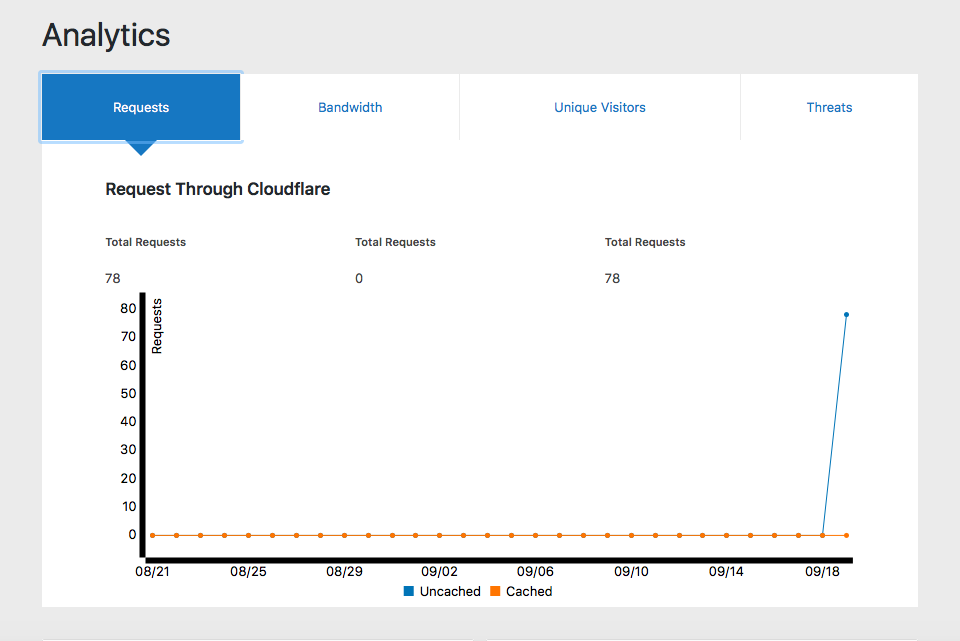
- Click the “Analytics” link to see the requests to your site, bandwidth used, and threat by country.
Advanced Cloudflare WordPress Plugin Settings
There are some other settings available in the Cloudflare plugin that you might want to take a look at:
Under Attack Mode
You can enable this mode using the button on the top right corner of the settings home page. You can use this feature when your website is under a DDoS attack to make every visitor view an interstitial page while their traffic and behavior is analyzed for level of threat.
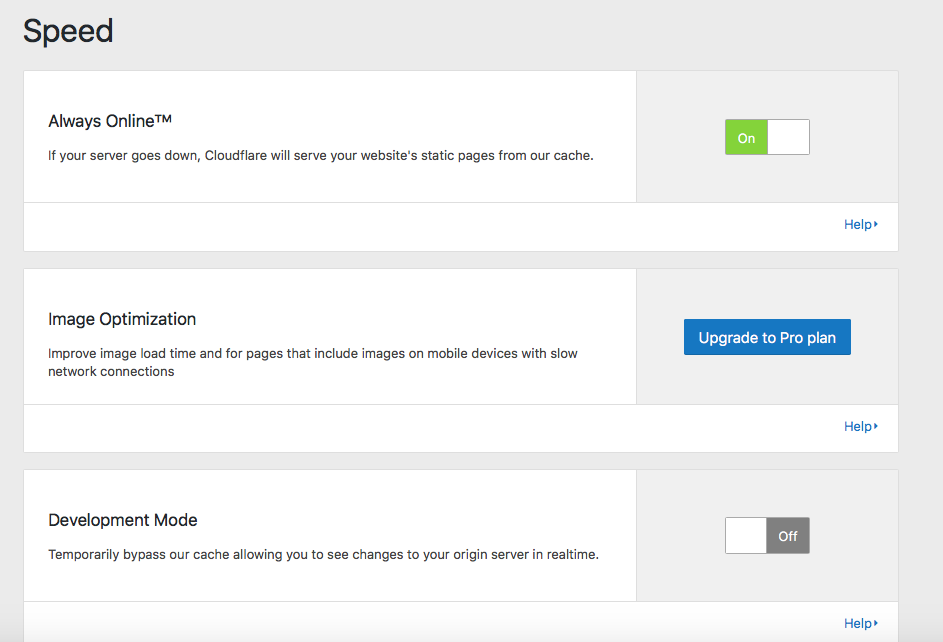
Development Mode
You’ll find the option to turn on development mode under settings. If you activate this, you’ll be able to bypass the Cloudflare cache and see changes you make to the site in real-time. You should activate this mode if you are doing any design tweaks or other development work on your site.
Security Level
You can choose the security level of Cloudflare from “Essentially Off” to “Under Attack”. As a default this is set to medium, which will display a captcha to both the most threatening visitors and “moderate threat” visitors.
Cloudflare can be a bit excessive with what it considers a threat so if you’re getting complaints from people that they are challenged when accessing your site for a legitimate reason, you might want to drop the security level down to Low.
Always Online
This service serves up a cached version of your website even if your server goes offline. It’s recommended to leave this option on.
Image Optimization (Pro plan only)
With this option cached images are optimized to reduce file size and delivers images faster for users on mobile devices with slow connections.
Cache HTML at CDN (Business plan only)
This reduces bandwidth usage by serving up cached HTML content for unregistered users but displays real-time custom content for registered users based on cookie.
Web Application Firewall (Pro Plan only)
Detects and blocks specific WordPress threats and attacks.
Advance DDoS (Business plan only)
Protects against DDoS attacks regardless of size or duration
Automatic HTTPS Rewrites
A handy option for those who have signed up to Cloudflare to take advantage of its free SSL certificates. This function changes “http” to “https” for all links and resources on your site.
There are also many more advanced settings to access on the Cloudflare website. You can read their official guidelines on settings to harden WordPress security, and speeding up WordPress.
Conclusion
Cloudflare is a very well known service and is used by some big names such as Zendesk and Cisco. It’s worth giving Cloudflare’s free plan a go, especially if you frequently find your site under attack or you want to conserve bandwidth (you can see how much bandwidth you’re saving under the analytics tab in the Cloudflare plugin).
If you want to make the switch from HTTP to HTTPS for SEO purposes (Google now gives more power to sites with SSL certificates), using Cloudflare is an easy and free way to do so.
Those with bigger sites with a lot of traffic should seriously consider opting for one of the paid Cloudflare plans for enhanced security and performance.
The Cloudflare CDN is easy to set up and just as easy to turn off again if you change your mind. If you try out Cloudflare and find it doesn’t really work for you, there are other options for speeding up your WordPress site and improving security.


If im using a certificate from comodo, i cant use cloudflare?
Hi Louis, please checkout these options on the cloudflare support page – https://support.cloudflare.com/hc/en-us/articles/200170546-I-already-have-SSL-on-my-site-What-are-my-options-
Well… ! Thanks.
Hello Rachel,
Nice article, i just want to know few things before setting up cloudflare. I have both options, built-in and adding website into cloudflare. After setting up my smtp stopped functioning. I have checked in cloudflare account and forwarded MX records to my web hosting company. But it is still not working, can you help me with this?
Thanks