Despite how stable WordPress is as a platform, you will encounter an error at some point. What’s more, it could be that you have no idea how it got there or what you can do to fix it. In this sort of situation, the WordPress debug mode is a lifesaver.
Debugging is a way to find out why a ‘bug’ is causing havoc, although you’ll also have to figure out how to fix it. Some debug messages will give you a pointer. Though, once the debug mode gives you a helping hand, the repair process is often straightforward.
In this post, we’re going to show you everything you need to know about the WordPress debug mode. First off, let’s offer you more insight into what the mode does.
What the WordPress Debug Mode Is
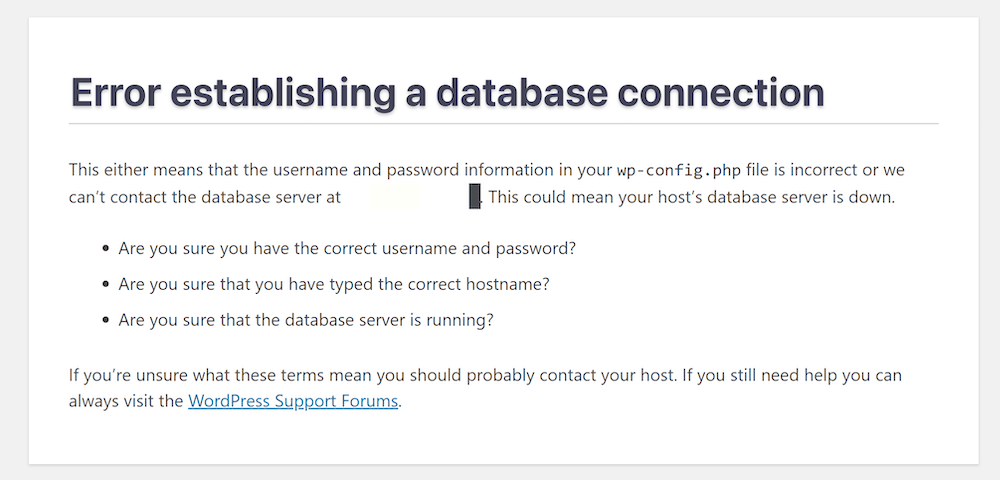
In lots of cases, you already see a version of debugging in action. When you encounter an error on your WordPress website, this is a small part of the debug process in action – the end point. Under normal circumstances, you will see notifications of major critical errors on your site. Think of issues such as the Error Establishing a Database Connection, or the 500 Internal Server error.
Though, there are lots more errors that are ‘silent’. In other words, you won’t know that an error has happened unless you seek it out. The WordPress Debug Mode is ideal for these situations.
It will display notices on either the back or front ends of your site, and it’s not exclusive to errors. Enabling the debug mode (also known as WP_DEBUG) will also display warnings and notices about your underlying code too. For example, you will often see errors for aspects of your site that don’t appear or act broken. This is by design.
As such, you can use WP_DEBUG to catch issues with your site’s PHP code that, when fixed, will give you a more resistant and performant foundation.
Why You’d Want to Use the WordPress Debug Mode
It’s fair to say that on the surface, using WP_DEBUG doesn’t have a lot of benefits for the average site user. This can be the case, although it’s not universal. In fact, for most sites, you won’t need to use a debug mode because WordPress is great at both handling and displaying errors.
Though, we can think of a few situations where the WordPress debug mode is handy:
- Even for a typical site owner, activating
WP_DEBUGcan help you to diagnose complex issues that don’t present themselves under normal circumstances. One example is the WordPress White Screen of Death (WSoD). Lots of times, you’ll uncover an error if you use the WordPress debug mode, which will give you a head start on finding a fix. - If you’re a developer,
WP_DEBUGwill be an invaluable tool in your workflow. This is because you want to know about site-breaking errors, and those niggling issues that could cause problems down the line. The WordPress debug mode shows all of these, and more. For example, you will also see notices about depreciated functions and arguments within your code. These won’t break your site right now, but will be a problem once the functions disappear at a later date.
In general, WP_DEBUG shouldn’t be active on a live site. As such, it’s a more of a development tool when using a local or staging environment. Even so, the debug mode does have a use for live sites, but in tiny and disciplined frequencies.
If you use the debug mode on a live site, there are a few rules to follow: Don’t use it for very long, activate it at times when your site has the least amount of traffic, and deactivate WP_DEBUG after you finish. This will minimize the risks involved, and keep your site maintenance away from the eyes of your end users.
How to Enable the WordPress Debug Mode for Your Site in 2 Ways
If you’d like to enable WordPress debug mode, there are two typical ways to do so:
- Open up your wp-config.php file and add a few lines of code.
- Install and activate a plugin to enable the debug mode.
There are also some related and companion modes to help you debug your site too. We’ll cover these in a later section, but for now, let’s cover the manual approach.
1. Enable Debug Mode Through the wp-config.php File
If you’re familiar with WordPress’ core files, you’ll know about wp-config.php. For the uninitiated, this file stores your site and server configuration settings. It’s one file that can cause an Error Establishing a Database Connection, among other issues.
As such, it’s a file you should take some caution with. Because of this, you want to make sure that you have the following in place before you begin:
- Knowledge of Secure File Transfer Protocol (SFTP), and the skills to use it.
- A suitable SFTP client, such as FileZilla, Cyberduck, or Transmit.
- Your SFTP credentials, which you can find within your hosting dashboard, or in an email from your provider.
- A clean and current backup of your site in case you have to roll back changes.
- You might need a dedicated text editor, but it’s not necessary.
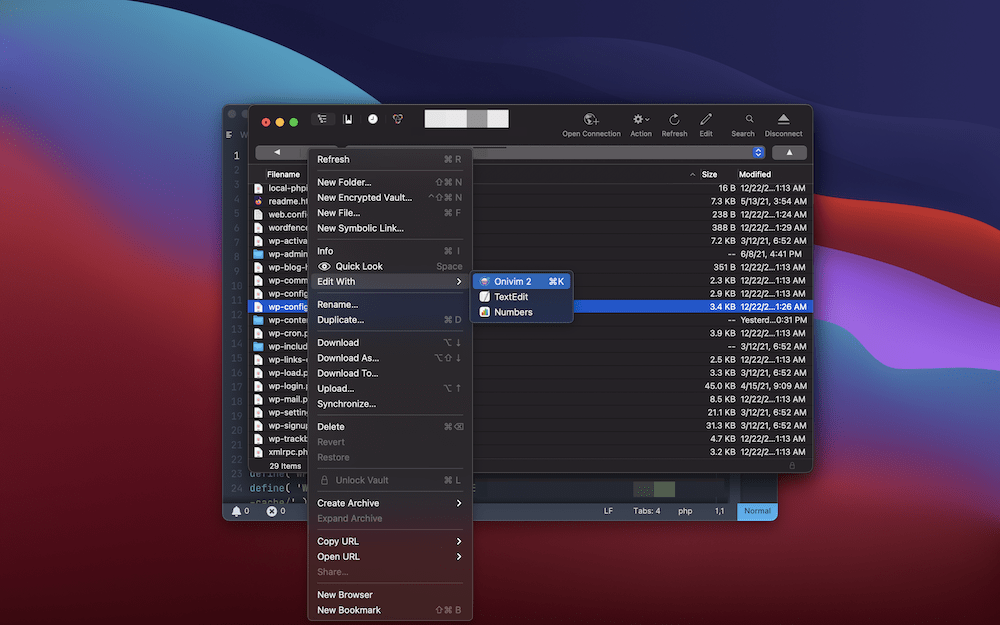
Once you have these in place, log into your site through SFTP. If you only run one site, the root directory (also called www or public_html) will be the place to go.
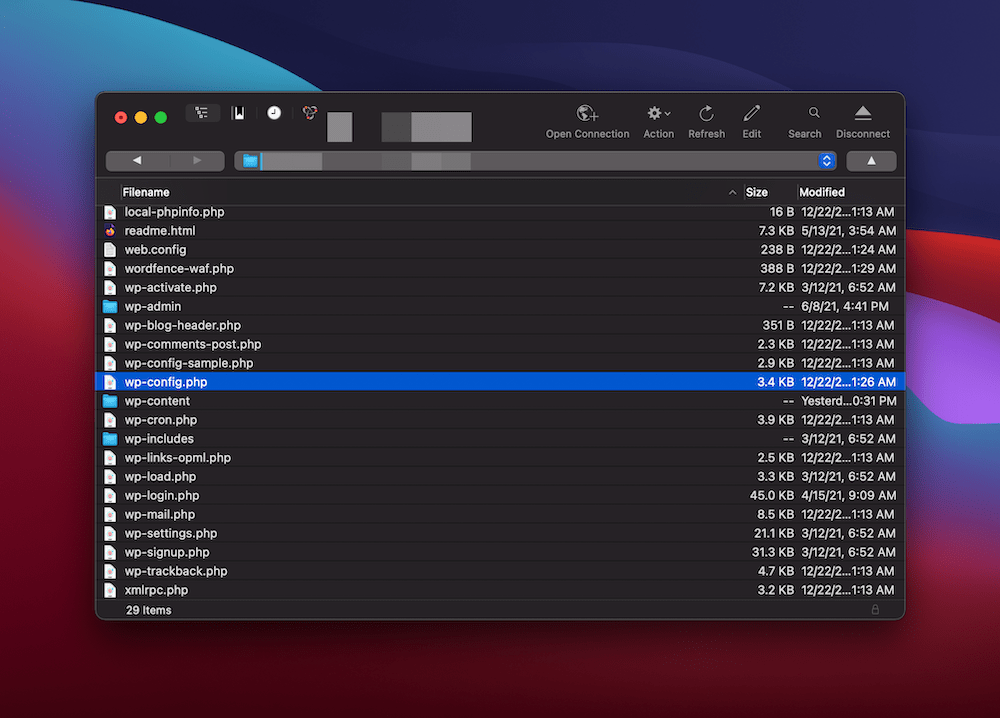
Though, if you run multiple sites on your server, it could also be in a directory with the name of your site. Once you’re in the right place, look for the wp-config.php file. Note that there is also a wp-config-sample.php file, but this isn’t what you need.
When you find the file, right-click to and select the option to edit. This will differ depending on your SFTP solution, but it’s often hard to miss:
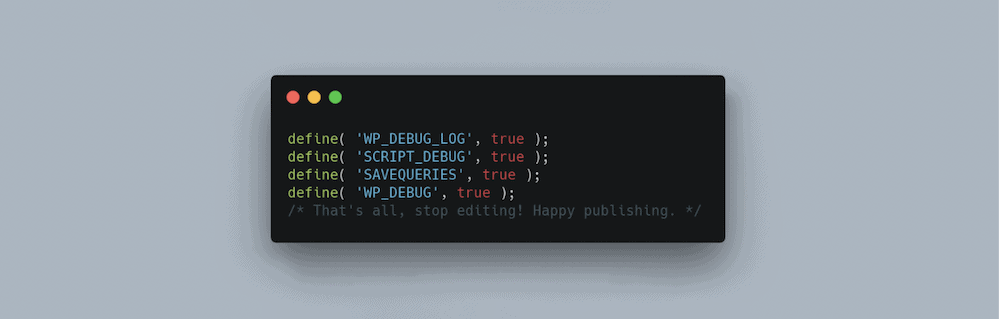
Once the file is open, you want to add a single line to enable debug mode:
define( 'WP_DEBUG', true);
Type this above the line that reads /* That's all, stop editing! Happy blogging. */. Once you save your changes, the WordPress debug mode is active. You can also add more lines to your file. For example, you can create a dedicated written debug.log file with the following:
define( 'WP_DEBUG_LOG', true );
Though, remember to disable WP_DEBUG using the false value instead of true. As an alternative, you can remove the relevant lines from your wp-config.php file and re-save your changes.
2. Use a Dedicated Plugin to Enable WordPress’ Debug Mode
You can also use a plugin to enable the debug mode. This makes the process a touch more accessible if you’re uncomfortable poking around in your core files. A top solution for this is WP Debugging:
Once you install and activate the plugin, it’s already at work. It enables the following ‘constants’ within your wp-config.php:
define( 'WP_DEBUG', true );
define( 'WP_DEBUG_LOG', true );
define( 'SCRIPT_DEBUG', true );
define( 'SAVEQUERIES', true );
You’ve used the first two constants already. SCRIPT_DEBUG switches WordPress over to use the development versions of core CSS and JavaScript files. Under normal circumstances, WordPress will use minified files, which can cause issues in some rare cases. This isn’t going to affect you if you’re hunting bugs, but could do if you’re a developer.
SAVEQUERIES is also a developer-focused constant that stores database queries in a a global array ($wpdb->queries). It will store the query itself, how long it took to execute, and which function called it. It also has a performance impact, so you should bear this in mind if you use the plugin. If the above means little to you, know that it won’t matter too much to your experience.
Once you install the plugin, you’ll notice that you may need to install additional plugins too:

In fact, these aren’t necessary unless you’re a developer with a specific task to complete.
The plugin options are minimal, which helps with usability. You can find the settings under the Tools > WP Debugging menu in WordPress, and there are three options:
- Enable
WP_DEBUG. - Set
WP_DEBUG_DISPLAYto false. This will either show or hide notices on your website, independent of whether your log errors. - Toggle
WP_DISABLE_FATAL_ERROR_HANDLERto true. If you don’t know what this means, you should leave it alone as it can cause the WSoD on a more frequent basis.
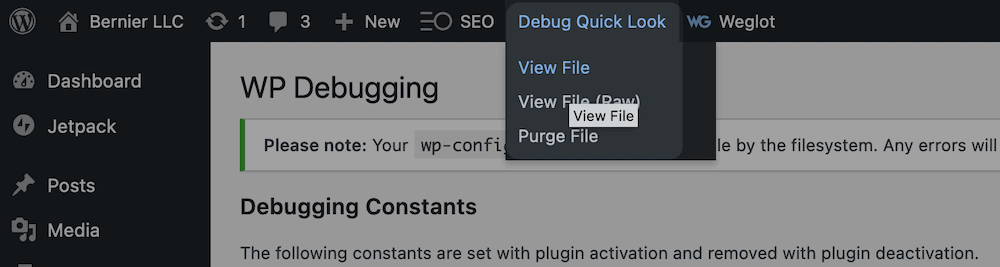
If you’d like to look at the log, you can do so through the Debug Quick Look menu:
The plugin is a handy way to debug your site without digging into your core files, so it’s worth the install. Of course, you’ll want to uninstall the plugin or deactivate the options after you finish, just like the manual method.
Wrapping Up
A WordPress site failing is a rare occurrence, or at least when it does happen you’re able to fix it. Most major errors show themselves either through a notice on your site or through a page when you load your site. Though, there are lots of other ‘silent’ errors or concerns that you might need to know about, especially if you’re a developer.
In this post, we gave you two ways to activate the WordPress debug mode. Here they are again:
- Open your wp-config.php file using SFTP and add a few lines of code.
- Install a plugin such as WP Debugging and log your errors with a hassle-free approach.
Do you need to use the WordPress debug mode, and will this post help you? Let us know in the comments section below!


Glad I finally found someone to say WHY it’s not the best thing to debug a live site. Now I know I can briefly.