There is a lot of back and forth debate about sliders and it’s been going on for years. Some people steadfastly believing that sliders are bad for conversions, and according to the data, they’re right.
At the same time, though, there seems to be no decrease in the use of sliders overall – they’re still a popular option for many websites. While I’ll be the first to admit that I rarely stick around to view anything beyond 1-2 slides, I think it’s fair to say that if they are designed properly, you can minimize the negative impacts.

Consider not using multiple sliders – or possibly a single call to action could be displayed using slightly different slide backgrounds. It’s easy to do and a plugin like Smart Slider 3 will allow you to use a single slide with all kinds of animations – there is no disputing the fact that done right, slides are capable of improving the visual appearance of your website.
Smart Slider 3 a great plugin that is available in both free and premium versions. This post is going to be a bit of a combination – Covering an overview of the plugins features, and also a basic tutorial that demonstrates how easy it is to set up a slider and have it published to your website in a very short period of time.
Key Plugin Features
- Intuitive user interface – every plugin says this, but in this case, it’s true
- Drag-and-drop builder with live preview
- Dynamic slides can be created using posts and filtered by ID, filter or custom pages
- Generate slides (dynamically) from a variety of social channels (Facebook, 500px, Dribbble, Flickr, Instagram, Twitter, YouTube and More).
- Customizable slider controls and loading animations
- Slider background animations (Ken Burns)
- Multiple transition animations including slide, puzzle, fade, curtain, zoom, and more
- Highly customizable autoplay configurations
- Ability to hide specific layers on tablets or mobile devices
- Define and adjust slide size for mobile devices
- SEO Optimized and customizable settings
- Easy to create great looking sliders
- Site Origin Page Builder compatible and Adobe Creative Aviary image editing
- And dozens more!
Free versus Paid
If all you’re looking for is a basic slider, Smart Slider 3 is available from WordPress.org in the plugin repository. Even the free version is impressive and a definite step up when compared to some of the other free sliders out there.
A personal single-site license is only $25 (renewal $15), so it’s not like you’re going to break the bank on this plugin. Even a lifetime 50 site license is only $100, which makes that option a killer deal.
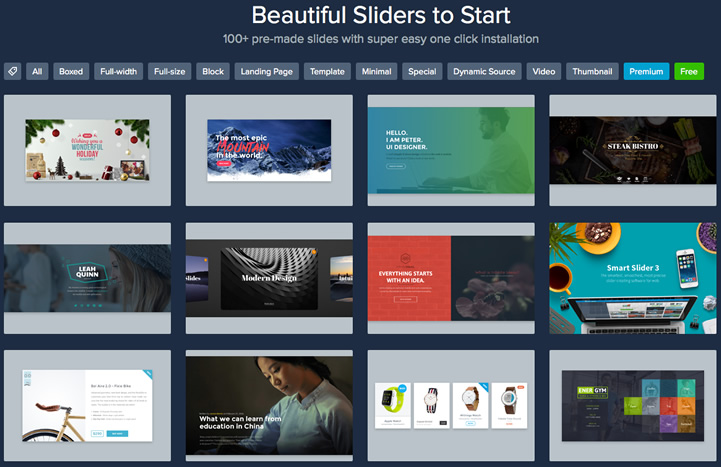
The pro version comes with 100+ templates
There are some key differences between the free and paid versions in terms of what’s included and functionality. Here what you get with the paid version:
- Unlimited dynamic slide generators
- Advanced controls
- Expert mode
- Layer animations with live timeline
- Ken Burns and background animations
- A lightbox and image editor
- 43 pre-built slider demos
When we run through a bit of tutorial later in the post you’ll see some of these features come into play. If you see them as being a requirement instead of a luxury, you’ll need to look at the paid version.
Installation & Setup
Installing Smart Slider is a snap. Simply upload the zip file from your desktop via the WordPress plugin installer, click activate and you’re ready to roll.
Here’s the thing: I wish I could give you a little more to work with here. Some kind of hiccup or a bug in the installation process, but no. Not a single problem, and it gets even better.
I’ve worked with quite a few well-known slider plugins and some of them, while loaded with features, were downright difficult to set-up. Smart Slider 3 was by far the easiest slider set-up I’ve ever experienced. How easy? I’m glad you asked.
Tutorial: Creating a Basic Slider
Once activated, Smart Slider places its own menu at the bottom of the WordPress Admin Panel. Clicking on the Smart Slider menu opens up the main interface where the first option you’ll see is a big green button that says “Create Slider” which opens up an initial setup window like you see below.

From here you can name your slider and pick a general style. There are plenty of styles to pick from (including full-width, full-page, carousel, thumbnail and more), but we’re going to go with a block slider based upon the layout of our existing site. Click “CREATE” and Smart Slider will get to work building your base model slider. After a few seconds, you’ll end up on a screen that provides all the basic details about the plugin.
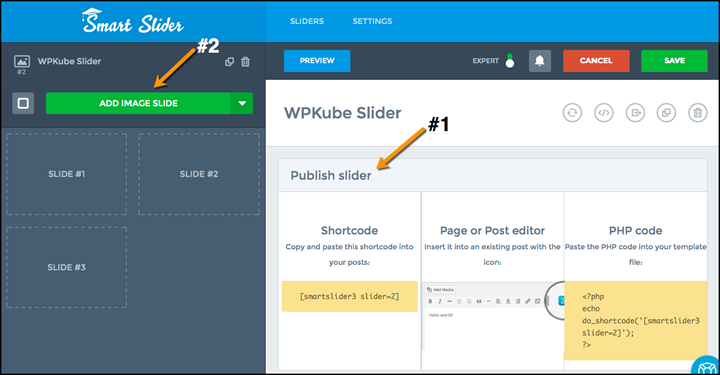
The first thing to note here is the publish slider section. You’ll need to use one of these three methods (short code, post editor, or PHP) when it comes time to publish your slide (#1 below). Before we can do that, we need to create some slides. This is where this plugin really demonstrates its ease of use.
All you need to do is click the green “ADD IMAGE SLIDE” button (#2 below) and your media library will open. From here you can select as many images as you want, or start with just one, and then click select in the media library window.
Note: You’re not limited to images when selecting your slide. You can also use video or posts as well as create an empty, static, or even dynamically created slides.
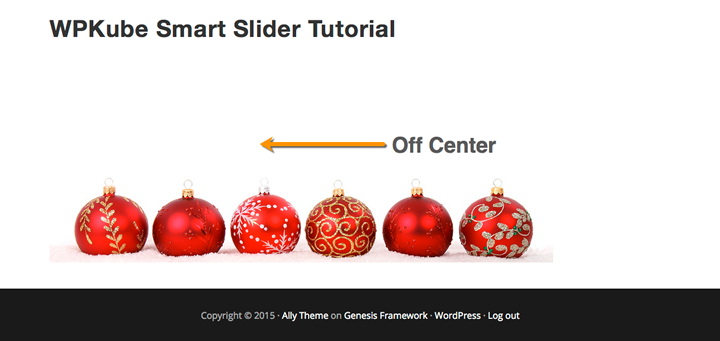
Smart Slider loads your slide(s) into the interface and you’re ready to either save and publish or start customizing. If I just go ahead and publish my slide, it’ll work fine but it’s not quite what I was looking for as you can see in the image below.
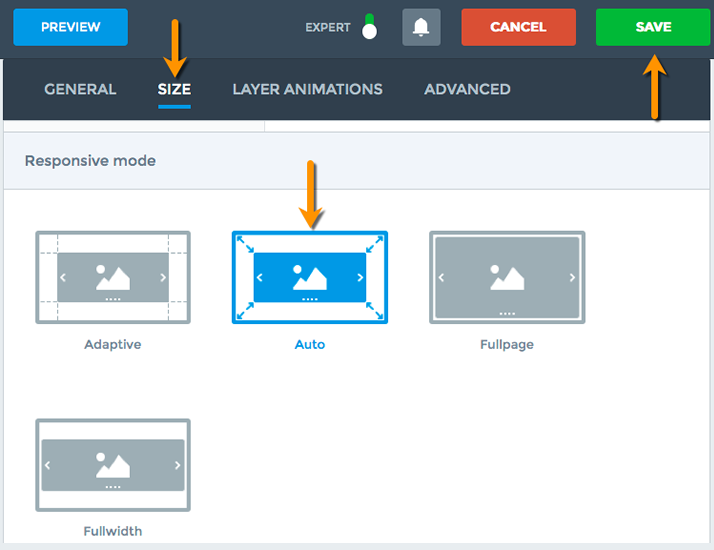
To fix this, I went into the “SIZE” menu and scrolled down to the responsive mode section. The current selection was “Fullwidth”, so I selected “Auto” and saved my progress. From there, I went back to the “GENERAL” tab and selected a center alignment.
When I talk about ease of use here, keep in mind this whole process took under 5 minutes on my first attempt.
Now it’s time to work on the side itself. When hovering over your slides in the display window, you’ll notice that a green first box appears in the top left corner. As you probably guessed, clicking it will tag that particular slide as the first in the sequence.
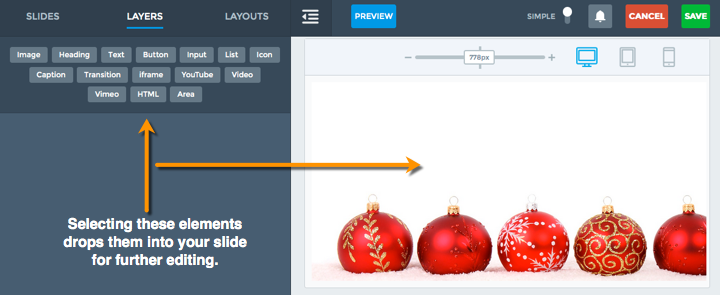
With my slider created and the background in place, it was time to add some content and transitions. To get this stage started, I simply clicked on the slide that I wanted to edit which takes me into the layers section. There are lots of individual settings in the right-hand panel but if you scroll to the bottom you’ll find an image your slide. You can then click on any of the elements from the left-hand panel in order to place them on your slide.
Creating these slides is really a post in itself. There are so many options available, it would be easy to go on forever. To give you an idea of the flexibility that this plugin provides, consider that each element you bring into your slider can be customized via:
- An item menu
- Animations
- Layer settings
Within each of those menus are multiple sub-menus. For example, when you create a text element, as part of the item menu, you can adjust the font settings. Included in the font setting for that single element are:
- Font family
- Text color
- Font size
- Line height
- Text decoration
- Alignment
- Letter & word spacing
- Text transform settings
- Text shadow
Every single text element on your slider can have unique settings, unique animations and it’s own timing settings. There is even a section for custom CSS.
As you’re adding elements and animations to your slide, on the pro version you’ll also notice a timeline feature. This allows you to control the display timing of individual elements and the duration of their animations using simple slide-bars. I relied on this feature when adding different layers to this slide a little later.
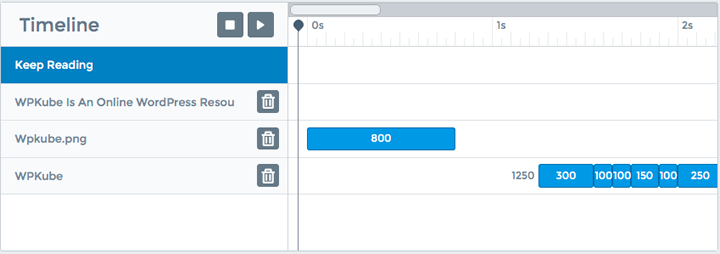
Control timing, duration, and animations with the timeline editor (pro version)
Adding Layers & Animations
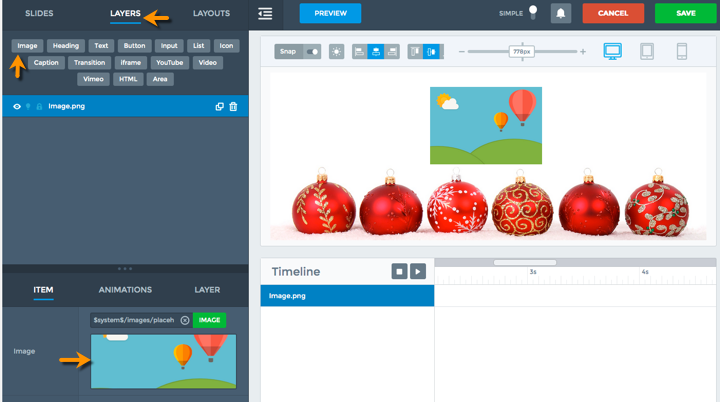
With our slider in place and the background all set up, it’s time to introduce some different elements and layers. We’re going to start with adding an image of a snowman to the slide. To do this, I start in the “LAYERS” menu and click “IMAGE”. Doing this will place a dummy image into the slide. From there you can click the dummy image in the bottom left and then select and resize the image from the media library.
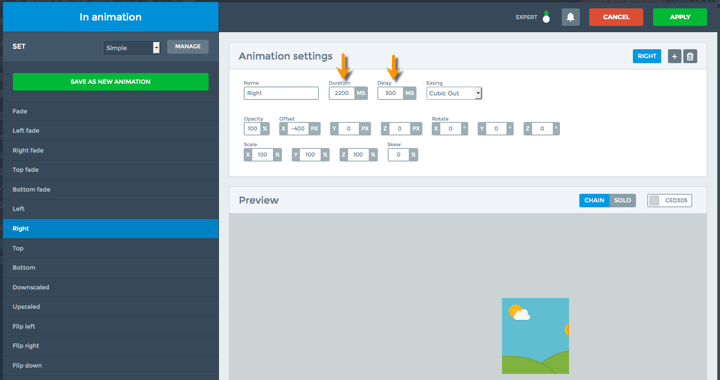
Once I’ve selected, inserted, and resized my image, it’s time to add a basic animation which can be accomplished in a few steps. First is selecting the “ANIMATIONS” tab as seen below. Once that’s done, we’re going to click the green “IN” animation button.

The next screen is where I can select my desired animation as well as adjust the timing. For this particular slide, I’m introducing a “RIGHT” animation and increasing the duration to 2200ms. I’ll also add a delay of 300ms. At the bottom of this screen is an option to have a specific event trigger this animation, such as a mouse entering the slide or a click within the slide. I’m not bothering with those settings for this example.
Next, I’m going to add some text. Following the same process as above, Click on the add “TEXT” element and make your adjustments as required. I entered the text and then went into the font settings where I changed the size and color. I then added a “Fade In” animation and adjusted the timing so that it starts just after the snowman animation.
You’ll also notice in this menu that there is an option to have specific text for tablets and mobile devices. This is a great example of the kinds of features that make this plugin so user-friendly and flexible. In some “other” sliders, I’d be forced to use a media query and custom CSS.
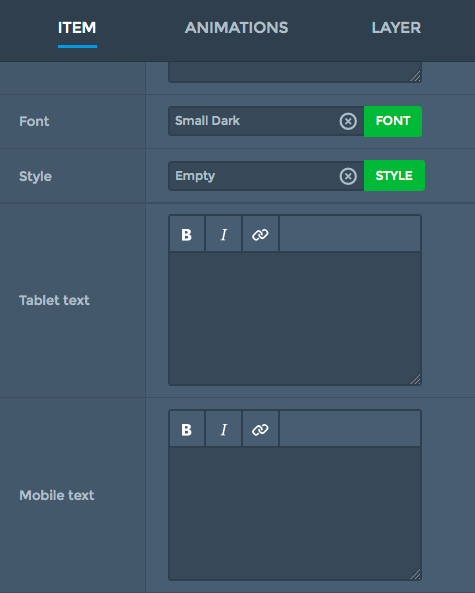
Easily change your text layer depending on the device type
To finish things off, I’m adding two more layers. The first is a text layer and the second is an image layer. Again, I followed the exact same process as above, but I delayed the animation timing just a little bit extra. You can see the final results below. All told, creating this slide was about a 20-minute process if you’re not typing instructions as you go.
Note: Converting this slide to a GIF altered some of the beautiful animation delays that I painstakingly assembled, but you get a general idea.

Documentation & Support
The documentation for Smart Slider 3 is impressive. It’s a searchable knowledge base that is broken down into 8 categories and about 40 sub-categories. It covers almost any question you might possible have about how this plugin or a specific feature works.
If for some reason you can’t find the answer to your question, there is contact form located on the website and they also offer email support.
Conclusion
Having tried more than a few WordPress slider plugins, both free and paid, I can honestly say that this is one of the best that I’ve ever tested. It’s not just one specific feature that sets it apart either. It’s a combination of things that add up to what is simply an awesome plugin. It’s important to note that I haven’t covered every single feature. There are just too many list within the confines of this post.
I’m sure that if I spend a little more time working with the plugin, I’d find a few things I’d like to change, and maybe even a few bugs. However, considering the importance of first impressions, Smart Slider 3 manages to nail it right out of the gate. I think the ease of use will keep people around long enough that they can eventually take full advantage of the multitude of features offered. And trust me, there are many.
If you’re looking for a slider plugin for your WordPress website that will get you up and running quickly, but also has features that you can grow into, look no further. If I were plunking down my money for a slider, this is where it would go.
But hey, don’t take my word for it. Download the free version and try it for yourself.


No doubt this is the best slider plugin for WordPress now. While it’s super simple to use, there are plenty of features to customize the slide content as you like. I especially like the feature for creating dynamic slides or video slides.
I highly recommend Smart Slider 3.
all those buttons, sections, options (x, y, x, y, offset…) bring confusion to me. it does not look simple while wordpress users need simplicity.
screenshots leave much to be desired.
Helpful Post, Thanks for sharing 🙂