
The appearance and feel of a website is of great importance in attracting and holding a visitor’s attention. Content on a website can be dominated by text, images, or media. Text, wherever used, whether abundantly or sparingly, must be chosen with care. Typography plays an important part in the overall look and feel of a website.
Builtin fonts are available in the browser and the style.css file usually accesses these fonts for display. This means that there is no variation and this makes for a lackluster website. But it doesn’t have to be that way. You can choose fonts that make your website outstanding and unique. Sometimes, fonts can even be the defining character of a website.
It may be useful to know that all fonts fall into one of two types- serif, which means the fonts have an added line or curl at the end of the main stroke or sans-serif, which means without such line or curl.
Choosing Fonts
There are many places where you can access great looking fonts such as FontSquirrel. Check whether the license attached to these resources permit you to use it for your purposes. Often the themes that you use on the website come with their own choice of fonts and you should really put these to good use. You can also purchase premium fonts from Typekit.
While choosing fonts, go in for a style that is in sync with the mood or target audience of your website. For instance a playschool’s website can use fonts that appear like a child’s handwriting. If you are combining two styles, pick opposites, such as thick and thin. Most importantly, the fonts should be readable.
Adding Google fonts to an existing theme may not be such a good idea, as you will have to use the filters and hooks provided by that theme to add Google fonts. Having said that, Google does have a large library of fonts, which is updated regularly. In this tutorial, you will learn how to integrate it with your website.
Once you have made your pick of fonts, the method of adding it varies,
- One method requires that you download the font file and this can take up server space. Also not all font files are compatible with all browsers.
- Another method requires that you use an enqueue script to link external scripts to your site.
- Plugins can be used for adding Google fonts.
Method 1: Adding Google Fonts Using Code
As this method of integrating Google fonts will involve some editing of the existing theme, you may want to work within a child theme to prevent changes being lost at the time of updation.
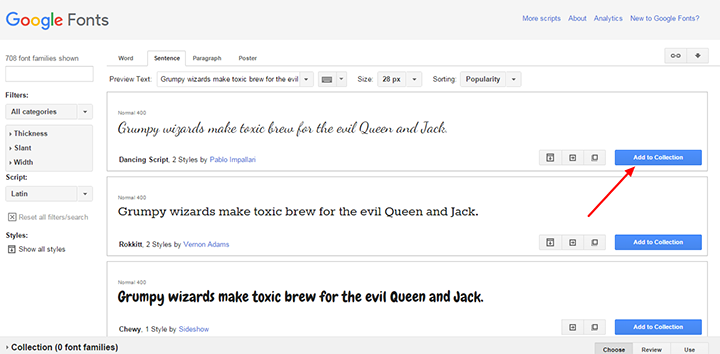
Open Google Fonts page in your browser, and check out the font options available there. When you find the one you want, click on the Add to Collection button against that font style. For this tutorial, I am choosing Dancing Script style with weights 700 and 400. You can choose more than one font style. In this case, combine the multiple font styles with a ‘|’ symbol. If the name of the font style uses multiple words, insert a ‘+’ in between the words.
A pop-up will open at the bottom of your screen. All the font styles you have chosen will be displayed in that pop-up.
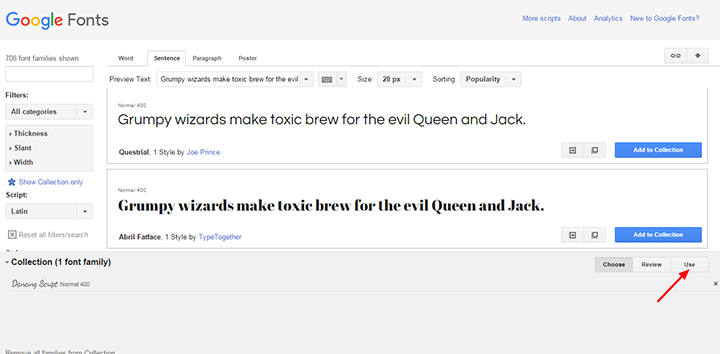
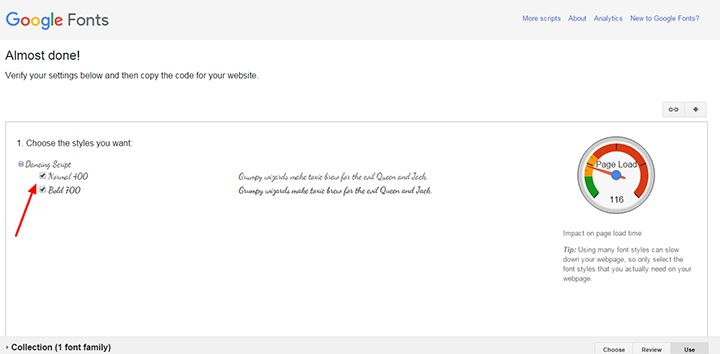
Next, click on the Use button to the right. Another page will open up where you can choose the weight of the fonts. The dial on the right indicates the speed at which the website will load for the respective font styles and weights. If you add more than one font style, the dial will display the total speed for all the font styles together. In this screen, you can also add any special characters specific to the language you have chosen.
Lower down the page, against step 3, you will notice 3 tabs- Standard, Import and Javascript. You can choose anyone of these tabs for embedding the code in your website.
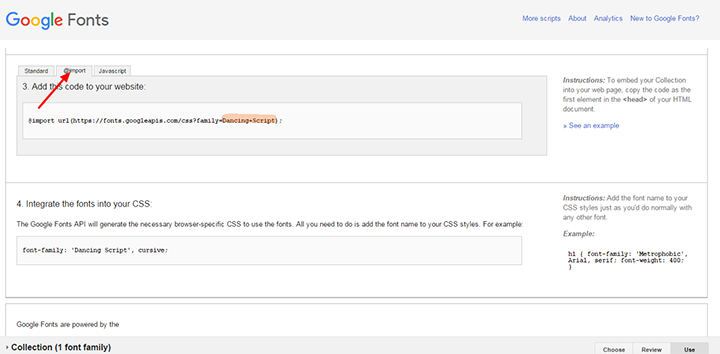
Under the Import tab, you will see a code which includes the name of the font (highlighted) that you have selected.
@import url(http://fonts.googleapis.com/css?family=Dancing+Script:400,700);
Now, you can simply paste this code in the style.css file of your theme. While this method is easy to follow, it has the disadvantage of slowing down your site. This is because the imported file will have to be downloaded first, and the rest of the content thereafter.
A better way of adding Google fonts is to use the code that is generated by clicking the Standard tab.
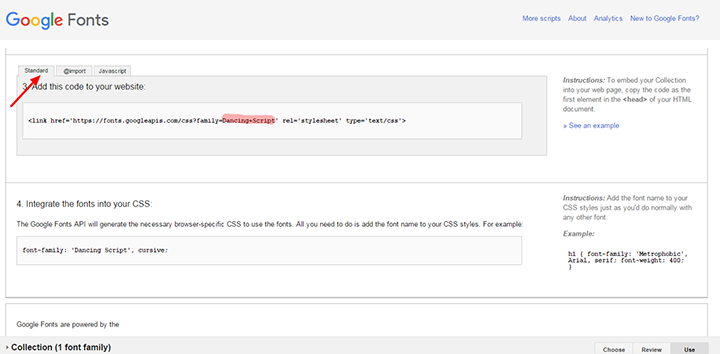
Pasting this piece of code directly in the header.php may not really do the trick. And making changes in the parent theme’s files is not advisable, as the changes may all be lost at the next updation. A neater way of doing this is to make the changes in functions.php in the child theme. This means that these changes will play out sequentially after the parent theme functions are executed (and will not override the parent’s functions).
The link that is generated is a stylesheet declaration. You can register this code under ‘googleFonts’ and create a function load_fonts. This will enqueue the style. The add_action, will add the fonts to the header.
function load_fonts() {
   wp_register_style('googleFonts',
'http://fonts.googleapis.com/css?family=Dancing+Script:400,700');
   wp_enqueue_style('googleFonts');
     }

add_action('wp_enqueue_scripts', 'load_fonts');
After this is done, save the file.
With this action, the code will be included in the header, while the child theme continues to inherit the header.php of the parent. This method will improve the portability of your theme, while keeping it compatible with plugins.
Only one step remains – integrating Google fonts in your CSS.
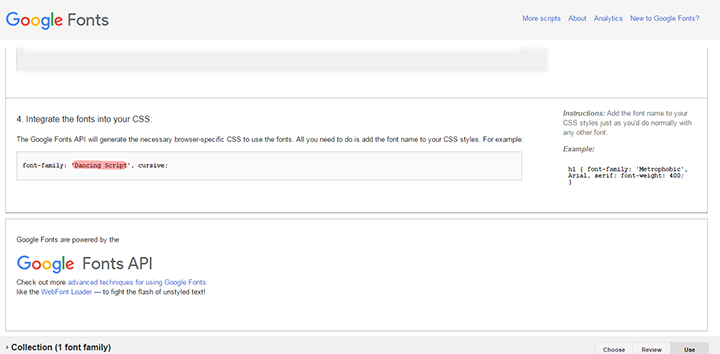
So, proceed to your main CSS stylesheet and add a font family declaration there like this one,
body {
font-family: 'Dancing+Script' , sans-serif;
font-size: 14px;
color: #191919;
}
Similarly, you can apply the same style formatting to other elements and save your CSS file.
Now you will see that the website has been updated with the fonts you have selected.
If you choose to go with the code generated by clicking on the Javascript tab, paste the code in header.php, right after opening the head tag.
Method 2: Adding Google Fonts with plugins
As I’ve mentioned at the start, you can also add Google fonts using plugins. Installing and activating these plugins is quite easy. But choosing the right fonts with some plugins may be a little sticky, as it may need some customization with CSS.
There are many plugins that help to add fonts to your website, including Google fonts. To name a few- Fontmeister, Supreme Google Webfonts, Typecase Web Fonts, Google Web Fonts Manager. Let us take a closer look at two of the more popular plugins that will help in adding Google fonts.
WP Google Fonts
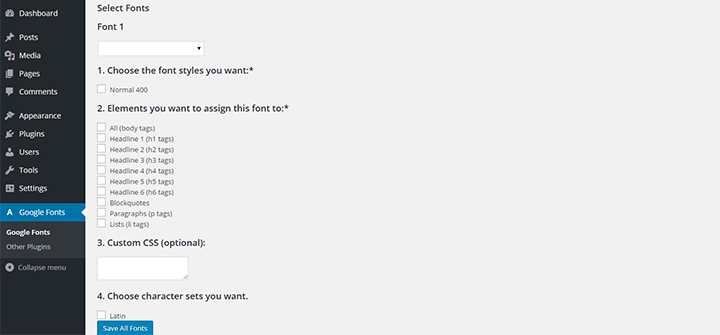
WP Google Fonts adds the necessary code to your website. It helps you to add fonts from the Google Fonts directory in two ways –
- From within your admin panel, you can assign Google fonts to specific CSS elements of your website.
- Or, you can work from within the stylesheet of your own theme.
You can customize the fonts a good deal by checking the options in the settings page. However, there is no option to preview the fonts before hitting the save button. It is possible to save upto 6 settings and assign them to 6 different tags. The plugin is updated as and when fonts are added to the Google font library. It logs 100,000+ active installs, but annoyingly, advertisement for other services have been bundled with the plugin. It draws a 3.9 star rating.
Easy Google Fonts
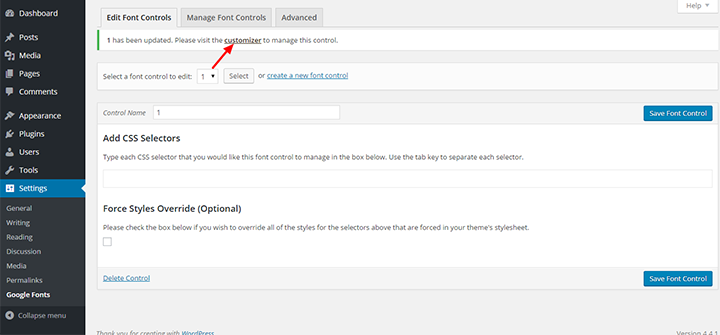
Easy Google Fonts plugin integrates with your WordPress customizer and allows you to create custom fonts for your website and preview it, before zeroing on the font you want and saving it. You can insert font and font variants without any coding. Every aspect of the font can be customized- weight, size, height, color, spacing. When you choose a Google font, all the stylesheets for those fonts are automatically enqueued.
A major advantage with this plugin is that no editing is required in the themes stylesheet, which means you can update your theme without losing the Google fonts. The plugin is also translation ready with .mo and .po files included.
The plugin is ideal for website owners who want to stick to their theme, but just want to change the typography without any coding. Or for folks who have a basic knowledge of coding and want to add some custom font rules.
This plugin has clocked over 200,000+ installs and rates a high 4.9 stars.
Conclusion
Now that you know how to add Google fonts to a website, you can try it out for some variation in your website. Keep in mind that adding too many font styles can slow down your website, so keep it to the minimum that you will actually use.


Very good artcie. Came through you fb add.
Keep on going for more articles 🙂
One of the highly inefficient way of doing this 🙂 Let me know if you want me to teach you how to code for web optimally and also include google fonts in a better way.
Let me know if you want your this website optimized too.
how to use your wpkube heading fonts? is this available in google font or similar ?
We’re using the Proxima Nova Soft font for headings, it is a premium font. You can purchase it from MyFonts or Typekit.