I probably don’t have to tell you that every page on your website should have a clearly defined goal and purpose.
Yep, every single one of them.
Each page should be aimed at getting your visitors to take a certain action — like join your newsletter, leave a comment, click “like” on Facebook or whatever you are trying to do.
This purpose-driven approach is culminated in the call to action.
Calls to action (or CTAs) are an art in themselves and anyone doing business online ideally invests a lot of time in getting better at them.
You can spend hours A/B testing your CTA (and many do). Different wording, design, colors, fonts — everything can make a difference and influence your conversion rate.
Lately a new form of call to action is sweeping the web and it answers to the name Welcome Mat.
Even if you haven’t heard the term yet, chances are good you have seen it around. More and more websites and blogs are adopting it for their marketing.
The reason for that is simple: It works extremely well.
In fact, when the good people at AppSumo developed it for their own site it tripled their conversion rate!
Three times as many subscribers? I wouldn’t mind that either. You? No wonder AppSumo included the Welcome Mat as part of their SumoMe plugin suite.
So, if you would like to know more about this new conversion tool, what it can do and how to set it up on your own website, stick around. I’ll explain it all in great detail.
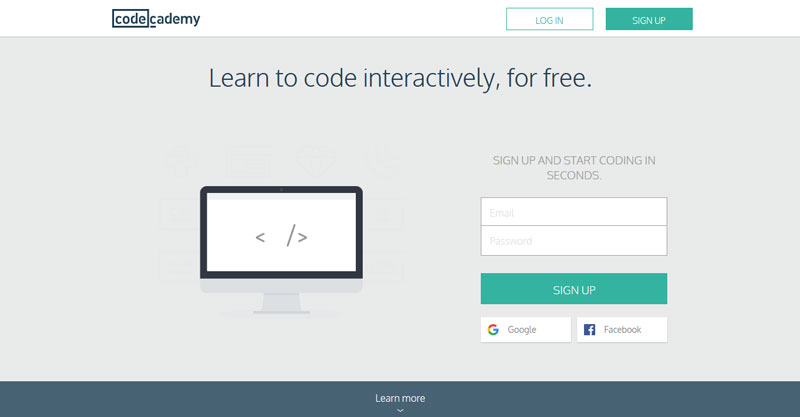
Look at the screenshots from the following websites and tell me what they all have in common:
If you said “full-screen call to action”, you’d be correct.
So, why do these very dissimilar companies all rely on the same format for their websites?
Evidently because it’s effective. It gives you just as much information as you need without unnecessary distractions and drives you towards a single action: Clicking the large button.
How’s that for great user guidance?
However, what does this have to do with our topic? Well, the Welcome Mat works pretty much the same way, only that it is a popup instead of a separate page.
When active on your site, the first thing visitors will see after coming there is one big, simple call to action asking them to do a single thing. Very hard to ignore.
However, your website, the blog post that brought them to it or whatever they clicked on earlier is still there, right below the CTA and just one click away.
In short, a Welcome Mat packs an entire landing page into one popup. Pretty practical if you ask me.
However, you don’t have to rely on my word alone. The full-screen CTA has since been adopted by some big names in the marketing sphere.
For example, Neil Patel over at Quicksprout use it to move people to like his Facebook page. Ever since then, I have seen his fan count move up by a couple thousand.
It also shows that the CTA isn’t limited to collecting email subscribers. You can use it for all kinds of purposes:
If that isn’t enough to convince you to try it out, I don’t know what will. So, if you want to give the full-screen CTA a try, in the next section you will learn how to set up one for your WordPress website.
For this purpose, we will be using two different applications: SumoMe and OptinMonster.
Since (to my knowledge) SumoMe were the first ones to implement it (and coin the name Welcome Mat), we will start with this application first.
SumoMe is a collection of useful tools for increasing website traffic. It was made by AppSumo and contains plugins for lead generation, sharing, content analysis and more.
One of the best things about SumoMe is that its basic version is completely free. That includes the Welcome Mat, which is part of the tool stack.
Let’s see how to set it up on your site, shall we?
SumoMe can be installed in different ways. For WordPress users, the easiest way to do so is to download their WordPress plugin. You can find it either in the plugin directory or install it through your back end.
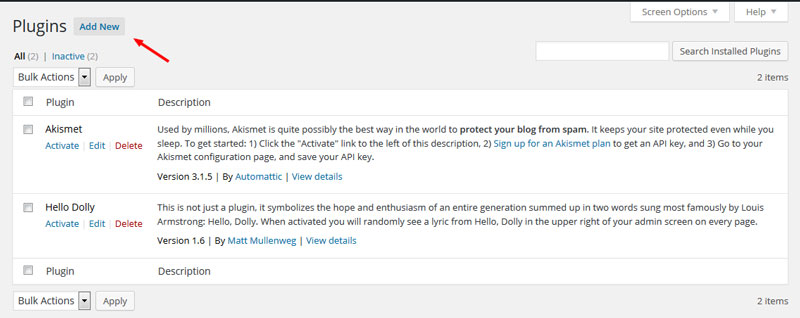
For the latter, go to the plugins menu and click Add New at the top of the screen.
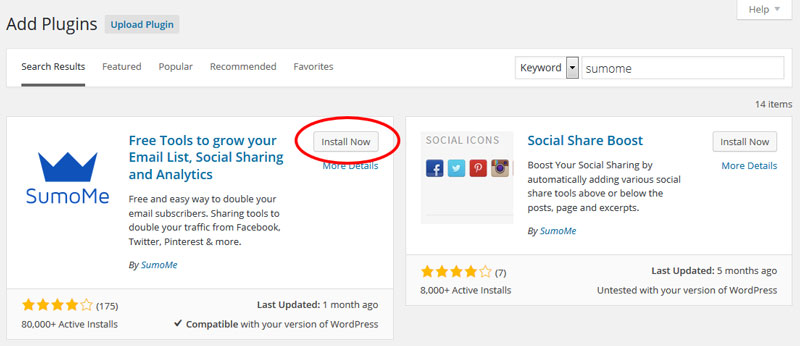
Then type SumoMe into the search bar and press enter. The plugin should be the first one on the list. Hit Install Now to download and install it.
Once the download is complete, a click on Activate Now will activate it.
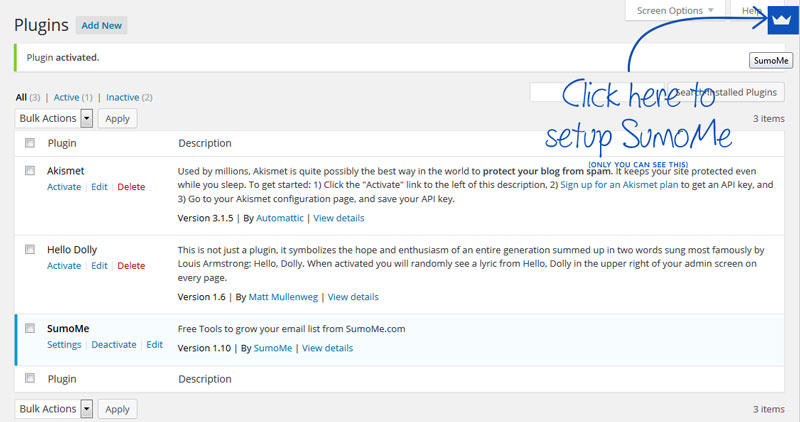
After the installation is complete, you will see a big blue arrow pointing to the corner of your site. When you hover over it, the SumoMe menu button (also called “badge) will slide in.
This is where you do all configurations. The badge will also show up on the front end of your site. Even visitors will see it unless you opt for one of the paid plans that start at $10 per month.
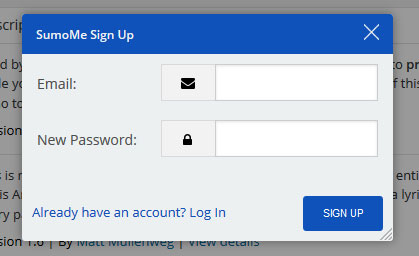
As a very first step, you need to register a new account. For that, just click the SumoMe button.
You will automatically be asked to provide an email address and password. After filling in the information and a click on Sign Up you are good to go.
Should you already have an existing account, you can also log into it from here.
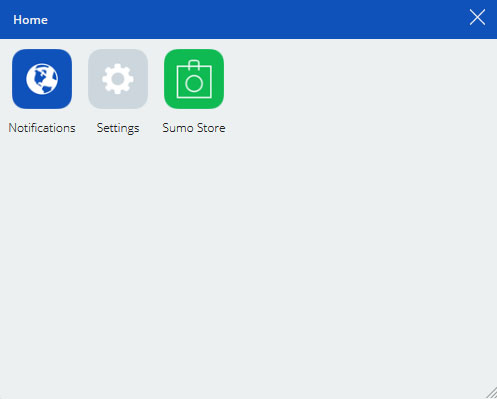
After setting up your account, you will be greeted by the home screen. From here you can check your notifications, change basic settings for SumoMe and — most importantly — find the Sumo Store.
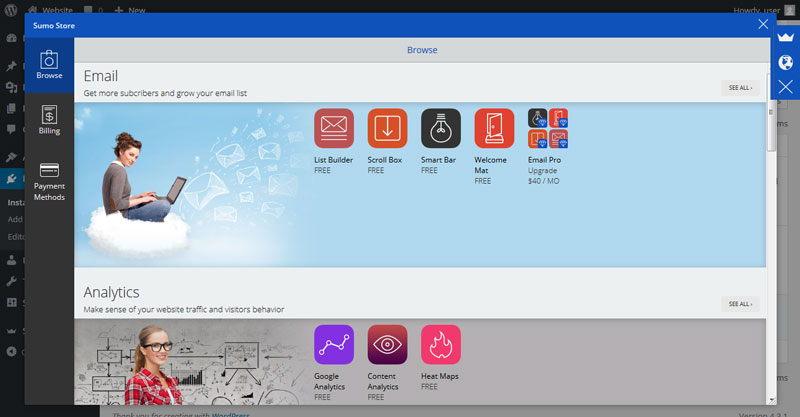
Upon click, the store is where you will find all available apps in the SumoMe stack.
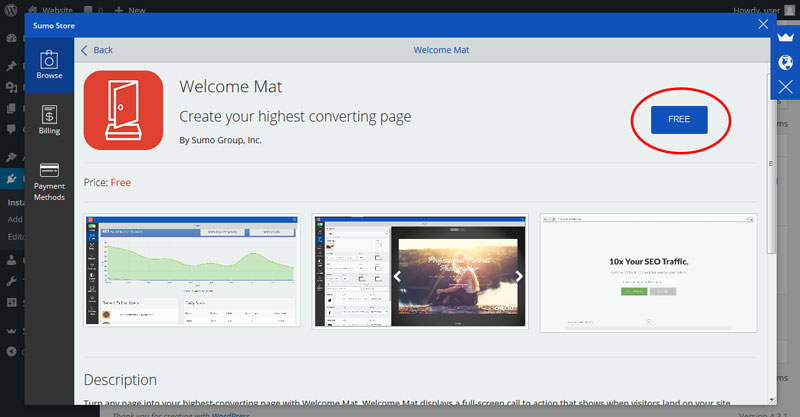
The welcome Welcome Mat is located right in the first section under Email. Click it and then click on Free in the next screen to start the installation.
That’s it. Welcome Mat is now installed. Time to configure it.
You can open the app either by clicking Open from the store screen or by opening your home screen from the SumoMe badge and then choosing Welcome Mat directly.
Either way you will be asked to choose one of the available plans. For our purposes at the moment it’s enough to click Continue at the bottom and stay with the free plan. You will end up in this screen:
Let’s take a quick walkthrough of the Welcome Mat configuration options:
For beginner purposes, Design, Behavior and Display Rules will be the most interesting and will allow us to set up our own basic Welcome Mat.
Be aware that some design features — such as setting background images instead of a plain color — can only be used with a paid plan. Same goes for most of the ready-made templates.
However, with the available options you should have no problem designing your very own full-screen popup. Once you are satisfied, it is time to…
When your design is complete, launching the Welcome Mat is as easy as hitting the red button in the upper left corner of the app menu.
The Welcome Mat will then become active and you can lean back and (hopefully) watch your subscriber numbers soar. Congratulations, you made it! Not so hard now, was it?
However, that’s only the first of two possibilities to set up a this type of conversion tool for your site. The second one follows now.
The fabulous OptinMonster is another plugin/web application for list building. Unlike SumoMe it is mainly focused on collecting email subscribers.
Besides integrating with all major email marketing services, the app allows you to quickly and easily set up forms, includes A/B testing, exit-intent technology (popups showup the moment a visitor is about to leave your site) and more.
The only downside: It’s not free. However, at the same time pricing starts at $49/year and you have a 14-day no-questions-asked return policy to try it out. Plus, it’s totally worth it!
In fact, after researching OptinMonster for this article, I ended up purchasing it for myself. Is there a better recommendation?
However, back to topic. OptinMonster has a similar feature to SumoMe’s Welcome Mat called Welcome Gate. It, too, is a full-screen popup that can be triggered at different times and in different places of your site.
In the following we will have a detailed look at how to set it up. Of course, for this tutorial I will assume you already have an OptinMonster account. If you don’t, you can get it here.
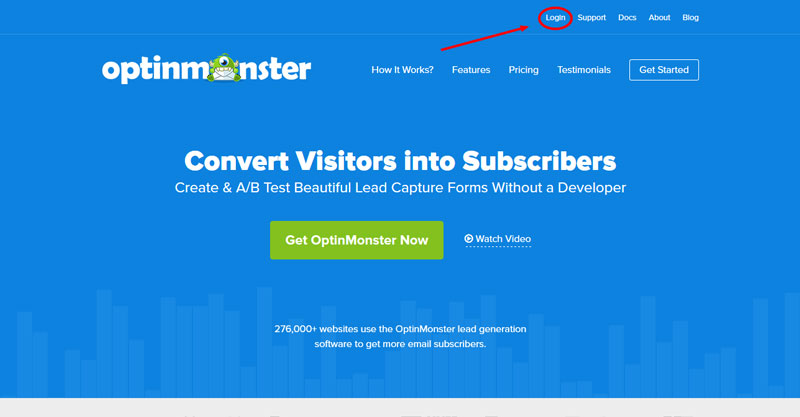
On the OptinMonster homepage you will find Login on the left in the top menu.
When you click on it, the site will ask you to provide your username and password. After that, it will take you to the dashboard.
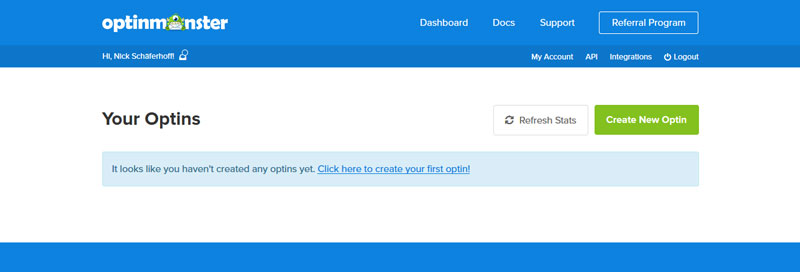
In OptinMonster, popups and forms to collect subscibers are called optins (makes sense, doesn’t it?). The dashboard shows all optins you have created and information about whether they are active or not.
If you have a fresh account (like me), you will have to create an optin from scratch.
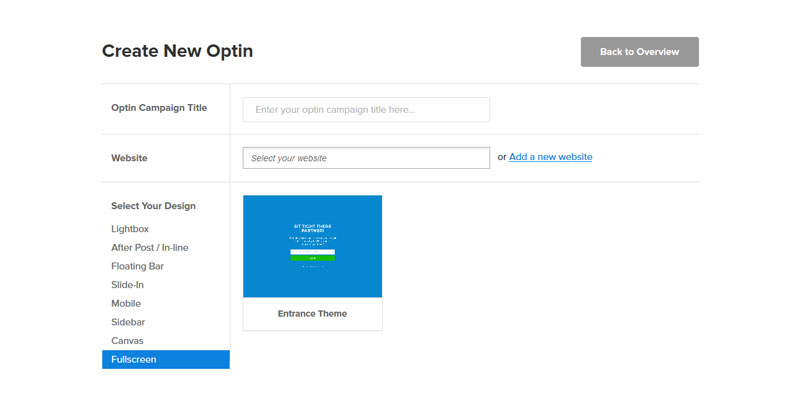
Find Create New Optin in the upper right corner (big green button, really hard to miss), it will take you to the setup screen.
Since we want to create a Welcome Gate, we first choose Fullscreen under Select your design in the lower left corner.
After that, it’s time to fill in the campaign name. I’m going with Welcome Gate Test Campaign but you are free to come up with your own title.
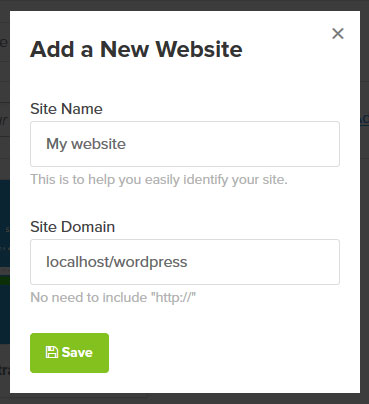
Now it’s time to determine the website it will run on. If you have other campaigns active on your target site, simply choose it from the dropdown menu. Otherwise you need to click Add new website.
Here, enter a site name (for easier identification) plus your domain (so OptinMonster will work on it).
Save and you are done.
Now all that’s left is choosing a template. For the full-screen popup we currently only have the Entrance Theme available, so the choice is really easy. A click on it will get us to the next step.
Like in SumoMe, you can completely customize your CTA to make it look awesome and fit the rest of your website.
Here’s what the customization options contain in detail:
When you are satisfied with the look of your optin, don’t forget to save. After that, it’s time to get the form onto your site.
To have the newly created optin appear on your website, you will need to install the WordPress plugin from OptinMonster. You can either find it in the directory oder install it from the WordPress back end.
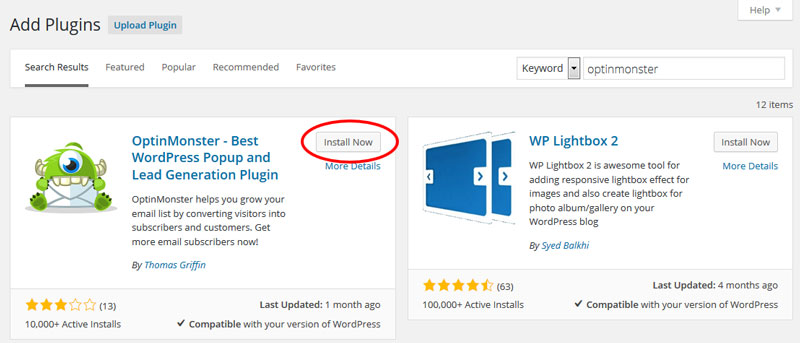
For the latter, log in to your site and go to the Plugins menu. Here, click on Add New at the very top. In the next screen, search for OptinMonster. The plugin you are looking for will be in the first place.
Click Install Now to initiate the installation process and don’t forget to activate!
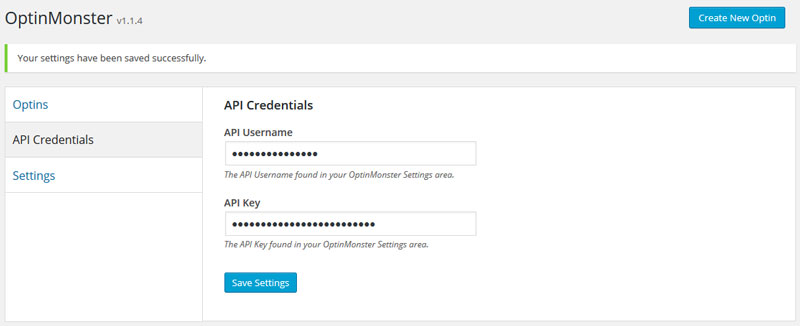
Next, you will need to authenticate your OptinMonster account inside the plugin.
For that, find the applications menu item at the bottom of the WordPress main menu and click it. You will then be asked to input your API username and key.
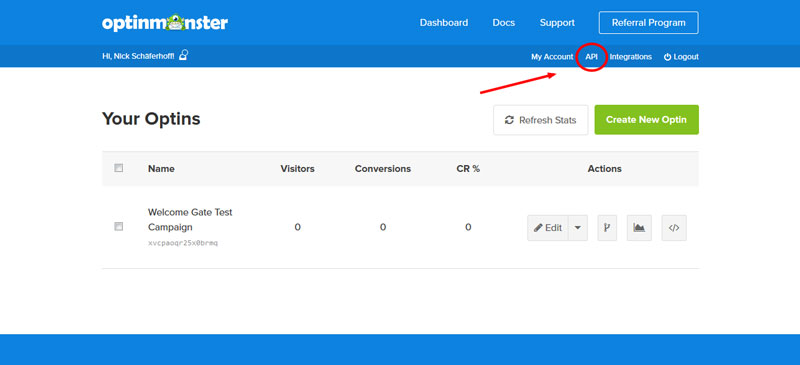
This information can be found by going back to your OptinMonster dashboard and clicking on API in the top menu.
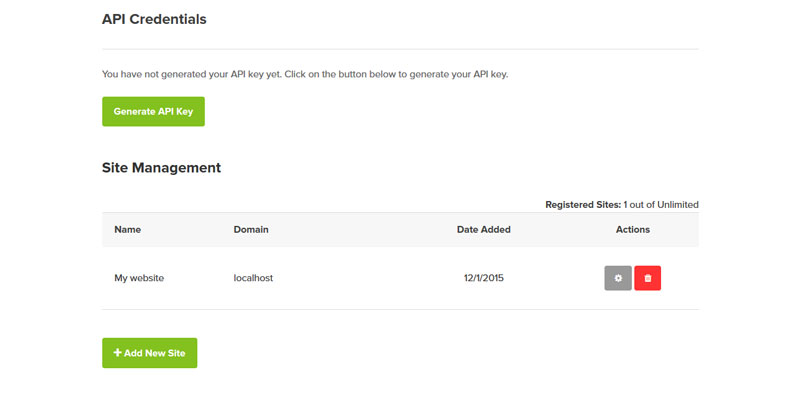
This will take you to the page for your API info.
If you haven’t generated an API key yet, click the green button to do so. After that, copy the username and key and input them in the respective fields on your WordPress site. Done.
Now we will determine when and where your CTA will show up on your site and who will see it.
For that, first go to Optins in the OptinMonster menu on your WordPress website. If you don’t already see a list of your optins, you might have to click on Refresh Optins at the bottom.
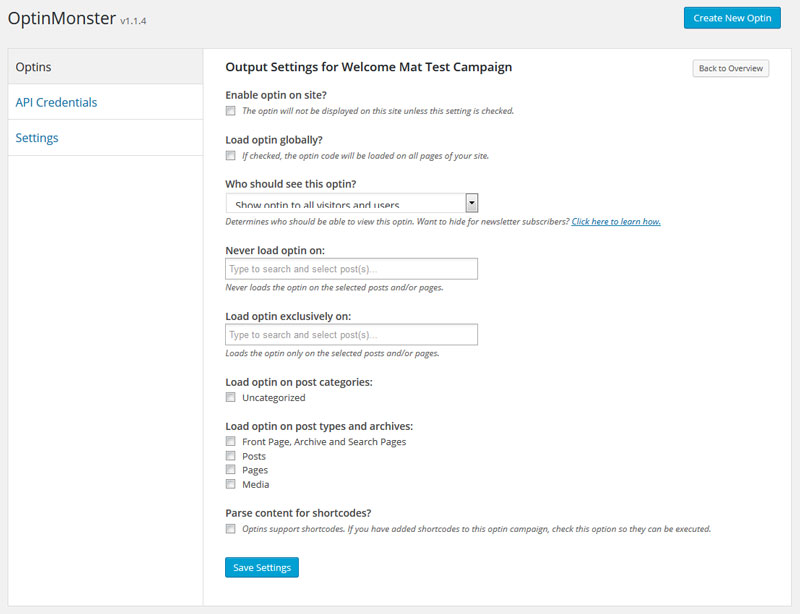
After that, find your newly created Welcome Gate campaign. When you hover over it, a number of menu items will appear. We are interested in Edit Output Settings.
After a click, we find the following options:
The most important thing is to check the box that says “Enable optin on site?“, otherwise the Welcome Gate won’t work at all.
The rest of the display settings is up to your own preferences. You can show the form everywhere, limit it to a few pages or types of content, exclude pages and more.
Unfortunately, if you want to change the time interval before the popup shows up you need to do so on the OptinMonster website.
If you have added shortcodes (e.g. from other plugins), be sure to check the last box so that they will be parsed and put out in the optin form.
Once you are done setting everything up, all it takes is one click on the Save button and your Welcome Gate will be live. How exciting!
From now on visitors will see your beautiful full-screen call to action exactly when, where and how you have set it up.
You can test it out right now. Go to your site (in a private browsing window if you disabled the optin for logged-in users) and surf to a page that has the popup enabled. You will see exactly what your visitors do.
Well done!
SumoMe’s Welcome Mat and OptinMonster’s Welcome Gate are a new and versatile type of call to action that combines the targeted approach of a landing page with the ease of a popup.
Though some people might think it a bit too in-your-face, it’s effectiveness and ability to increase conversion rates has been proven many times over. Visitors can’t seem to help but click it.
While this form of CTA is most often used for collecting email subscribers, it’s usage is more versatile than that. From getting social followers to providing a simple welcome, there is very little you can’t do.
With SumoMe and OptinMonster, users have two high-quality solutions available to put full-screen CTAs into action. Both of them are very intuitive and easy to set up — even for beginners.
Of course, each application has its own strengths and weaknesses.
Overall I found OptinMonster a little easier to configure and build designs with. In addition to that, it also does all sorts of other optin forms and has loads of templates.
On the other hand, I the need to connect it with another plugin is a little more complicated than it should be. Plus, there is no free version for testing though you can use 14-day money-back guarantee.
What SumoMe has going for itself is that everything happens on your own site and there is no need to visit any third-party website.
It’s also free in the basic version and comes with lots of other (free) plugins beyond email collection.
That being said, if you want to get features like A/B testing and advanced display rules, SumoMe gets costly pretty quickly. Yet, you do get a lot of bang for your buck. You may also want to see our comparison of top 10 list building plugins for WordPress.
Which solution you decide for is ultimately up to you. Both are definitely worth trying out.
Here’s to growing your conversion rate. Good luck!
Have you used a full-screen call to action on your site? How was you experience? Did you use SumoMe or OptinMonster? We’d be happy to hear your thoughts.
Searching for the best WordPress maintenance service to get a little helping hand with your…
Do you really need managed WordPress hosting? Let's face it: Running a WordPress blog or…
WP Engine is one of the very first companies to start offering tailor-made hosting for…
Cloudways is a very original type of a web hosting company when compared to other…
WordPress is incredibly easy to install, but if you want to move an already setup…
Considering using the Divi theme for your WordPress site? In our hands-on Divi theme review,…
View Comments
Great post Nick. I decided to add this to our monthly Wordpress roundup - http://wpresstic.com/wordpress-rewind-jan-2016/
Great comment Nick! Thanks for including the article in your roundup.
Awesome first name by the way.
Like this post. However is have still a question. Like Neil Patel does, use the mat for likers instead of subscribers, can this be installed of is this custom made?
Hey Steff,
thanks for the question. I looked into it and OptinMonster does not currently offer custom HTML for the full-screen popup (however, they do for a different one, where you could use this tactic). Neil Patel is using a service called "Hello Bar". I don't know if that program offers a Facebook like button integration out of the box or if he had it custom made.
Let me know if I can be of any more assistance.
I'm struggling to understand why. Should I pay an annual fee for a simple HTML page I could knock up in Adobe Muse? Answer, no why are people so gullible? Create your own and have all your control, make it your homepage and closely match design principles of the big companies to make sure you're not too far off optimum. These offerings from Simo and other are ridiculously overpriced and oversold for what they are. Your business is not going to be made or broken by a welcome mat if your value proposition is solid and sincere, rather too much strong arming for details if your proposition is weak can hurt you but there again, if it's weak you'll be all over this like a rash looking for every trick in the book. Spend your time on your value offering and do welcome mat yourself
Hey Paul,
I completely agree with you that apps like SumoMe and OptinMonster will not make up for a non-existent value proposition. If you don't have anything of value to offer, no amount of popups will help you.
It's also true that using these services can be quite an investment and that you can recreate some of their offerings for cheaper yourself.
However, on the other hand not everyone has the technical chops to do so.
While I could create an HTML page, setting it up as an automatic full-screen call to action like the ones above would be beyond my abilities without some serious research.
Plus, many people just don't have the time to go through a lengthy process like that and therefore prefer to pay for convenient tools that allow them to create optins quickly and easily with a few mouse clicks.
So, while I am all for doing things yourself, sometimes it makes more sense to go the path of least resistance and spend some money instead.
Thanks for reading and for your input!